


4
5
Follow these steps when the battery is
installed in a vehicle:
1. Position AC and clamp cords away from hood, door, or moving engine parts.
2. Stay clear of fan blades, belts, pulleys, and other parts that can cause injury to persons.
3. Check polarity of battery posts. POSITIVE (POS, P, +) battery post usually has larger diameter than
NEGATIVE (NEG, N, –) post.
4. Determine which post of battery is grounded (connected) to the chassis. If NEGATIVE post is
grounded to chassis (as in most vehicles), see 5. If POSITIVE post is grounded to the chassis, see 6.
5. For negative-grounded vehicle, connect POSITIVE (RED) clamp from battery charger to POSITIVE
(POS, P, +) ungrounded post of battery. Connect NEGATIVE (BLACK) clamp to vehicle chassis or
engine block away from battery. Do not connect clip to carburetor, fuel lines, or sheet-metal body
parts. Connect to heavy gauge metal part of the frame or engine block.
6. For positive-grounded vehicle, connect NEGATIVE (BLACK) clamp from battery charger to
NEGATIVE (NEG, N, –) ungrounded post of battery. Connect POSITIVE (RED) clamp to vehicle
chassis or engine block away from battery. Do not connect clip to carburetor, fuel lines or sheet-
metal body parts. Connect to a heavy gauge metal part of the frame or engine block.
7. When disconnecting charger, disconnect AC cord, remove clamp from vehicle chassis, and then
remove clamp from battery terminal.
8. Do not charge the battery while the engine is operating.
9. Refer to battery manufacturer’s instruction on battery charging/maintaining procedures.
Follow these steps when the battery has been
removed from a vehicle:
1. Check polarity of battery posts. Positive post (marked POS,P, +) usually has a larger diameter than
the Negative battery post (marked NEG, N, –).
2. Attach a 24-inch (minimum length) #6 AWG insulated battery cable to the NEGATIVE battery post
(marked NEG, N, –).
3. Connect the POSITIVE (RED) battery clamp to the POSITIVE battery post (marked POS, P, + or
red).
4. Stand as far back from the battery as possible, and do not face battery when making final
connection.
5. Carefully connect the NEGATIVE (BLACK) charger clamp to the free end of the battery cable
connected to the NEGATIVE terminal.
6. When disconnecting charger, always do so in reverse sequence of connecting procedure and
break first connection while as far away from battery as practical.
• Check unit periodically for wear and tear. Take to a qualified technician for replacement of worn or
defective parts immediately.
• Read and Understand This Instruction Manual Before Using This Unit.
SAVE thESE inStRuctionS
WARNING: TO REDUCE THE RISK OF INJURY:
Follow these instructions and those published by the battery manufacturer and manufacturer of any
equipment you intend to use with this unit. Review cautionary markings on this product and on engine.
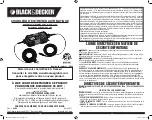
INTRODUCTION
Thank you for selecting the
Black & Decker
®
6 Volt / 12 Volt Automatic Battery Maintainer.
Use for
battery maintenance, charging RVs, speciality vehicles, antique and classic cars, motorcycles, lawn
mowers, tractors, ATVs, snowmobiles. personal watercraft and more.
With proper care and use, it will give you years of dependable service. With proper care and use, it
will give you years of dependable service. Please read and observe all safety warnings and cautions
and this entire user’s instruction manual, before installing or using this device. The instruction manual
should then be retained for quick reference whenever the unit is used.
FEATUREs
• The unit has two voltage settings (6v, 12v) controlled by one switch
• Maintains battery charge in stored vehicles
• Includes three connector sets:
a) DC accessory plug
b) Battery clamps
the battery maintainer, read the vehicle’s owner’s manual to confirm proper method of maintaining
vehicle battery.
• When working with lead acid batteries, always make sure immediate assistance is available in case
of accident or emergency.
• Always have protective eyewear when using this product: contact with battery acid may cause
blindness and/or severe burns. Be aware of first aid procedures in case of accidental contact with
battery acid.
• Have plenty of fresh water and soap nearby in case battery acid contacts skin.
• If battery acid contacts skin or clothing, wash immediately with soap and water for at least 10
minutes and get medical attention immediately.
• Never smoke or allow a spark or flame in vicinity of vehicle battery, engine or charger.
• Remove personal metal items such as rings, bracelets, necklaces and watches when working with a
lead acid battery. A lead acid battery can produce a short circuit current high enough to weld a ring,
or the like of a metal, causing a severe burn.
• Never allow battery acid to come in contact with this unit.
• Do not operate this unit in a closed area or restrict ventilation in any way.
•
FIRST AID – SKIN:
If battery acid comes in contact with skin, rinse immediately with water, then
wash thoroughly with soap and water. If redness, pain, or irritation occurs, seek immediate medical
attention.
EYES:
If battery acid comes in contact with eyes, flush eyes immediately, for a minimum of 15
minutes and seek immediate medical attention.
preparing to Charge
1. Determine voltage of battery to be maintained by referring to the vehicle manual.
2. If it is necessary to remove battery from vehicle to charge, or to clean terminals, always remove
grounded terminal from battery first. Make sure all accessories in the vehicle are off, so as not to
cause an arc.
3. Clean battery terminals. Do not allow corrosion to come in contact with eyes.
4. Add distilled water in each cell until battery acid reaches level specified by battery manufacturer.
This helps purge excessive gas from cells. Do not overfill. For a battery without cell caps
(maintenance free), carefully follow manufacturer’s charging instructions.
5. Study all battery manufacturer’s specific precautions, such as removing or not removing cell caps
while charging, and recommended rates of charge.
6. Remove battery completely from boat/airplane or any confined area before charging. Area around
battery should be well ventilated while battery is being charged. Do not operate within an enclosed
area.
CAUTION:
This battery maintainer does not detect, diagnose or analyze the condition of the
battery. Attempting to charge/maintain a battery with an abnormal condition can further damage the
battery. If in doubt, have the battery checked by a qualified professional prior to using the BM3B
maintainer.
Charger Location
1. Locate battery maintainer as far away from battery as cables permit.
2. Charge above freezing temperature and below 40 degree Celsius (C) (104 degree Fahrenheit).
3. NEVER place battery maintainer directly above battery being charged; gases from battery will
corrode and damage charger.
4. NEVER allow battery acid to drip on battery maintainer when reading gravity or filling battery.
5. NEVER operate battery maintainer in a closed-in area or restrict ventilation in any way.
6. Marine batteries must be removed and charged on shore. To charge it on board requires
equipment specially designed for marine use. This unit is NOT designed for such use.
7. Do not set a battery on top of battery maintainer.
WARNING: A SPARK NEAR THE BATTERY MAY CAUSE AN EXPLOSION. TO REDUCE RISK OF A
SPARK NEAR THE BATTERY: CONNECT AND DISCONNECT DC OUTPUT CLAMPS AND RING
TERMINALS ONLY AFTER REMOVING AC CORD FROM ELECTRIC OUTLET.
Connection precautions
1. Remove AC cord from electric outlet before connecting or disconnecting DC clamps and ring
terminals.
2. Never allow clamps to touch each other.
BM3B_ManualENFRSP_040111.indd 4-5
4/1/2011 3:37:10 PM


