


Img. 21
09
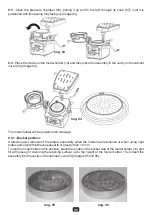
8.10 - Ideal lamination point:
Due to the existence of various types of plates (different materials and thicknesses), the ideal
plasticization point is identified by changes in the plate and not by time. Therefore, it is the responsibility
of each plate manufacturer to prescribe the most correct form of the ideal lamination point.
In general, the ideal point is observed by the color change (brightness) for more opaque plates, i.e., the
plate will be shiny and transparent (e.g., milky plates) or by the plate flowing by 10 to 12mm, as
indicated in the drawing below (e.g., crystal and soft plates).
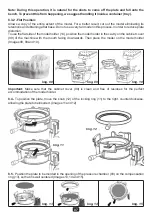
Observe the plate heating process described above through the gap between the heating unit (1) and
the pressure chamber (03) (Image 21). In the first uses, if there is any doubt, move the heating unit (01)
back slightly and, if there is a need for more heating, return it to the one above the pressure chamber
(03) (Image 21).
Img. 22
Img. 22a
Caution:
Do not allow the plate to be heated beyond the time indicated by its manufacturer, avoiding its
overheating, making it unusable and being necessary to clean the melted material inside the pressure
chamber.
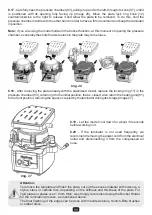
8.12
- Return the pressure chamber (03) to its closed position (turning it forward counterclockwise and
then clockwise to the right. At this time. The resistance indicator LED (05) should go off (Figure 23).
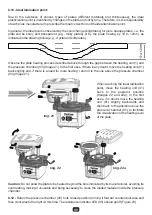
When reaching the ideal lamination
point, move the heating unit (01)
back to the posterior position
(Images 22 and 22a). In the first
uses, if in doubt, move the heating
unit (01) slightly backwards and
then back to the position above the
pressure chamber (03), to facilitate
the visualization of the heating level
of the plate.