


7.
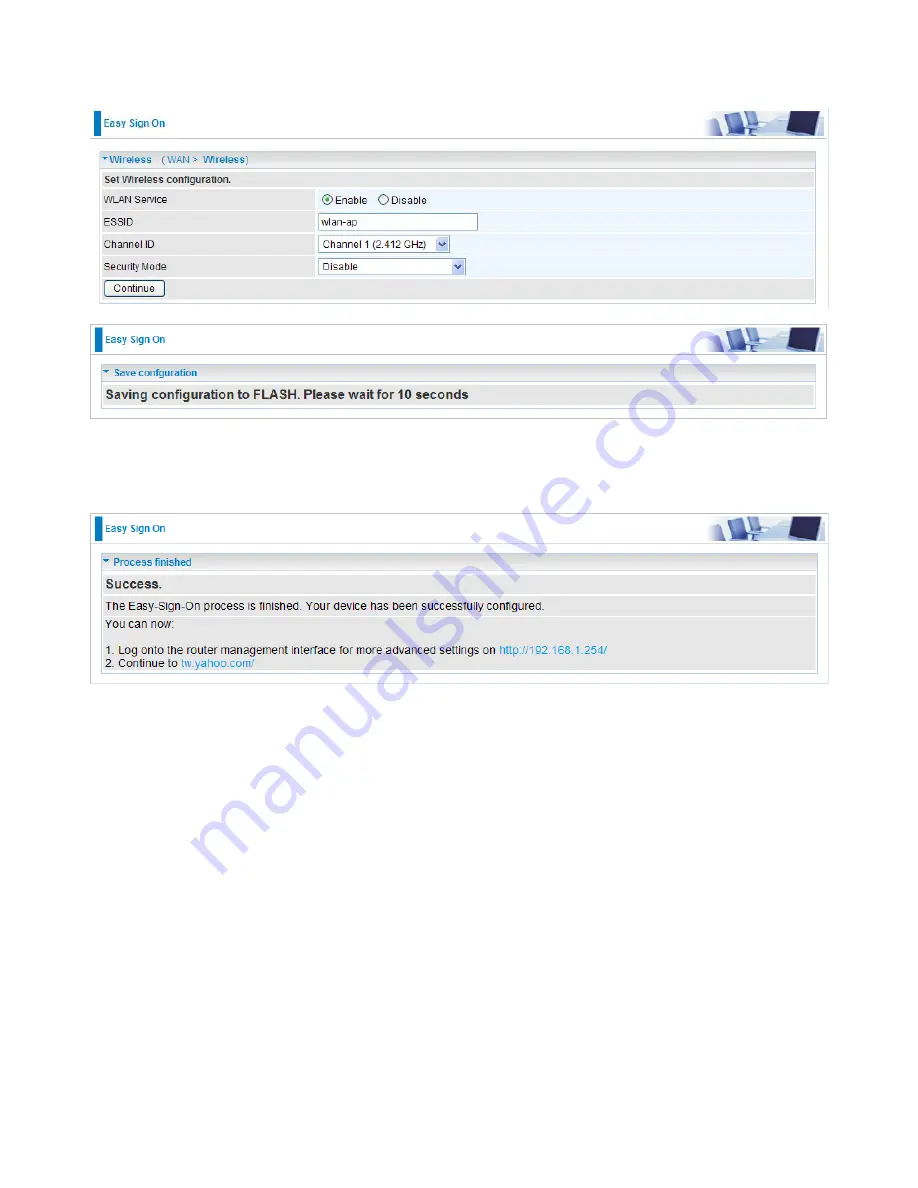
Select Enable and enter the necessary information in the blanks provided for the Wireless LAN
setting (wireless setting is only available for BiPAC 8200N) if you would like to use this feature
and then click Continue.
8.
The system will save your new configuration and complete the setup. You can test the con
-
nection by clicking on the URL link provided. If the setup is successful you will be redirected to
website.
25
Summary of Contents for BiPAC 8200N
Page 15: ...12 Applications of the device Deployment scenario for VDSL using FTTx...
Page 68: ...65...
Page 69: ...66...
Page 73: ...70 4 Enter the AP SSID then click Next 5 Enter the passphrase then click Next...
Page 98: ...Src IP Source IP Src Port Source Port Dst Port Destination Port Dst IP Destination IP 95...


