- 14 -
USE
INSTRUCTIoNS FoR USE
D
Increase “+” setting button
E
Decrease “-” setting button
F
On-off button
G
Time display
H
ON-OFF display
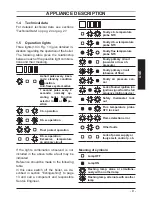
Setting the current time
Note
: with a new unit or when the reset but-
ton B has been pressed and the selector
switch A is to the position, the time display
G is flashing.
Set the mode selector switch A to the posi-
tion and press the buttons D or E until the
current time appears in the display G.
The clock starts by moving the switch A to
the
AUTo
position.
Setting example shown in Fig. 2.13:
Current time 16.30.
Fig. 2.13
A
Setting the switching time
20 memory locations are available, corre-
sponding to 10 on-off sequences.
Set the mode selector switch A to the
C1
po-
sition.
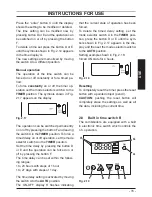
The symbols shown in Fig. 2.14 appears in
the display.
Fig. 2.14
A
Press the buttons D or E to set the desired
ON time. Press the “enter” button C to con-
firm the setting and to continue programming
the OFF time.
Set the OFF time as explained above for the
ON setting and confirm by pressing the “en-
ter” button C. Proceed in the same way for
other settings.
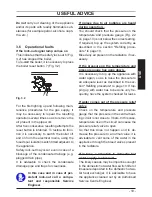
Setting example shown in Fig. 2.15:
I
ON time 7.45.
J
OFF time 10.30.
Fig. 2.15
I
J
Activating the timed settings
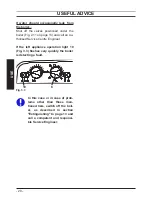
Set the mode selector switch A to the
AUTo
position shown in Fig. 2.16.
The current time appears in the display. The
ON-OFF display H indicates the current
state of operation (according to the settings).
Fig. 2.16
A
Note
: when the mode selector switch A is in
the
AUTo
position and the boiler is switched
off at the fused spur isolation switch, the
display H indicates only the OFF state. The
other indications are blanked.
Reading the timed settings
Set the mode selector switch A to the
C1
po-
sition. The symbols shown in Fig. 2.14 ap-
pears in the display.
Press the “enter” button C. Each time the
button is pressed the display shows the de-
tails of the next setting.
Changing or deleting the timed settings
Set the mode selector switch A to the
C1
po-
sition. The symbols shown in Fig. 2.14 ap-
pears in the display.
Summary of Contents for Riva Plus HE M296.24SC
Page 56: ...56 NOTES...
Page 57: ...57 NOTES...


