background image


20 


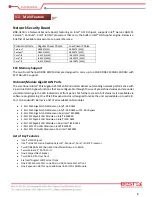
Bypass Enable Jumper for LAN4-LAN5 (JP7)


Pin


Definition


1-2


Enabled


2-3


Disabled


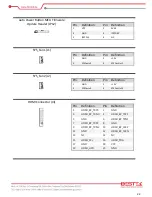
Auto Power Button Jumper (JP11)


Pin


Definition


1-2 Close, 3-4 Close


Enabled


Open


Disabled


Power/Reset Switch Selection Jumper (JP13)


Pin


Definition


1-2


Power Switch


2-3


Reset Switch


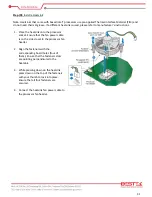
GPIO Power Selection Jumper (JP14)


Pin


Definition


1-2


5V


2-3


3.3V


Summary of Contents for BNX-H110

Page 1: ...1 Security Board BNX H110 Always at the forefront of innovation User Manual...

Page 2: ...t 15 of the FCC rules These limits are designed to provide reasonable protection against harmful interference when the equipment is operated in a residential installation This equipment generates uses...

Page 3: ...electrical discharge can damage computer components without causing any signs of physical damage You must take extra care in handling them to ensure against electrostatic build up 1 To prevent electr...

Page 4: ...pe recommend by the manufacturer Dispose of used batteries according to local ordinance Before using the system prepare basic system components If the system comes as a barebone that is none of the ke...

Page 5: ...Precautions 13 2 3 Setting Jumpers 14 2 4 Edge Connectors 15 2 5 Location of Jumpers and Connectors 16 2 6 Jumpers 19 2 7 Internal Connectors 21 Chapter 3 Operation 3 1 System Memory 27 3 2 Installin...

Page 6: ...6 Chapter 5 Programming Guide 5 1 Bypass Setting 46 5 2 GPIO 50...

Page 7: ...7 Chapter 1 General Information...

Page 8: ...ring via the LED indications at front panel Yet further access to full status is also available via software programming One PCIe X8 expansion slot is designed to make the unit expandable up to extra...

Page 9: ...ule Storage SATA 2x SATA CF 1x CompactFlash Socket Front I O Indication 1x Power LED 1x HDD LED 2x Bypass LEDs LAN 6x RJ45 1G LAN Port Console 1x RJ45 Type Console Port USB 2x USB 3 0 Ports Button 1x...

Page 10: ...ule Chipset Intel 82580EB Interface PCIe 2 0 X4 Network Port Four SFP Fiber Gigabit BEM H110 350 F4 Type LAN Module Chipset Intel i350 AM4 Interface PCIe 2 0 X4 Network Port Four SFP Fiber Gigabit BEM...

Page 11: ...11 Figure 1 1 Board Layout of BNX H110 1 4 Board Layout...

Page 12: ...12 Chapter 2 Preparation...

Page 13: ...ts Humid environment tend to have less static electricity than dry environments A grounding strap is warranted whenever danger of static electricity exists Computer components and electronic circuit b...

Page 14: ...f you remove the jumper cap or place the jumper cap on just one pin the jumper is OPEN Please see the following illustrations The illustrations on the right show a 2 pin jumper When the jumper cap is...

Page 15: ...15 1 Micro USB Port 2 Power Reset Switch 3 RJ45 Console Port 4 Six RJ45 Gigabit LAN Ports 5 Dual Bypass LEDs 6 Dual USB 3 0 Ports 7 Power LED HDD LED 2 4 Edge Connectors...

Page 16: ...16 2 5 Locations Of Jumpers and Connectors...

Page 17: ...umper JP3 Watchdog Enable Jumper JP4 Clear CMOS Jumper JP5 Chassis Intrusion Jumper JP6 Bypass Enable Jumper for LAN2 LAN3 JP7 Bypass Enable Jumper for LAN4 LAN5 JP11 Auto Power Button Jumper JP13 Pow...

Page 18: ...4 DIMM0 J6 DDR4 DIMM1 J7 2X2 ATX 12V Connector J9 24pin ATX Connector J10 SATA1 Connector J12 SATA0 Connector with 5V on Pin7 for SATADOM J13 CF Connector J14 Onboard COM2 Connector J15 TPM Connector...

Page 19: ...nable Jumper JP3 Pin Definition Close Enabled Open Disabled CMOS Jumper JP4 Pin Definition 1 2 Normal Operation default 2 3 Clear CMOS Chassis Intrusion Jumper JP5 Pin Definition Close Enabled Open Di...

Page 20: ...Enabled 2 3 Disabled Auto Power Button Jumper JP11 Pin Definition 1 2 Close 3 4 Close Enabled Open Disabled Power Reset Switch Selection Jumper JP13 Pin Definition 1 2 Power Switch 2 3 Reset Switch GP...

Page 21: ...ition Pin Definition 1 VPP_B 2 VCC 5V 3 GND 4 ICSPDAT_B 5 ICSPCLK_B 6 NC Bypass MCU Firmware Update Header JP9 Pin Definition Pin Definition 1 VPP_A 2 VCC 5V 3 GND 4 ICSPDAT_A 5 ICSPCLK_A 6 NC Bypass...

Page 22: ...2 12V 3 SYSFanIn1 4 SYSFanOut1 SYS_Fan2 J2 Pin Definition Pin Definition 1 GND 2 12V 3 SYSFanIn2 4 SYSFanOut2 HDMI Connector J3 Pin Definition Pin Definition 1 HDMI_BP_TXP0 2 GND 3 HDMI_BP_TXN0 4 HDM...

Page 23: ...17 USB3_P4_RX_DP_R 18 USB3_P4_RX_DN_R 19 VCC_USB1 Onboard COM2 Connector J14 Pin Definition Pin Definition 1 GND 2 F_DSR_N 3 F_SIN 4 F_RTS_N 5 F_SOUT 6 F_CTS_N 7 VCC 5V 8 F_RI_N 9 F_DTR_N 10 F_DCD_N...

Page 24: ...ort 80 Connector J17 Pin Definition Pin Definition 1 LPC_AD0 2 VCC3 3 3V 3 LPC_AD1 4 LPC_PLT_RST 5 LPC_AD2 6 LPC_FRAME 7 LPC_AD3 8 80H_LPC1CLK_24M 10 GND GPIO Connector J18 Pin Definition Pin Definiti...

Page 25: ...25 Factory Default Power Reset Switch SW1 Up Power Switch Reset Switch Down Factory Default...

Page 26: ...26 Chapter 3 Operation...

Page 27: ...up the two side tabs on the slot 2 Make sure the Key on Memory module and socket are perfectly matched and add slowly the RAM module into the socket along the plastic guides at both ends 3 Make sure t...

Page 28: ...28 4 To remove the Memory modules please push the tabs outwards and the memory modules will be automatically disengaged...

Page 29: ...identally damage the socket simply by adjusting the position of the CPU Please follow the installation instructions as shown below Step A Opening the Socket 1 Push the Socket Lever down and away from...

Page 30: ...with the Pin 1 chamfer on the socket 3 Make sure that the notches on the processor align with the posts on the socket 4 Lower the processor straight down without tilting or sliding it in the socket St...

Page 31: ...processor socket Ensure that the fan power cable is on the side closet to the processor fan header 2 Align the fasteners with the corresponding board holes four of them Ensure that the fasteners slots...

Page 32: ...he 24 pin ATX Power Connector on the blue connector and 4 pin 12Vdc Power Connector on the red connector In case the 12Vdc Power Connector is not added power supply will be triggered but the motherboa...

Page 33: ...33 Please do not add CFast card onto this socket Make sure to shut down the system board before adding your CompactFlash card 3 5 Add CompactFlash Card...

Page 34: ...34 Chapter 4 BIOS Setup...

Page 35: ...shouldbeexecuted underthefollowing conditions Whenchanging thesystem configurations Whena configuration erroris detectedbythe systemand youare promptedto make changes to the Setup program Whenresettin...

Page 36: ...followingmessageduringthe POST TO ENTER SETUP BEFORE BOOT PRESS CTRL ALT ESC OR DEL KEY Pressthe Del keyor pressthe Ctrl Alt and Esc keysto enterSetup The online description of the highlighted setup i...

Page 37: ...system configuration Advanced Advanced system settings Chipset Other functions Security Configure Supervisor and User Password Boot System boot configuration Save Exit Exit options as well as loading...

Page 38: ...onfiguration H W Monitor Serial Port Console Redirection and CSM Configuration Super IO Configuration Serial Port 1 2 Configuration Serial Port This setting enables disables the specified serial port...

Page 39: ...ntrol Mode Configure Fan Speed Control Mode Serial Port Console Redirection Console Redirection Enables or disables Console Redirection function CSM Configuration Boot option filter This controls Lega...

Page 40: ...40 CPU Configuration Display CPU Information 4 6 The Chipset Menu...

Page 41: ...41 System Agent SA Configuration PEG Port Configuration PEG Port Options Memory Configuration Display memory size Frequency SATA Configuration SATA Controller s Enable or disable SATA Device...

Page 42: ...42 Administrator Password Set Administrator Password User Password Set User Password 4 7 The Security Menu...

Page 43: ...wait for setup activation key 65535 0xFFFF means indefinite waiting Bootup NumLock State Select the keyboard NumLock state Quiet Boot Enables or disables Quiet Boot option FIXED BOOT ORDER Priorities...

Page 44: ...nd Reset Reset system setup without saving any changes Restore Defaults Restore Load Default values for all the setup options Launch EFI Shell from filesystem device Attempts to Launch EFI Shell appli...

Page 45: ...45 Chapter 5 Programming Guide...

Page 46: ...c driver 2 Make the file with this command make or make clean then make again if error message prompts 3 Install driver files with this command insmod caswell bpgen3 ko 4 Now two file folders g3bp0 an...

Page 47: ...Bypass LED is green and the network connection is not available Now go to the folder g3bp0 and issue this command echo b bypass This will change the status of Bypass pair 1 to bypass mode also the bo...

Page 48: ...p Bypass LED is green and the network connection is not available Now go to the folder g3bp1 and issue this command echo b bypass This will change the status of Bypass pair 2 to bypass mode also the t...

Page 49: ...r g3bp1 and issue this command echo 1 nextboot Reboot to see this change take effect Both Bypass LEDs are turned to red and as in the picture below the notebook is now connected to internet To reverse...

Page 50: ...right to complete the job Please logon to root now Install the driver files 1 Open up the driver file folder as Your File System src driver 2 Make the file with this command make or make clean then m...

Page 51: ...as GPO pins with value low The pin 1 3 5 7 are defined as GPI pins A few jumpers will be added onto pin 1 2 3 4 5 6 7 8 so pin 1 will read the value of pin 2 pin 3 will read the value of pin 4 etc Wi...

Page 52: ...52 Now move these two jumpers onto 3 4 and 7 8 Pin 3 and pin 7 will now read value low Users are welcome to configure this GPI script for other programming jobs...

Page 53: ...ns Pin 2 4 6 and 8 are negative pins The script will change the value of Pin 1 3 5 and 7 so when the a high is set LED will be turned on If a low is set LED will be turned off Walkthrough 1 LED on Pin...

Reviews: