34
On-screen editing/Saving motifs
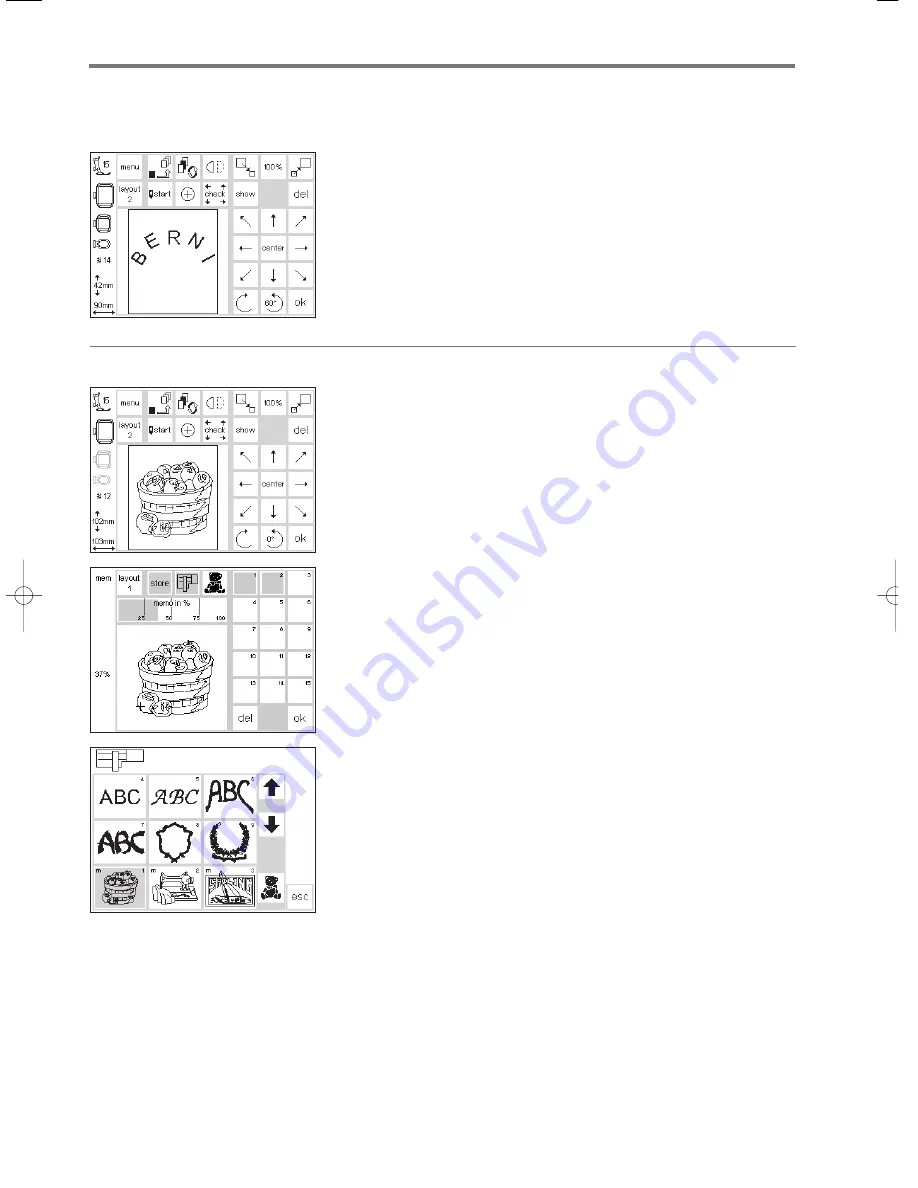
Arched lettering
Use the rotating feature of the edit
function to create arched lettering.
· following the directions on pages
24–32, select the desired letters as
individual motifs
· go to layout 1
· the motifs will appear as rectangles
· select each letter, move and rotate
it in succession as desired, e.g.,
B = 300°, E = 330°, R = 0°, N = 30°,
I = 60° etc., pressing “temporary
save” after each letter is correctly
positioned
· touch “ok” when the letters form
the desired arch
· the sewing screen appears
· the design will be developed in the
programming sequence
· follow the instructions on pages
34–35 to save the design
Saving motifs in the embroidery module
Layout 1 screen (example)
· motifs can be saved in the
Embroidery screen or in Layout 1 or
Layout 2 screens
· press external “mem” button
Memory screen
· the memory screen appears
· activate the embroidery module
function
· touch “store”
· the motif will be automatically
saved in the next available memory
space
Note:
A motif which was altered in size,
switch density, etc. then saved on the
embroidery module (memory card)
will be retrieved as a new motif when
selecting it. The sewing computer
considers the final setting as original
size (100%). The motif as it was
before alterations were made, will
not be retrievable after saving the
final version of the design.
Select a motif saved in the
embroidery module
· the newly saved motifs are added to
the end of the list of motifs
· scroll through the view of motifs to
find the last saved motif at the end
of the list
· the small “m” in the top left of the
motif field shows that the motif is
from the embroidery module
memory
165_170_180_SM_engl 19.04.2004 8:59 Uhr Seite 34
008904.55.04_EMB_0401_a165 a170 a180_EN


