


Operation
44
Using the quick install
The projector provides a hot key to set
Projector Installation
,
Test Pattern
, an
d
Keystone
quickly.
Press
Quick Install
on the remote control and press
▲
/
▼
to select:
• Projector Installation: See
"Positioning your projector" on page 18
• Test Pattern: See
"Using the test pattern" on page 43
.
• Keystone: See
"Correcting 2D Keystone" on page 27
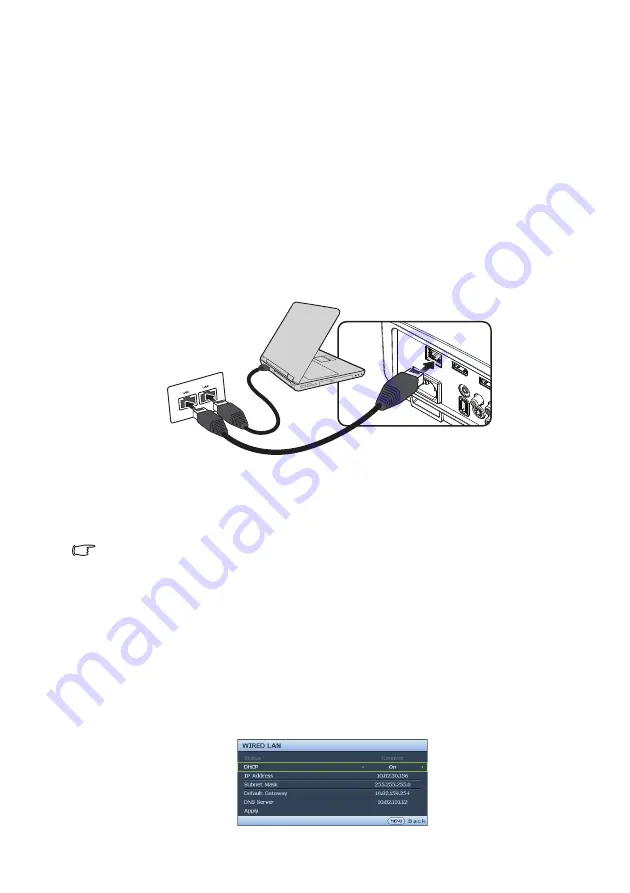
Controlling the projector through a Wired LAN
environment
Wired LAN allows you to manage the projector from a computer using a web browser
when the computer and the projector are properly connected to the same local area
network.
Configuring the Wired LAN
If you are in a DHCP environment:
1.
Take a RJ45 cable and connect one end to the RJ45 LAN input jack of the projector
and the other end to the RJ45 port.
When connecting the RJ45 cable, avoid coiling and intertwining the cable as it may cause signal
noise or interruption.
2.
Press
MENU/EXIT
and then press
◄
/
►
until the
System Setup: Advanced
menu is highlighted.
3.
Press
▼
to highlight
Network Settings
and press
MODE/ENTER
. The
Network Settings
page is displayed.
4.
Press
▼
to highlight
Wired LAN
and press
MODE/ENTER
. The
Wired LAN
page is displayed.
5.
Press
▼
to highlight
DHCP
and press
◄
/
►
to select
On
.
6.
Please wait for around 15 - 20 seconds, and then re-enter the
Wired LAN
page.
7.
The
IP Address
,
Subnet Mask
,
Default Gateway
, and
DNS Server
settings will
be displayed. Note down the IP address displayed in the
IP Address
row.


