background image

INSTALLATION AND OPERATION MANUAL

SHIPPING DAMAGE CLAIMS

When this equipment is shipped, title passes to the 
purchaser upon receipt from the carrier. Consequently, 
claims for the material damaged in shipment must be made 
by the purchaser against the transportation company at the 
time shipment is received.

BE SAFE

Your new lift was designed and built with safety in mind. 
However, your overall safety can be increased by proper 
training and thoughtful operation on the part of the operator. 
DO NOT operate or repair this equipment without reading 
this manual and the  important safety instructions shown 
inside.

1645 Lemonwood Dr.

Santa Paula, CA. 93060, USA

Toll Free 1-800-253-2363

Tel: 1-805-933-9970

Fax: 1-805-933-9160

www.bendpak.com

Keep this operation manual near the 

machine at all times. Make sure that 

ALL USERS  read this manual.

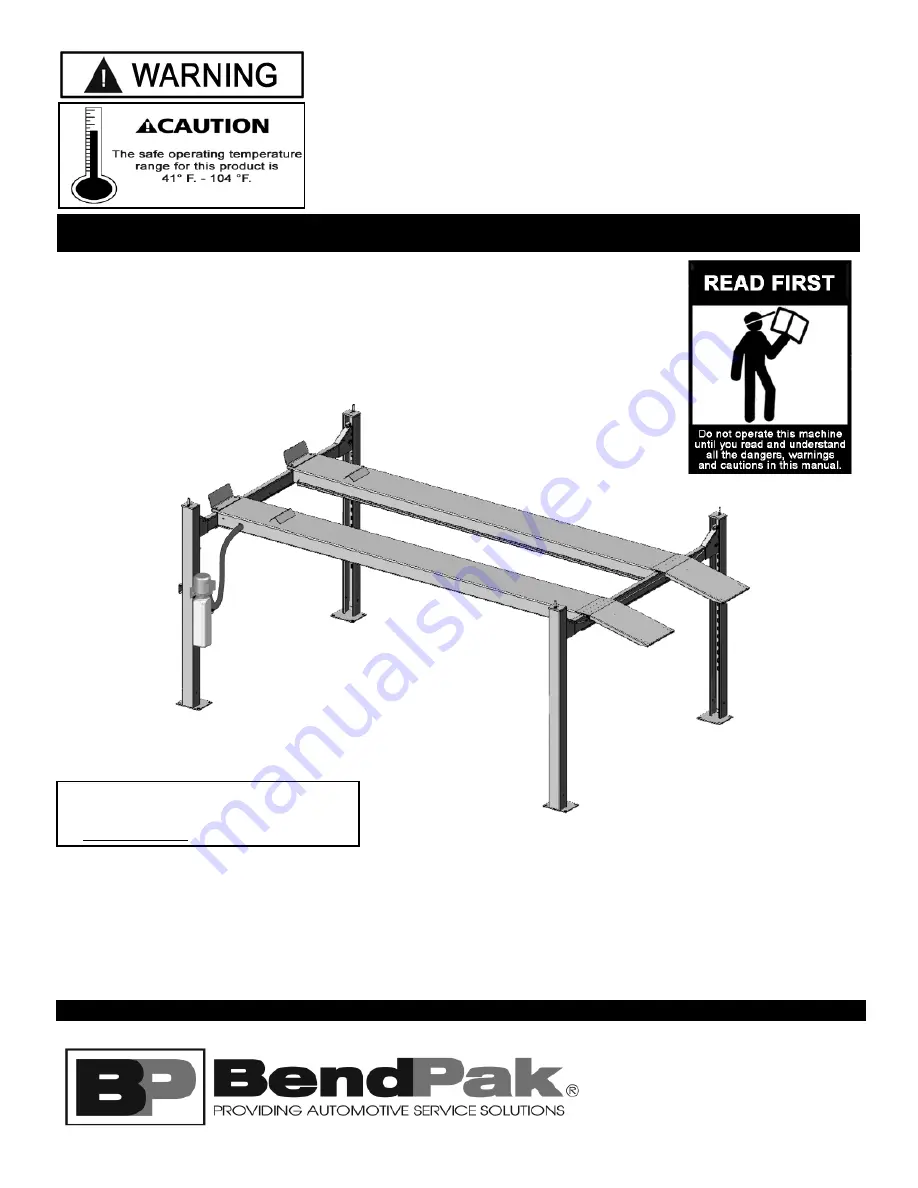
14,000 POUND CAPACITY
COMMERCIAL GRADE
FOUR-POST LIFTS

MODELS:
HD-14SS
HD-14
HD-14X
HD-14 TL

PLEASE READ THE ENTIRE CONTENTS OF THIS MANUAL PRIOR TO INSTAL-
LATION AND OPERATION. BY PROCEEDING YOU AGREE THAT YOU FULLY 
UNDERSTAND AND  COMPREHEND THE FULL CONTENTS OF THIS MANUAL. 
FORWARD THIS MANUAL TO ALL OPERATORS. FAILURE TO OPERATE THIS 
EQUIPMENT AS DIRECTED MAY CAUSE INJURY OR DEATH.

REV D 08-13-10

p/n 5900037

Summary of Contents for HD-14

Page 1: ...quipment without reading this manual and the important safety instructions shown inside 1645 Lemonwood Dr Santa Paula CA 93060 USA Toll Free 1 800 253 2363 Tel 1 805 933 9970 Fax 1 805 933 9160 www bendpak com Keep this operation manual near the machine at all times Make sure that ALL USERS read this manual 14 000 POUND CAPACITY COMMERCIAL GRADE FOUR POST LIFTS MODELS HD 14SS HD 14 HD 14X HD 14 TL...

Page 2: ...shall repair or replace at their option for the warranty period those parts returned to the factory freight prepaid which prove upon inspection to be defective BendPak Inc will pay labor costs for the first 12 months only on parts returned as previously described The warranty does not extend to defects caused by ordinary wear abuse misuse shipping damage improper installation voltage or lack of re...

Page 3: ...he lift for correct initial function Read and follow the safety instructions Keep them readily available for machine operators Make certain all operators are properly trained know how to safely and correctly operate the unit and are properly supervised Allow unit operation only with all parts in place and operating safely Carefully inspect the unit on a regular basis and perform all maintenance as...

Page 4: ...sing the Cross Tubes 12 Step 5 Powerside Runway Installation 13 Step 6 Offside Runway Installation 13 Step 7 Cable Sheave Installation 14 16 Step 8 Cable Installation 15 16 Step 9 Power Unit Installation 16 17 Step 10 Routing Hydraulic Hoses 17 18 Step 11 Routing Air Lines 19 Step 12 Power Unit Hook Up 20 22 Step 13 Inspecting Slack Safety Springs 22 Step 14 Lift Start Up Final Adjustments 22 23 S...

Page 5: ...or or bystander or damage to property or lift Failure to follow danger warning and caution instructions may lead to serious personal injury or death to operator or bystander or damage to property Please read entire manual prior to installation Do not operate this machine until you read and understand all the dangers warnings and cautions in this manual For additional copies or further information ...

Page 6: ... is approved by the manufacturer 7 DO NOT override self closing lift controls 8 REMAIN CLEAR of lift when raising or lowering vehicle 9 CLEAR AREA if vehicle is in danger of falling 10 ALWAYS INSURE that the safeties are engaged before any attempt is made to work on or near vehicle 11 DRESS PROPERLY Non skid steel toe footwear is recommended when operating lift 12 GUARD AGAINST ELECTRIC SHOCK This...

Page 7: ... or on cracked or defective concrete DO NOT install or use this lift on a second elevated floor without first consulting building architect DO NOT install or use this lift outdoors CONCRETE SPECIFICATIONS LIFT MODEL CONCRETE REQUIREMENTS HD 14SS 4 Min Thickness 3 000 PSI HD 14 4 Min Thickness 3 000 PSI HD 14X 4 Min Thickness 3 000 PSI HD 14TL 4 Min Thickness 3 000 PSI DANGER All models MUST be ins...

Page 8: ...8 Assembly View ...

Page 9: ...0 508 mm J Width Between Runways 37 49 940 mm 1245mm 37 49 940 mm 1245mm 37 49 940 mm 1245mm 37 49 940 mm 1245mm K Length of Runways 174 4420 mm 198 5029 mm 236 5994 mm 198 5029 mm Min Wheelbase Rated Capacity 125 3175 mm 140 3556 mm 170 4318 mm 140 3556 mm Min Wheelbase 75 Rated Capacity 105 2667 mm 120 3048 mm 145 3683 mm 120 3048 mm Min Wheelbase 50 Rated Capacity 90 2286 mm 100 2540 mm 120 304...

Page 10: ...Unit location Each Runway MUST be installed with the Utility Rails to the inside For the remainder of this instruction we will illustrate the Power Unit mounted at the DRIVER SIDE LEFT FRONT column TOP ILLUSTRATION For Power Unit at right rear rotate lift 180 leaving approach Ramps and Front Tire Stops in original position IMPORTANT NOTE POWER UNIT LOCATION ...

Page 11: ... thickness recommended by the factory is no more than 1 2 per Column using shims and anchors provided with the lift A maximum shim thickness of 2 is possible by ordering optional Shim Plates Contact your authorized BendPak Distributor for ordering information 3 Using a forklift or crane raise the Cross Tubes making sure the Plastic Slide Blocks are still in position and drop down into the top of t...

Page 12: ...mbly 2 Manually raise the Cross Tubes until the Primary Safety Locks engage and rest on the lock position second down from the top of the Ladder or approximately 66 off the ground It is important that the SLACK SAFETY LOCK IS CLEARED The Slack Safety Lock must never rest on the Safety Ladder See Fig 4 1 3 The Columns and Cross Tubes will now be in position and spaced properly for the Runways Be ve...

Page 13: ...ross Tubes with the Utility Rail towards the center The fitting holes located at the side of the Powerside Runway should be adjacent to the Power Unit Column Align the holes in the runway with the holes on the Cross Tubes and bolt together using four M12 x 1 75 x 90 hex bolts and washers Tighten to 80 ftl lbs See Fig 5 4 STEP 6 Offside Runway Installation 1 Position the Offside Runway on top of th...

Page 14: ... 970mm Cable B C HD 14SS 5595042 HD 14LS 14SS 12 x 7 675mm Cable C D HD 14SS 5595043 HD 14LS 14SS12 x 9 280mm Cable D A HD 14X 5595004 HD 14LSXE 14X 12 x 4 935mm Cable A B HD 14X 5595002 HD 14LSXE 14X 12 x 6 540mm Cable B C HD 14X 5595008 HD 14LSXE 14X 12 x 10 820mm Cable C D HD 14X 5595006 HD 14LSXE 14X 12 x 12 425mm Cable D Model Part Description A HD 14TL 5595139 HD 14T 12 x 3 665mm Cable A B H...

Page 15: ...of the guide Lug ends of Cables start at Cylinder See Fig 8 1 2 Route the threaded Cable ends through the ends of each Cross Tube over the Slack Safety Sheave then to the top of each Column Secure using the M22 hex nuts and flat washers Tighten each nut until there is at least one inch of threads protruding through the top of the nut The Cables will remain loose until start up and final Cable adju...

Page 16: ...ing Bracket using the M8 hex bolts and nylon nuts See Fig 9 1 2 Fill the reservoir with 12 quarts of 10 WT hydraulic oil or Dexron III automatic transmission fluid DANGER DO NOT PERFORM ANY MAINTENANCE OR INSTALLATION OF ANY COMPONENTS WITH OUT FIRST ENSURING THAT ELECTRICAL POWER HAS BEEN DISCONNECTED AT THE SOURCE OR PANEL AND CANNOT BE RE ENERGIZED UNTIL ALL MAINTENANCE AND OR INSTALLATION PROC...

Page 17: ...er electrical hook up can damage motor and will not be covered under warranty Motor can not run on 50HZ without a physical change in motor Use a separate breaker for each power unit Protect each circuit with time delay fuse or circuit breaker For 208 230 volt single phase use a 25 amp fuse For 208 230 volt three phase use a 20 amp fuse For 380 440 volt three phase use a 15 amp fuse The standard po...

Page 18: ...djacent to the Power Unit Install POWERSIDE RUNWAY adjacent to the Power Unit Install the other end of the Flex Hose to the Flex Hose Bracket the other end of the Flex Hose to the Flex Hose Bracket Assy Tighten securely See Fig 10 5 Assy Tighten securely See Fig 10 5 5 Connect Hoses as shown below making sure to pass through the retaining rings MAKE SURE HOSES ARE KEPT CLEAR OF CABLES See Fig 10 6...

Page 19: ...d 1 4 air line tubing with a sharp blade to lengths as required Tubing must be cut square with no burrs Note To assemble air line tubing into fitting use firm manual pressure to push tubing into the fitting until it bottoms out To remove air line tubing from the fitting hold push sleeve in against fitting and at the same time pull out on tubing Pay careful attention to keep air line clear of any p...

Page 20: ...ay fuse or circuit breaker For 208 230 volt single phase use a 25 amp fuse For 208 230 volt three phase use a 20 amp fuse For 380 440 volt three phase use a 15 amp fuse Installation and adjustment DO NOT attempt to raise vehicle until a thorough operation check has been completed All wiring must be performed by a certified electrician only DANGER DO NOT PERFORM ANY MAINTENANCE OR INSTALLATION OF A...

Page 21: ...21 ...

Page 22: ... unit reservoir is full with 12 quarts of 10 WT hydraulic oil or Dexron III automatic transmission fluid 2 Spray the inside of the Columns where the Slide Blocks glide with a light lubricant or WD 40 3 Test the Power Unit by pressing the push button switch If the motor sounds like it is operating properly raise the lift and check all hose connections for leaks If the motor gets hot or sounds pecul...

Page 23: ...and check that all safety locks are functioning properly Lower the lift by pressing the push button air valve and power unit lowering valve simultane ously KEEP HANDS AND FEET CLEAR Remove hands and feet from any moving parts Keep feet clear of lift when lowering Avoid pinch points 9 Check all MAIN SAFETY LOCKS to make sure they move freely and spring back to the lock position when released Lubric...

Page 24: ...T If Anchor Bolts do not hold when torqued to required amount concrete must replaced Saw cut and remove 24 x 24 square area each Column base then re pour with reinforced 2500 concrete to a depth of six inches minimum keying new concrete under existing floor See Fig 15 5 STEP 16 Attaching the Approach Ramp Tire Stops 1 Install the Approach Ramps on the entry side of the lift Use the Top Pin Tube fo...

Page 25: ... B until the cross hairs of the Level align to reference mark on the target scale See Fig 17 1 9 Repeat steps locating the target assembly at points C and D and adjusting safety ladders at each corre sponding Column until the reference mark on the target scale is on the cross hairs of the Level The Runways are now level at all four points See Fig 17 1 10 To complete the leveling procedures lock ea...

Page 26: ...is will place pressure on the hydraulic system Stop and check all fittings and hose connections Tighten or reseal if required POST INSTALLATION CHECK OFF Columns Properly Shimmed And Stable Anchor Bolts Tightened Pivot Sheave Pins Properly Attached Electric Power Supply Confirmed Cables Adjusted Properly Safety Locks Functioning Properly Check For Hydraulic Leaks Oil Level Lubrication of Critical ...

Page 27: ...27 HD 9 12 12X 14 14X Series Rolling Jack Air Line Installation Kit Part 5174009 REV 06 04 09 ...

Page 28: ...28 Adapter Plate Required for HD 9 12 14 Adapter Plate Required for HD 9 12 14 ...

Page 29: ...at all FOUR LOCKS are disengaged If one of the locks inadvertently locks on descent the lift and or vehicle may disrupt causing personal injury or death WEEKLY MAINTENANCE 1 Lubricate all rollers with general purpose oil or WD 40 2 Check all Cable connections bolts and pins to insure proper mounting 3 Lubricate Safety Lock pivot points with general purpose oil or WD 40 MONTHLY MAINTENANCE 1 Check ...

Page 30: ...similar heavy lubricant applied by any method including pump spray dispensing brush hand and or swabbing HOW OFTEN TO INSPECT Lifting cables should be visually inspected at least once each day when in use as suggested by American Petroleum Institute API RP54 guidelines Any lifting cables that have met the criteria for removal must be immediately replaced WHEN TO REPLACE LIFTING CABLES DUE TO BROKE...

Page 31: ...31 ...

Page 32: ...32 ...

Page 33: ...ian The vehicle manufacturer s recommendations should be used for spotting and lifting the vehicle LIFT OPERATION SAFETY It is important that you know the load limit Be careful that you do not overload the lift If you are unsure what the load limit is check the data plate found on one of the lift columns or contact the manufacturer The center of gravity should be followed closely to what the manuf...

Page 34: ...edures before operating lift KEEP HANDS AND FEET CLEAR Remove hands and feet from any moving parts Keep feet clear of lift when lowering Avoid pinch points ONLY TRAINED OPERATORS should operate this lift All non trained personnel should be kept away from work area Never let non trained personnel come in contact with or operate lift USE LIFT CORRECTLY Use lift in the proper manner Never use lifting...

Page 35: ...d start unit allowing possible contamination it to run for 15 seconds 4 Dirty oil Replace oil with clean Dexron ATF 5 Tighten all fasteners Tighten fasteners to recommended torques 6 Check for free movement of release If handle does not move freely replace bracket or handle assembly 7 Check motor is wired correctly Compare wiring of motor to electrical diagram on drawing 8 Oil seal damaged or cock...

Page 36: ...ew part Replace with new part 5 Reset circuit breaker fuse Reset circuit breaker fuse 6 Return unit for repair Return unit for repair 7 See Installation Manual See Installation Manual 8 Check wall outlet voltage and wiring Make sure unit and wall outlet is wired properly Motor must run at 208 230 VAC LIFT LOWERS SLOWLY OR NOT AT ALL POSSIBLE CAUSE 1 Cylinders binding 1 2 Release valve clogged 5 4 ...

Page 37: ...tlet is wired properly LIFT WILL NOT STAY UP POSSIBLE CAUSE 1 Air in oil 1 2 3 4 Lowering valve leaks 4 5 1 7 6 2 Check valve leaks 6 5 Leaking fittings 8 3 Cylinders leak internally 7 REMEDY INSTRUCTION 1 Check oil level The oil level should be up to the bleed screw in the reservoir with the lift all the way down 2 Oil seal damaged and cocked Replace oil seal around pump shaft 3 Bleed cylinder Re...

Page 38: ...38 ...

Page 39: ...P C N I K A P D N E B C N I K A P D N E B N O I S I V E R V E R N O I T P I R C S E D E T A D Y B D E T I D E O C E D S N O I S I V E R M O B D E T A D P U 8 0 0 2 8 1 6 0 C A 1 1 2 0 0 E S N O I S I V E R M O B D E T A D P U 8 0 0 2 8 1 7 0 C A 4 2 2 0 0 F X E L F D E V O M E R S P O T S E R I T D E V O M E R S N O I S I V E R M O B D E T A D P U T E K C A R B E S O H T F I L W O N T F I L E T E ...

Page 40: ...P C N I K A P D N E B C N I K A P D N E B N O I S I V E R V E R N O I T P I R C S E D E T A D Y B D E T I D E O C E D S N O I S I V E R M O B D E T A D P U 8 0 0 2 8 1 6 0 C A 1 1 2 0 0 E S N O I S I V E R M O B D E T A D P U 8 0 0 2 8 1 7 0 C A 4 2 2 0 0 F E S O H X E L F D E V O M E R S P O T S E R I T D E V O M E R S N O I S I V E R M O B D E T A D P U S T E K C A R B T F I L W O N T F I L E T ...

Page 41: ...P C N I K A P D N E B C N I K A P D N E B N O I S I V E R V E R N O I T P I R C S E D E T A D Y B D E T I D E O C E D S N O I S I V E R M O B D E T A D P U 8 0 0 2 9 1 6 0 C A 1 1 2 0 0 E S N O I S I V E R M O B D E T A D P U 8 0 0 2 8 1 7 0 C A 4 2 2 0 0 F X E L F D E V O M E R S P O T S E R I T D E V O M E R S N O I S I V E R M O B D E T A D P U S T E K C A R B E S O H T F I L W O N T F I L E T ...

Page 42: ...N I K A P D N E B N O I S I V E R V E R N O I T P I R C S E D E T A D Y B D E T I D E O C E A E S A E L E R N O I T C U D O R P 8 0 0 2 9 2 9 0 C A 0 4 1 0 0 Y L B M E S S A T X E N 1 6 1 0 6 2 5 M E T I O N T R A P R E B M U N N O I T P I R C S E D Y T Q V E R 1 2 7 0 0 0 7 5 K C O H C L E E H W 2 A 2 4 9 0 4 7 1 5 S E I R E S 4 1 D H G A B S T R A P 1 A 3 9 0 0 5 0 5 5 N I P P M A R P U E V I R ...

Page 43: ... K A P D N E B C N I K A P D N E B N O I S I V E R V E R N O I T P I R C S E D E T A D Y B D E T I D E O C E A E S A E L E R N O I T C U D O R P 8 0 0 2 9 2 9 0 C A 0 4 1 0 0 Y L B M E S S A T X E N 5 6 1 0 6 2 5 M E T I O N T R A P R E B M U N N O I T P I R C S E D Y T Q V E R 1 2 7 0 0 0 7 5 K C O H C L E E H W 2 A 2 4 9 0 4 7 1 5 S E I R E S 4 1 D H G A B S T R A P 1 A 3 9 0 0 5 0 5 5 N I P P M...

Page 44: ...P D N E B C N I K A P D N E B N O I S I V E R V E R N O I T P I R C S E D E T A D Y B D E T I D E O C E A E S A E L E R N O I T C U D O R P 8 0 0 2 1 0 0 1 C A 0 4 1 0 0 Y L B M E S S A T X E N 6 6 1 0 6 2 5 M E T I O N T R A P R E B M U N N O I T P I R C S E D Y T Q V E R 1 2 7 0 0 0 7 5 K C O H C L E E H W 2 A 2 4 9 0 4 7 1 5 S E I R E S 4 1 D H G A B S T R A P 1 A 3 9 0 0 5 0 5 5 N I P P M A R ...

Page 45: ... P C N I K A P D N E B C N I K A P D N E B N O I S I V E R V E R N O I T P I R C S E D E T A D Y B D E T I D E O C E A E S A E L E R N O I T C U D O R P 8 0 0 2 8 2 8 0 C A 0 4 1 0 0 Y L B M E S S A T X E N 2 0 3 0 5 2 5 6 0 3 0 5 2 5 7 0 3 0 5 2 5 8 0 3 0 5 2 5 O N M E T I R E B M U N T R A P N O I T P I R C S E D Y T Q V E R 1 6 5 7 0 3 5 5 5 2 x 1 x 6 M B H H 8 2 7 5 3 5 3 5 5 L N 0 1 x 6 M T U...

Page 46: ...1 D 7 5600140 HD 14 EXTENDED LADDER WELDMENT 4 A 8 5535021 NYLOCK HEX NUT M16 x 2 4 B 9 5545025 WASHER M16 x 30mm FLAT 4 10 5535008 NUT M16 x 2 NL 4 11 5215104 DRIVE UP RAMP ASSEMBLY 2 SHEET 1 OF 1 REV DWG NO A SIZE TITLE NAME DATE CHECKED DRAWN SIZE MATERIAL C 1645 LEMONWOOD DR SANTA PAULA CA 93060 PROPRIETARY AND CONFIDENTIAL THE INFORMATION CONTAINED IN THIS DRAWING IS THE SOLE PROPERTY OF BEND...

Page 47: ... x 8590mm 1 A 12 5595187 HD 14T CABLE ASSY Ø12 x 10190mm 1 A 13 5570795 1 4 POLY FLO TUBING 17000mm 14 5570025 HYD HOSE ASSEMBLY Ø6 4 x 3685mm 1 A 15 5535011 NUT M22 x 2 5 NL 4 16 5700029 HD 7P 9 FLEX TUBE BRACKET PLATE 1 D 17 5700033 HD 7 9 FLEX TUBE ANGLE 1 D 18 5530456 AB 3 4 x 4 3 4 16 SHEET 1 OF 1 REV DWG NO A SIZE TITLE NAME DATE CHECKED DRAWN SIZE MATERIAL D 1645 LEMONWOOD DR SANTA PAULA CA...

Page 48: ...Parts Or Service Contact BendPak Inc Ranger Products 1645 Lemonwood Dr Santa Paula CA 93060 Tel 1 805 933 9970 Toll Free 1 800 253 2363 Fax 1 805 933 9160 www bendpak com www rangerproducts com p n 5900037 ...

Reviews: