background image

Commissioning

EL10xx, EL11xx

80

Version: 4.5

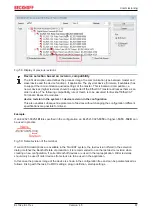
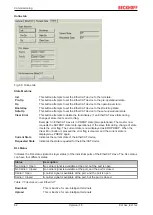
Type

EtherCAT device type

Product/Revision

Product and revision number of the EtherCAT device

Auto Inc Addr.

Auto increment address of the EtherCAT device. The auto increment address
can be used for addressing each EtherCAT device in the communication ring
through its physical position. Auto increment addressing is used during the start-
up phase when the EtherCAT master allocates addresses to the EtherCAT
devices. With auto increment addressing the first EtherCAT slave in the ring has
the address 0000

hex

. For each further slave the address is decremented by 1

(FFFF

hex

, FFFE

hex

 etc.).

EtherCAT Addr.

Fixed address of an EtherCAT slave. This address is allocated by the EtherCAT
master during the start-up phase. Tick the control box to the left of the input field
in order to modify the default value.

Previous Port

Name and port of the EtherCAT device to which this device is connected. If it is
possible to connect this device with another one without changing the order of
the EtherCAT devices in the communication ring, then this combination field is
activated and the EtherCAT device to which this device is to be connected can
be selected.

Advanced Settings

This button opens the dialogs for advanced settings.

The link at the bottom of the tab points to the product page for this EtherCAT device on the web.

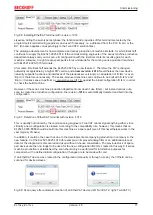
Process Data tab

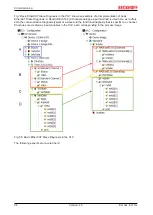
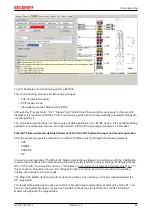
Indicates the configuration of the process data. The input and output data of the EtherCAT slave are
represented as CANopen process data objects (PDO). Digital input terminals (EL10xx) and digital output
terminals (EL20xx) feature a fixed PDO allocation.

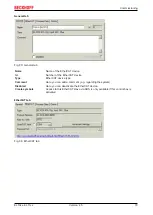
Fig. 85: Process Data tab

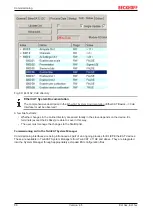
Sync Manager

Lists the configuration of the Sync Manager (SM).
The corresponding PDO Assignment is displayed in the 

PDO Assignment

 list below.

Summary of Contents for EL10 Series

Page 1: ...Documentation EL10xx EL11xx Digital Input Terminals 4 5 2020 03 06 Version Date...

Page 2: ......

Page 3: ...Technical data 22 2 3 EL1024 EL1034 Introduction 23 2 3 1 EL1024 LEDs and connection 23 2 3 2 EL1034 LEDs and connection 24 2 3 3 EL1024 EL1034 Technical data 25 2 4 EL108x EL109x Introduction 26 2 4...

Page 4: ...nCAT real time driver 54 5 1 2 Notes regarding ESI device description 60 5 1 3 OFFLINE configuration creation 64 5 1 4 ONLINE configuration creation 69 5 1 5 EtherCAT slave process data settings 77 5...

Page 5: ...ing these components It is the duty of the technical personnel to use the documentation published at the respective time of each installation and commissioning The responsible staff must ensure that t...

Page 6: ...ght Beckhoff Automation GmbH Co KG Germany The reproduction distribution and utilization of this document as well as the communication of its contents to others without express authorization are prohi...

Page 7: ...trained specialists in control automation and drive engineering who are familiar with the applicable national standards Description of instructions In this documentation the following instructions ar...

Page 8: ...ce notes 4 0 First publication in PDF format Structural update 3 3 Technical data section updated Assembly instructions with increased mechanical load capacity section supplemented 3 2 Technical data...

Page 9: ...by Beckhoff In principle a device with a higher revision can replace a device with a lower revision unless specified otherwise e g in the documentation Associated and synonymous with each revision the...

Page 10: ...u hardware version of the I O PCB Example D 22081501 calendar week 22 of the year 2008 firmware version of bus PCB 1 hardware version of bus PCB 5 firmware version of I O PCB 0 no firmware necessary...

Page 11: ...x 11 Version 4 5 Fig 2 EK1100 EtherCAT coupler standard IP20 IO device with serial batch number Fig 3 CU2016 switch with serial batch number Fig 4 EL3202 0020 with serial batch number 26131006 and uni...

Page 12: ...mber 158102 Fig 6 EP1908 0002 IP67 EtherCAT Safety Box with batch number date code 071201FF and unique serial number 00346070 Fig 7 EL2904 IP20 safety terminal with batch number date code 50110302 and...

Page 13: ...the product it can be found in the following places on the packaging unit directly on the product if space suffices on the packaging unit and the product The BIC is machine readable and contains info...

Page 14: ...iers are used by Beckhoff and serve internal processes Structure of the BIC Example of composite information from item 1 to 4 and 6 The data identifiers are marked in red for better display BTN An imp...

Page 15: ...igned with a functional potential separation of 2500 V test voltage E bus field voltage 2 1 1 EL1002 LEDs and connection Fig 10 EL1002 EL1002 LEDs LED Color Meaning INPUT 1 INPUT 2 green off Signal vo...

Page 16: ...t 1 24 V 2 Sensor supply for input 1 internally connected to terminal points 3 6 7 and positive power contact 24 V 3 Sensor supply for input 3 internally connected to terminal points 2 6 7 and positiv...

Page 17: ...8 LEDs LED Colour Meaning INPUT 1 8 green off Signal voltage 0 3 V 5 V on Signal voltage 1 11 V 30 V EL1008 Connection Terminal point Description Name No Input 1 1 Input 1 Input 3 2 Input 3 Input 5 3...

Page 18: ...configuration via TwinCAT System Manager Weight approx 55 g Permissible ambient temperature range during operation 25 C 60 C extended temperature range 0 C 55 C 25 C 60 C extended temperature range al...

Page 19: ...nel 2 2 1 EL1012 LEDs and connection Fig 13 EL1012 EL1012 LEDs LED Color Meaning INPUT 1 INPUT 2 green off Signal voltage 0 3 V 5 V on Signal voltage 1 11 V 30 V EL1012 Connection Terminal point Descr...

Page 20: ...2 Sensor supply for input 1 internally connected to terminal points 3 6 7 and positive power contact 24 V 3 Sensor supply for input 3 internally connected to terminal points 2 6 7 and positive power...

Page 21: ...18 LEDs LED Color Meaning INPUT 1 8 green off Signal voltage 0 3 V 5 V on Signal voltage 1 11 V 30 V EL1018 Connection Terminal point Description Name No Input 1 1 Input 1 Input 3 2 Input 3 Input 5 3...

Page 22: ...s image 2 input bits 4 input bits 8 input bits Configuration no address setting configuration via TwinCAT System Manager Weight approx 55 g Permissible ambient temperature range during operation 25 C...

Page 23: ...therCAT Terminal contains four channels that indicate its signal state by means of light emitting diodes With its input signal the EL1024 corresponds to IEC 61131 2 Type 2 Additionally the 4 channel E...

Page 24: ...ted to terminal points 2 6 7 and positive power contact Input 3 4 Input 3 Input 2 5 Input 2 24 V 6 Sensor supply for input 2 internally connected to terminal points 2 3 7 and positive power contact 24...

Page 25: ...power contacts typ 30 mA load Current consumption via E bus typ 90 mA Electrical isolation 500 V E bus field voltage Bit width in the process image 4 input bits Configuration no address setting config...

Page 26: ...multi channel sensors with single wire connections The EtherCAT Terminals indicate their signal state by means of light emitting diodes 2 4 1 EL1084 EL1094 LEDs and connection Fig 18 EL1084 EL1094 EL1...

Page 27: ...88 EL1098 LEDs LED Color Meaning INPUT 1 8 green off Signal voltage 0 18 V 30 V on Signal voltage 1 0 V 7 V EL1088 EL1098 Connection Terminal point Description Name No Input 1 1 Input 1 Input 3 2 Inpu...

Page 28: ...sible ambient temperature range during operation 0 C 55 C 0 C 55 C aligned in horizontal installation position 0 C 45 C all other installation positions see Note 44 0 C 55 C 0 C 55 C aligned in horizo...

Page 29: ...light emitting diodes 2 5 1 EL1104 EL1114 LEDs and connection Fig 20 EL1104 EL1104 EL1114 LEDs LED Color Meaning INPUT 1 4 green off Signal voltage 0 3 V 5 V on Signal voltage 1 11 V 30 V EL1104 EL111...

Page 30: ...idth in the process image 4 input bits Configuration no address setting configuration via TwinCAT System Manager Weight approx 55 g Permissible ambient temperature range during op eration 25 C 60 C ex...

Page 31: ...21 EL1124 EL1124 EL1144 EL1134 LEDs LED Color Meaning INPUT 1 4 green off EL1124 Signal voltage 0 0 8 V EL1144 Signal voltage 0 2 4 V EL1134 Signal voltage 0 3 5 V on EL1124 Signal voltage 1 2 4 V EL...

Page 32: ...d voltage Bit width in the process image 4 input bits Configuration no address setting configuration via TwinCAT System Manager Weight approx 55 g Permissible ambient temperature range during operatio...

Page 33: ...time in the input circuit Asymmetry of the filter time for rising and falling edge Duty factor for input signal Edge steepness of the input signal Due to the production related fluctuation range of th...

Page 34: ...C 8802 3 Pin Color of conductor Signal Description 1 yellow TD Transmission Data 2 orange TD Transmission Data 3 white RD Receiver Data 6 blue RD Receiver Data Due to automatic cable detection auto cr...

Page 35: ...minal for longer than the set and activated SM watchdog time e g in the event of a line interruption the watchdog is triggered and the outputs are set to FALSE The OP state of the terminal is unaffect...

Page 36: ...If the checkbox is not activated nothing is downloaded and the ESC settings remain unchanged Multiplier Multiplier Both watchdogs receive their pulses from the local terminal cycle divided by the wat...

Page 37: ...r switching off of the SM watchdog via SM watchdog 0 is only implemented in terminals from version 0016 In previous versions this operating mode should not be used CAUTION Damage of devices and undefi...

Page 38: ...perational Safe Op During transition between Pre Op and Safe Op the EtherCAT slave checks whether the sync manager channels for process data communication and if required the distributed clocks settin...

Page 39: ...the Init state In the Boot state mailbox communication via the file access over EtherCAT FoE protocol is possible but no other mailbox communication and no process data communication 3 5 CoE Interface...

Page 40: ...nit 1 ns Zero point 1 1 2000 00 00 Size 64 bit sufficient for the next 584 years however some EtherCAT slaves only offer 32 bit support i e the variable overflows after approx 4 2 seconds The EtherCAT...

Page 41: ...ith highly insulating materials synthetic fibers plastic film etc Surroundings working place packaging and personnel should by grounded probably when handling with the devices Each assembly must be te...

Page 42: ...the lock clicks onto the mounting rail If the terminals are clipped onto the mounting rail first and then pushed together without tongue and groove the connection will not be operational When correctl...

Page 43: ...ponents The six spring contacts of the K Bus E Bus deal with the transfer of the data and the supply of the Bus Terminal electronics The power contacts deal with the supply for the field electronics a...

Page 44: ...t not be used for other potentials 4 3 Installation positions NOTE Constraints regarding installation position and operating temperature range Please refer to the technical data for a terminal to asce...

Page 45: ...own in Fig Recommended distances for standard installation position is recommended Other installation positions All other installation positions are characterized by different spatial arrangement of t...

Page 46: ...h enhanced mechanical load capacity the following additional installation instructions apply The enhanced mechanical load capacity is valid for all permissible installation positions Use a mounting ra...

Page 47: ...assive terminals have no current consump tion out of the E Bus To ensure an optimal data transfer you must not directly string together more than 2 passive termi nals Examples for positioning of passi...

Page 48: ...ies feature a pluggable connection level The assembly and wiring procedure is the same as for the ELxxxx and KLxxxx series The pluggable connection level enables the complete wiring to be removed as a...

Page 49: ...uctors and conductors with a wire end sleeve can be inserted directly into the spring loaded terminal point without tools Wiring HD Terminals The High Density Terminals of the ELx8xx and KLx8xx series...

Page 50: ...on t toggle 2 The wire can now be inserted into the round terminal opening without any force 3 The terminal point closes automatically when the pressure is released holding the wire securely and perma...

Page 51: ...nd to the actual measured temperature values Observe the permissible ambient temperature range of 0 to 55 C for the use of Beckhoff fieldbus compo nents standard temperature range in potentially explo...

Page 52: ...nge ET in potentially explosive areas Measures must be taken to protect against the rated operating voltage being exceeded by more than 40 due to short term interference voltages The individual termin...

Page 53: ...ailable in the download area of the Beckhoff homepage http www beckhoff com 4 10 UL notice Application Beckhoff EtherCAT modules are intended for use with Beckhoff s UL Listed EtherCAT Sys tem only Ex...

Page 54: ...eXtended Automation Visual Studio Integration Choice of the programming language Supports object orientated extension of IEC 61131 3 Usage of C C as programming language for real time applications Con...

Page 55: ...aces listed under Compatible devices can be assigned a driver via the Install button A driver should only be installed on compatible devices A Windows warning regarding the unsigned driver can be igno...

Page 56: ...ties of the EtherCAT device can be opened by double click on Device EtherCAT within the Solution Explorer under I O After the installation the driver appears activated in the Windows overview for the...

Page 57: ...Commissioning EL10xx EL11xx 57 Version 4 5 Fig 42 Exemplary correct driver setting for the Ethernet port Other possible settings have to be avoided...

Page 58: ...Commissioning EL10xx EL11xx 58 Version 4 5 Fig 43 Incorrect driver settings for the Ethernet port...

Page 59: ...s where an EL6601 or similar devices are used it is useful to specify a fixed IP address for this port via the Internet Protocol TCP IP driver setting and to disable DHCP In this way the delay associa...

Page 60: ...that was current at the time when the TwinCAT build was created For TwinCAT 2 11 TwinCAT 3 and higher the ESI directory can be updated from the System Manager if the programming PC is connected to the...

Page 61: ...ision 1019 or for an older revision The ESI must then be requested from the manufacturer in this case Beckhoff b an ESI is present for the EL2521 0000 device but only in an older revision e g 1018 or...

Page 62: ...deleted as follows close all System Manager windows restart TwinCAT in Config mode delete OnlineDescription0000 xml restart TwinCAT System Manager This file should not be visible after this procedure...

Page 63: ...x EL11xx 63 Version 4 5 Reasons may include Structure of the xml does not correspond to the associated xsd file check your schematics Contents cannot be translated into a device description contact th...

Page 64: ...s For the present publisher subscriber service in combination with an EL6601 EL6614 terminal select EtherCAT Automation Protocol via EL6601 Fig 52 Selecting the EtherCAT connection TwinCAT 2 11 TwinCA...

Page 65: ...TwinCAT 3 The dialog for selecting a new device opens Only devices for which ESI files are available are displayed Only devices are offered for selection that can be appended to the previously select...

Page 66: ...Information Fig 57 Display of device revision In many cases several device revisions were created for historic or functional reasons e g through technological advancement For simplification purposes s...

Page 67: ...on This also enables subsequent replacement of devices without changing the configuration different specifications are possible for drives Example If an EL2521 0025 1018 is specified in the configurat...

Page 68: ...Commissioning EL10xx EL11xx 68 Version 4 5 Fig 60 EtherCAT terminal in the TwinCAT tree left TwinCAT 2 right TwinCAT 3...

Page 69: ...The online search is not available in RUN mode production operation Note the differentiation be tween TwinCAT programming system and TwinCAT target system The TwinCAT 2 icon or TwinCAT 3 icon within t...

Page 70: ...e The respective devices are lo cated in the stored ESI data and integrated in the configuration tree in the default state defined there Fig 65 Example default state NOTE Slave scanning in practice in...

Page 71: ...configuration B tsm in order to check the built machine However if the series machine production department now doesn t use B tsm but instead carries out a scan to create the productive configuration...

Page 72: ...witched to online state OPERATIONAL Fig 71 Config FreeRun query left TwinCAT 2 right TwinCAT 3 In Config FreeRun mode the System Manager display alternates between blue and red and the EtherCAT device...

Page 73: ...evice is detected i e an EtherCAT slave for which no ESI XML description is available In this case the System Manager offers to read any ESI that may be stored in the device This case is described in...

Page 74: ...nfiguration is then replaced by the revision found this can affect the supported process data and functions If a scan is initiated for an existing configuration the actual I O environment may match th...

Page 75: ...based on the higher revision number Device selection based on revision compatibility The ESI description also defines the process image the communication type between master and slave device and the...

Page 76: ...nCAT offers a function Change to Compatible Type for the exchange of a device whilst retaining the links in the task Fig 80 Dialog Change to Compatible Type left TwinCAT 2 right TwinCAT 3 This functio...

Page 77: ...Master uses the ESI description to configure the slave correctly The process data can be modified in the system manager See the device documentation Examples of modifications include mask out a chann...

Page 78: ...figuration G In case of incorrect configuration the EtherCAT slave usu ally refuses to start and change to OP state The System Manager displays an invalid SM cfg log ger message This error message inv...

Page 79: ...d Number of the EtherCAT device Type EtherCAT device type Comment Here you can add a comment e g regarding the system Disabled Here you can deactivate the EtherCAT device Create symbols Access to this...

Page 80: ...he input field in order to modify the default value Previous Port Name and port of the EtherCAT device to which this device is connected If it is possible to connect this device with another one witho...

Page 81: ...n an entry Column Description Index PDO index Size Size of the PDO in bytes Name Name of the PDO If this PDO is assigned to a Sync Manager it appears as a variable of the slave with this parameter as...

Page 82: ...e of state it sets the error flag The current state is now displayed as ERR PREOP When the Clear Error button is pressed the error flag is cleared and the current state is displayed as PREOP again Cur...

Page 83: ...lling task for diagnosis that is accurate for the current cycle when in operation not during commissioning are discussed below Fig 87 Selection of the diagnostic information of an EtherCAT Slave In ge...

Page 84: ...ckhoff EL3102 2 channel analogue input terminal is used here as it offers both the communication diagnosis typical of a slave and the functional diagnosis that is specific to a channel Structures are...

Page 85: ...ibly have effects on the process data of other Slaves that are located in the same Syn cUnit In order for the higher level PLC task or cor responding control applications to be able to rely on correct...

Page 86: ...d locally in the slave depends on the device EL terminals except the EL66xx are able to save in this way The user must manage the changes to the StartUp list Commissioning aid in the TwinCAT System Ma...

Page 87: ...al operation After the operating power is switched on an EtherCAT Slave must go through the following statuses INIT PREOP SAFEOP OP to ensure sound operation The EtherCAT Master directs these statuses...

Page 88: ...set as standard EtherCAT Master OP Slaves OP This setting applies equally to all Slaves Fig 91 Default behaviour of the System Manager In addition the target state of any particular Slave can be set...

Page 89: ...slave Fig 93 PLC function blocks Note regarding E Bus current EL ES terminals are placed on the DIN rail at a coupler on the terminal strand A Bus Coupler can supply the EL terminals added to it with...

Page 90: ...above a warning message E Bus Power of Terminal is output in the logger window when such a configuration is activated Fig 95 Warning message for exceeding E Bus current NOTE Caution Malfunction possi...

Page 91: ...EL11xx 91 Version 4 5 5 3 Control and Status Byte Control byte The control byte of the digital input terminals currently has no function Status byte The status byte of the digital input terminals curr...

Page 92: ...es are accessible there as zip files Customers can access the data via the EtherCAT fieldbus and its communication mechanisms Acyclic mailbox communication or register access to the ESC is used for up...

Page 93: ...unique identifier consisting of slave name 9 characters digits and a revision number 4 digits Each slave configured in the System Manager shows its identifier in the EtherCAT tab Fig 96 Device identif...

Page 94: ...figuration is identical otherwise a change dialog appears for entering the actual data in the configuration Fig 99 Change dialog In this example in Fig Change dialog an EL3201 0000 0017 was found whil...

Page 95: ...cted in the following dialog see Fig Selecting the new ESI The checkbox Show Hidden Devices also displays older normally hidden versions of a slave Fig 101 Selecting the new ESI A progress bar in the...

Page 96: ...access the slave online Click on the E Bus Terminal whose controller firmware you want to check in the example terminal 2 EL3204 and select the tab CoE Online CAN over EtherCAT CoE Online and Offline...

Page 97: ...CoE directory is managed by the controller and stored in a dedicated EEPROM which is generally not changed during a firmware update Switch to the Online tab to update the controller firmware of a sla...

Page 98: ...update may be accomplished via an rbf file Controller firmware for processing I O signals FPGA firmware for EtherCAT communication only for terminals with FPGA The firmware version number included in...

Page 99: ...yed right click the table header and select Properties in the context menu Fig 105 Context menu Properties The Advanced Settings dialog appears where the columns to be displayed can be selected Under...

Page 100: ...the terminal must have FPGA firmware version 10 or higher Older firmware versions can only be updated by the manufacturer Updating an EtherCAT device The following sequence order have to be met if no...

Page 101: ...m Manager select the terminal for which the FPGA firmware is to be updated in the example Terminal 5 EL5001 and click the Advanced Settings button in the EtherCAT tab The Advanced Settings dialog appe...

Page 102: ...to the device A download of firmware to an EtherCAT device must not be interrupted in any case If you interrupt this process by switching off power supply or disconnecting the Ethernet link the Ether...

Page 103: ...hoff components there Beckhoff Headquarters Beckhoff Automation GmbH Co KG Huelshorstweg 20 33415 Verl Germany Phone 49 5246 963 0 Fax 49 5246 963 198 e mail info beckhoff com Beckhoff Support Support...

Page 104: ...1002 15 Fig 11 EL1004 16 Fig 12 EL1008 17 Fig 13 EL1012 19 Fig 14 EL1014 20 Fig 15 EL1018 21 Fig 16 EL1024 23 Fig 17 EL1034 24 Fig 18 EL1084 EL1094 26 Fig 19 EL1088 EL1098 27 Fig 20 EL1104 29 Fig 21 E...

Page 105: ...rget system left TwinCAT 2 right TwinCAT 3 69 Fig 62 Scan Devices left TwinCAT 2 right TwinCAT 3 69 Fig 63 Note for automatic device scan left TwinCAT 2 right TwinCAT 3 69 Fig 64 Detected Ethernet dev...

Page 106: ...Illegally exceeding the E Bus current 90 Fig 95 Warning message for exceeding E Bus current 90 Fig 96 Device identifier consisting of name EL3204 0000 and revision 0016 93 Fig 97 Scan the subordinate...

Reviews: