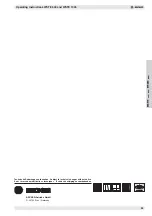
Operating Instructions WSTE 500 and WSTE 1000
21
E
N
G
L
I
S
H
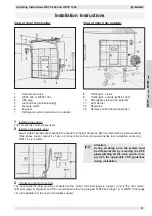
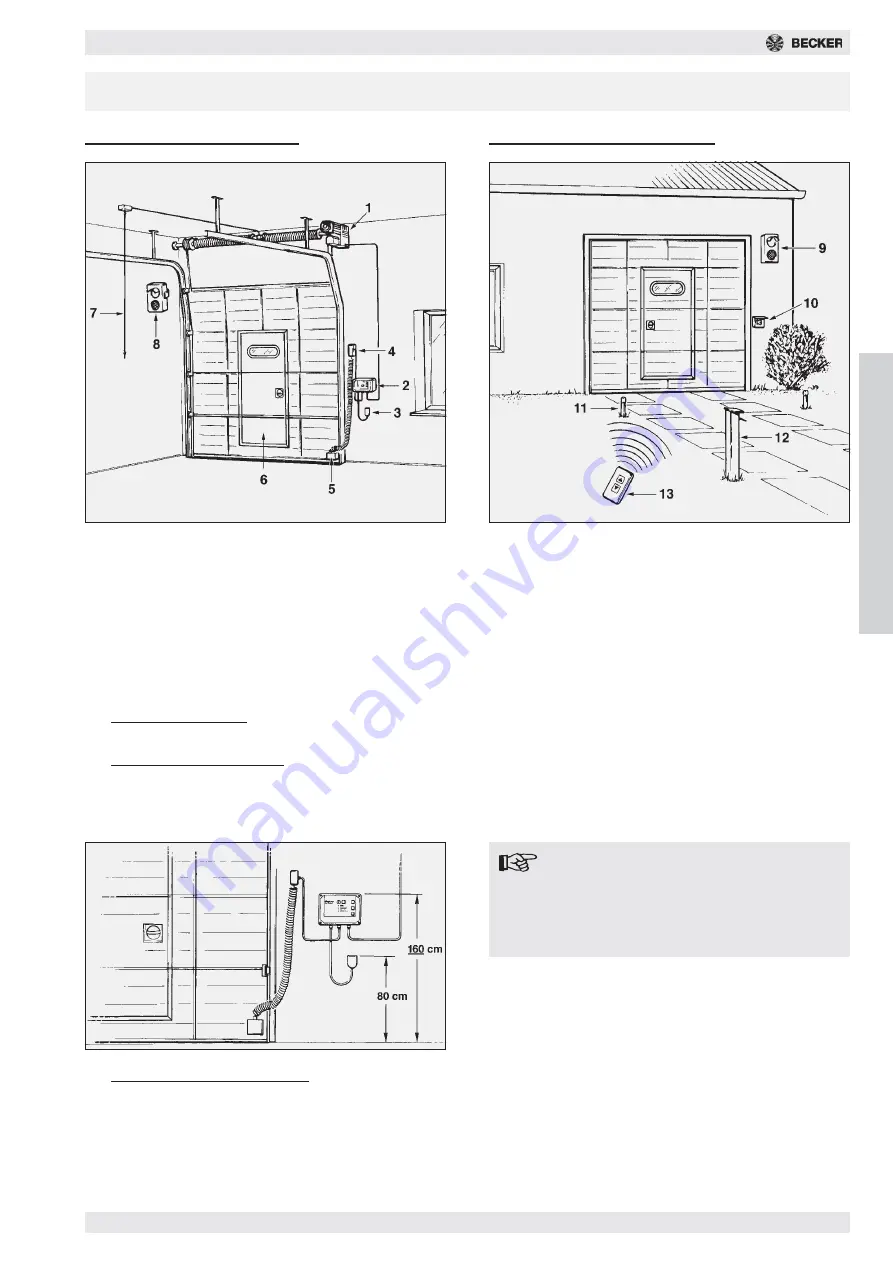
View of door from inside:
1
Installing the control
First, mount the control at eye level.
2
Installing the supply point
Mount a CEE 16A/6H socket beneath the control at a height of approx. 80cm (protect with a 3-pole automatic
three phase current cutout 3 x 16A), or connect the control via a permanently laid installation cable (e.g.
NYM-1 5 x 2.5 mm2).
Installation Instructions
1.
Direct-mount drive
2.
WSTE 500 or WSTE 1000
3.
CEE plug
4.
Junction box (multipoint plug)
5.
Pressure switch
6.
Slip door
7.
Ceiling pull switch (inside and / or outside)
View of door from outside:
8.
Traffic light - inside
9.
Traffic light - outside (WSTE 1000)
10.
Emergency stop switch, external
11.
Light barrier
12.
Keyswitch
13.
Remote control (hand transmitter)
Attention:
During all wiring work, the system must
be disconnected by removing the CEE
plug/switching off the main switch. Com-
ply with the applicable VDE guidelines
during installation.
3
Connecting the motor/control
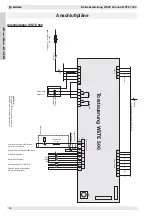
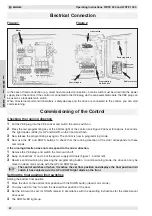
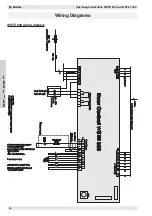
The drive cable (12-wire) must be connected to the “motor” terminals (page 6, Figure 1) and to the “limit switch”
terminals (page 6, Figure 2) and PE in accordance with wiring diagram WSTE 500 (page 14) or WSTE 1000 (page
15) (not applicable in the case of complete supply).


