


F/W Version 2.1
15
12.11.
Control Behavior
Here you can choose three different kinds of control behavior including stable, normal
and sport mode. The default setting is "Normal", this should be suitable for most pilots.
12.12.
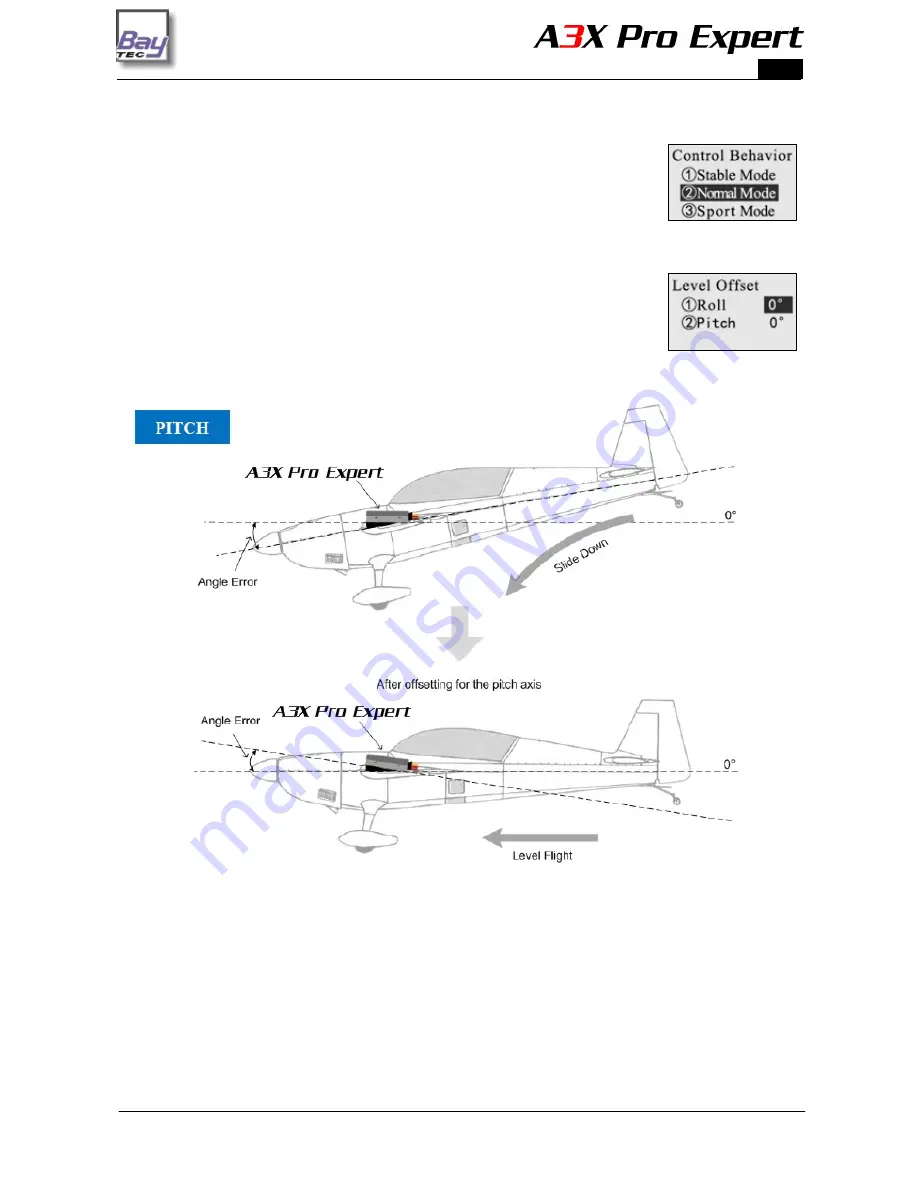
Level Offset
It is used to offset the absolute angle error caused by installation of the controller. When
operating in self-balance mode, such errors may result in the climbing up or sliding down
of the aircraft. In this condition, a angle compensation is needed to make the aircraft
maintain level flight. The value can be set within the range of
±
20
°
for both roll and
pitch axis. The following illustrations show you that what happens if a angle error exists during installation.
HTTP://WWW.BAY-TEC.DE
Sept. 12, 2013


