ENG
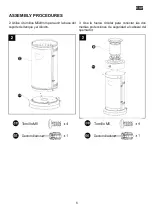
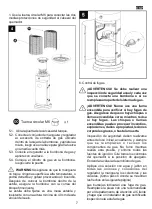
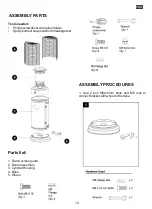
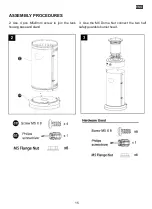
1. Use the M6 Dome Nut connect the two half
safety guards to burner head.
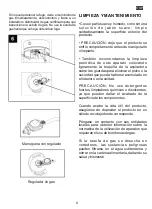
5-1. Open the door of tank housing.
5-2. Attach the hose and regulator assembly to the
gas inlet fitting located inside the tank housing, and
hand tighten, then use a wrench to turn the nut a
further half turn.
5-3. Attach the regulator to the gas cylinder and
tighten with wrench.
5-4. Put the gas cylinder into the tank housing, then
close the door.
WARNING!
Ensure the hose does not contact
any high temperature surfaces, or it may melt and
leak causing a fire. After the cylinder is placed
inside the heater, secure the cylinder with block belt
tightly.
The heater must be fixed on a stable and strong
table with a minimum height of 40cm from the floor
level.
6. Leak Check.
WARNING! A leak test must be performed
annually and each time a cylinder is
hooked up or if a part of the gas system is
replaced.
WARNING! Never use an open flame to
check for gas leaks. Be certain no sparks
or open flames are in the area while you
check for leaks. Sparks or open flames
will result in a fire or explosion, damage to
property, serious bodily injury, or death.
Leak testing: must be done before initial use,
annually,and whenever any gas Components
are replaced or serviced. Do not smoke while
performing this test, and remove all sources
of ignition. See Leak Testing Diagram for
areas to check. Turn all burner controls to the
off position. Turn gas supply valve on.
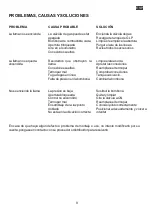
Brush a half-and-half solution of liquid soap
and water onto all joints and connections
of the regulator, hose, manifolds and valves.
(As step 6 where arrows show )
Bubbles will indicate a gas leak. Either tighten
the loose joint or have the part replaced with
one recommended by the Customer Care
department and have the patio heater
inspected by a certified gas installer.
16

