8
Operating your stove
Use Mr Heater Hose #F273072 - 12’ Propane
Hose Assembly
with Regulator (not included)
to connect stove to the bulk propane cylinder.
• Use only with propane bulk tanks. Not
recommended for use with the small
disposable 16.4 oz cylinders.
1. Assemble legs onto frame using included
hardware.
2. Adjust leg height so that all four legs touch the
ground adjusting accordingly to create a level
cooking surface.
3. Check that all fittings are tight.
4. Place a lighted match near the burner
openings and slowly open the gas valve.
• If burners fail to light recheck assembly
instructions and fittings.
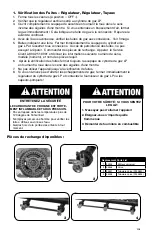
5. Once burners are lit, adjust the Oxygen screw
to achieve a flame that is blue at the base with
a slightly yellow tip.
6. Allow your burners to run for a few minutes to
“season” and burn off any grease or paint
used in the shipping process.
• Your burner orifices will turn white after the
first use. This is normal.
• Let the stove cool for 15 minutes or until
cold to the touch.
• Wash with warm soap and water and rinse.
Be sure to let dry thoroughly before storage.
To Clean your Stove
• Let the stove cool for 15 minutes
or until cold to the touch.
• Close valve on bulk propane cylinder.
• Remove flexible propane supply hose and
regulator assembly from stove.
• Never store with fuel supply attached
to the stove.
• You may leave the solid metal fuel
line attached to the burners during storage.
• A very light coat of W-D 40 sprayed on the
burner orifices just before storage may help
keep rust from forming on the open cast
surfaces.
• Store in a dry environment.
Storing Your Stove
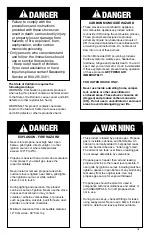
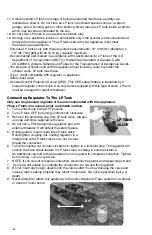
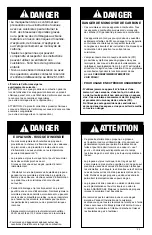
WARNING
FOR OUTDOOR USE ONLY!
• Supply plenty of fresh air when using the
camp stove.
• Do not obstruct the flow of combustion air or
ventilation air.
• Do not use as a space heater.
• Stoves produce heat. Keep stove away from
burnable materials.
• Do not place the stove any closer than
24” to combustibles.
• Use a flat, level support surface where the stove
is safe from accidental tipping.
• Use only with propane fuel.
• Apply soapy water to the connection to check
for leakage. (Leaking gas will form bubbles)
• After determining there is no leakage, draw a
flame towards the burner’s center and slowly
open valve (twist counter-clockwise).
• Each burner must be individually lit.
• Note that opening a burner valve and not lighting
the burner, while the other burner is firing, could
result in an explosion and/or fire.
WARRANTY
This appliance is covered against faulty
workmanship and materials for a period of
12 months from the date of original purchase.
#F235825
Fourneau simple de fer d’angle de brûleur
#F235830
Double fourneau de fer d’angle de brûleur
#F235835
Fourneau triple de fer d’angle de brûleur
Instructions d’utilisation


