69
Adding/Editing Clients
Each invoice has a client name at the top. This client name must be entered prior to generating an invoice.
Associated with each client, is a list of selcall ID’s that are reserved for this client. Once a selcall ID is allocated, it
can’t be allocated to any other client.
To add a new client, go to “Client Administrator” in the “Charging” menu. Press the “Add” button to invoke the client
editor.
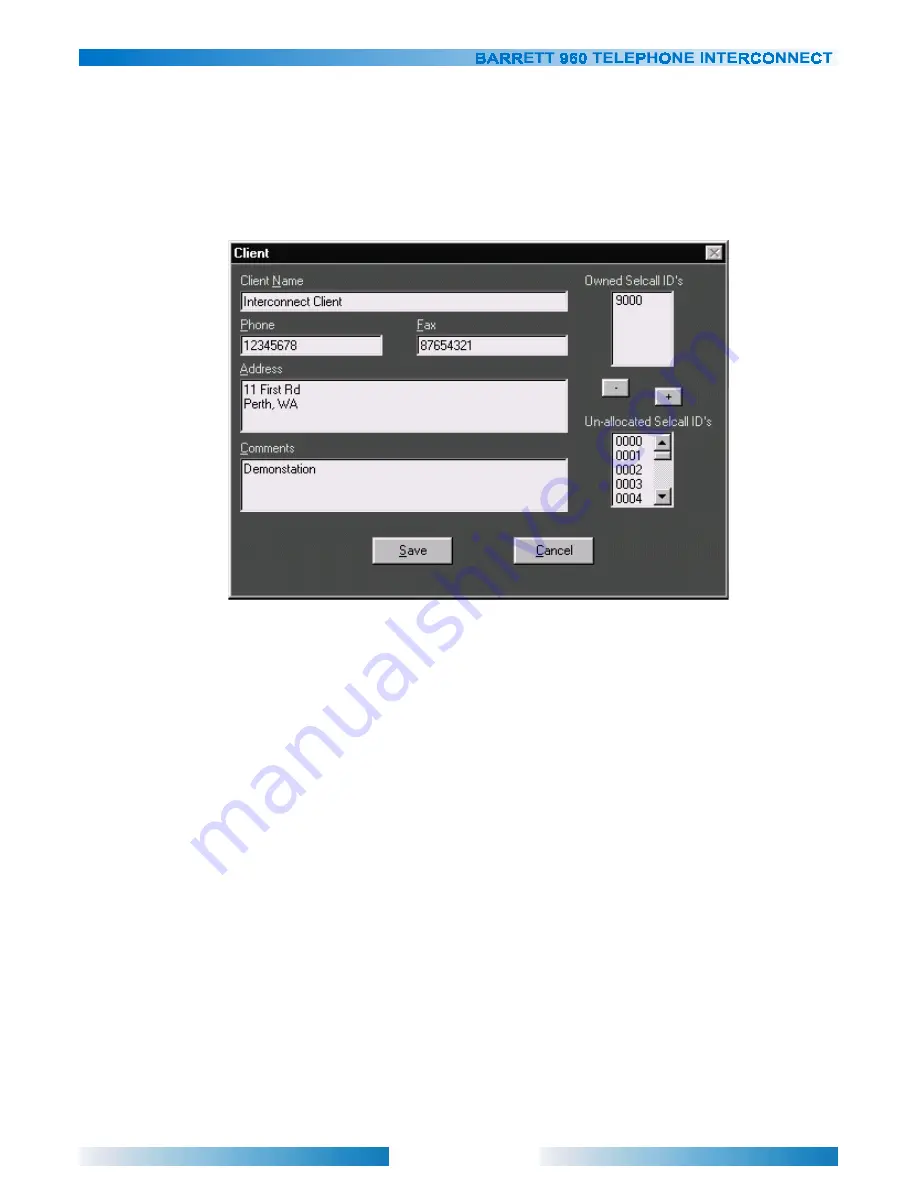
Enter a “Client Name”. This is the name of the company providing the interconnect service to it’s customers.
Optionally, enter a contact phone number, fax number, and address. These will be shown at the top of the generated
invoice. Any comments entered, will be displayed on the invoice as well.
To add selcall ID’s to this client, select the selcall ID from the “Unallocated Selcall ID’s” list, and press the “+” button.
To remote selcall ID’s, select the selcall ID from the “Owned Selcall ID’s” list, and press the “-” button.
Once finished press the OK button to save the client to the database, or press Cancel to abort.
To edit an existing client, select the client from the “Client’s Name” list in the Client Administrator. Press the “Edit”
button. The existing client options will be displayed. Modify and then press the “OK” button to save to the database.
To remove an existing client from the client database, press the “Remove” button in the Client Administrator. All
selcall ID’s allocated to that client will also be removed.


