


R5906150 /02
XDL
107
1
Image 10-1
3.
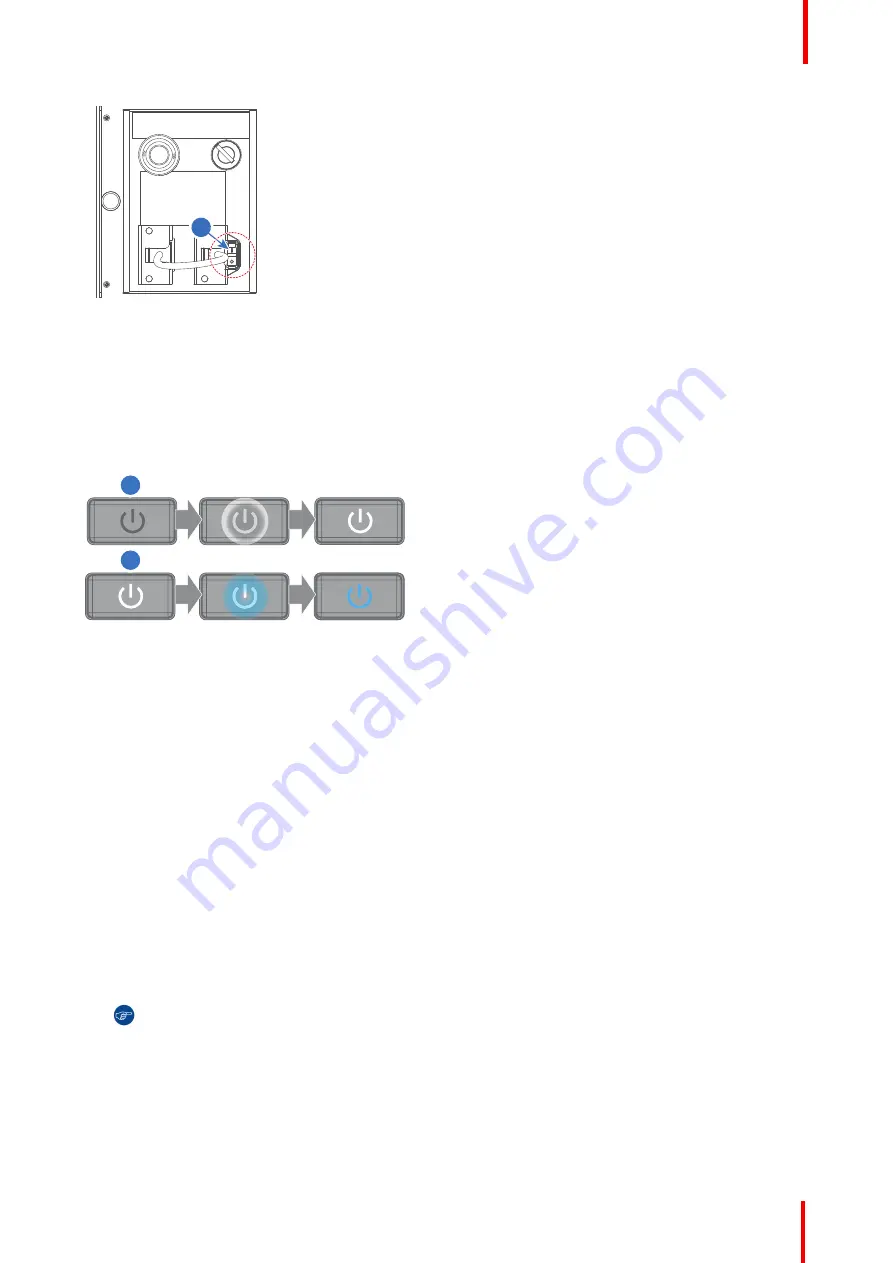
Press the
Power on/off
button on the projector, or the
Power On
button on the remote control. The projector
will continue to operational mode. The
Power on/off
button will blink BLUE until the projector is ready
(reference 2, Image 10-2). In this process the shutter will close and the
Shutter
button will be lit RED. The
start up screen is displayed on the LCD display and when fully started up, it changes to the overview screen.
Once the projector is ready & conditioned, the Power on/off button will be lit BLUE. Now the lasers are active
and light can come out of the projector. The shutter however remains closed. While the shutter is closed, the
lasers will be set to minimum power.
1
2
Image 10-2
4.
Press the
SHUTTER
button on the Local Keypad, remote control or use the Projector Toolset to open the
shutter.
Status overview
Once the projector is started, press the
Menu Activation
button to get an overview of parameters such as :
•
Device serial number and article number
•
Current firmware version and model name
•
Current illumination (in percentage)
•
Projector runtime in hours
•
Uptime in hours
•
Chosen source
•
Current resolution and refresh rate
•
Chosen communication method and IP address (if connected)
•
Active functions
Starting image projection
1.
Make sure the available sources are connected to the appropriate input ports.
Tip:
If properly connected, the
“
SYNC
”
LED will light up ORANGE.
2.
Press the
Input Selection
button on the keypad or on the remote control until:
•
the LED of the selected source (the
“
SEL
”
LED) light up GREEN, and
•
the image of the selected source is projected.
Summary of Contents for XDL Series
Page 1: ...ENABLING BRIGHT OUTCOMES Installation Manual XDL ...
Page 8: ...R5906150 02 XDL 8 ...
Page 22: ...R5906150 02 XDL 22 Safety ...
Page 30: ...R5906150 02 XDL 30 System overview ...
Page 50: ...R5906150 02 XDL 50 Pulse Remote Control Unit ...
Page 64: ...R5906150 02 XDL 64 Physical Installation ...
Page 72: ...R5906150 02 XDL 72 Lenses Lens selection ...
Page 80: ...R5906150 02 XDL 80 Scheimpflug ...
Page 94: ...R5906150 02 XDL 94 Input Communication ...
Page 104: ...R5906150 02 XDL 104 WiFi GSM Module ...
Page 116: ...R5906150 02 XDL 116 Getting Started ...
Page 134: ...R5906150 02 XDL 134 Specifications ...
Page 138: ...R5906150 02 XDL 138 Environmental information ...
Page 139: ...139 R5906150 02 XDL Overview video timings for video interfaces C ...
Page 148: ...R5906150 02 XDL 148 Overview video timings for video interfaces ...
Page 155: ...R5906150 02 XDL 155 ...
Page 156: ...Barco NV President Kennedypark 35 8500 Kortrijk Belgium www barco com R5906150 02 2018 11 07 ...


