


7. Advanced operations
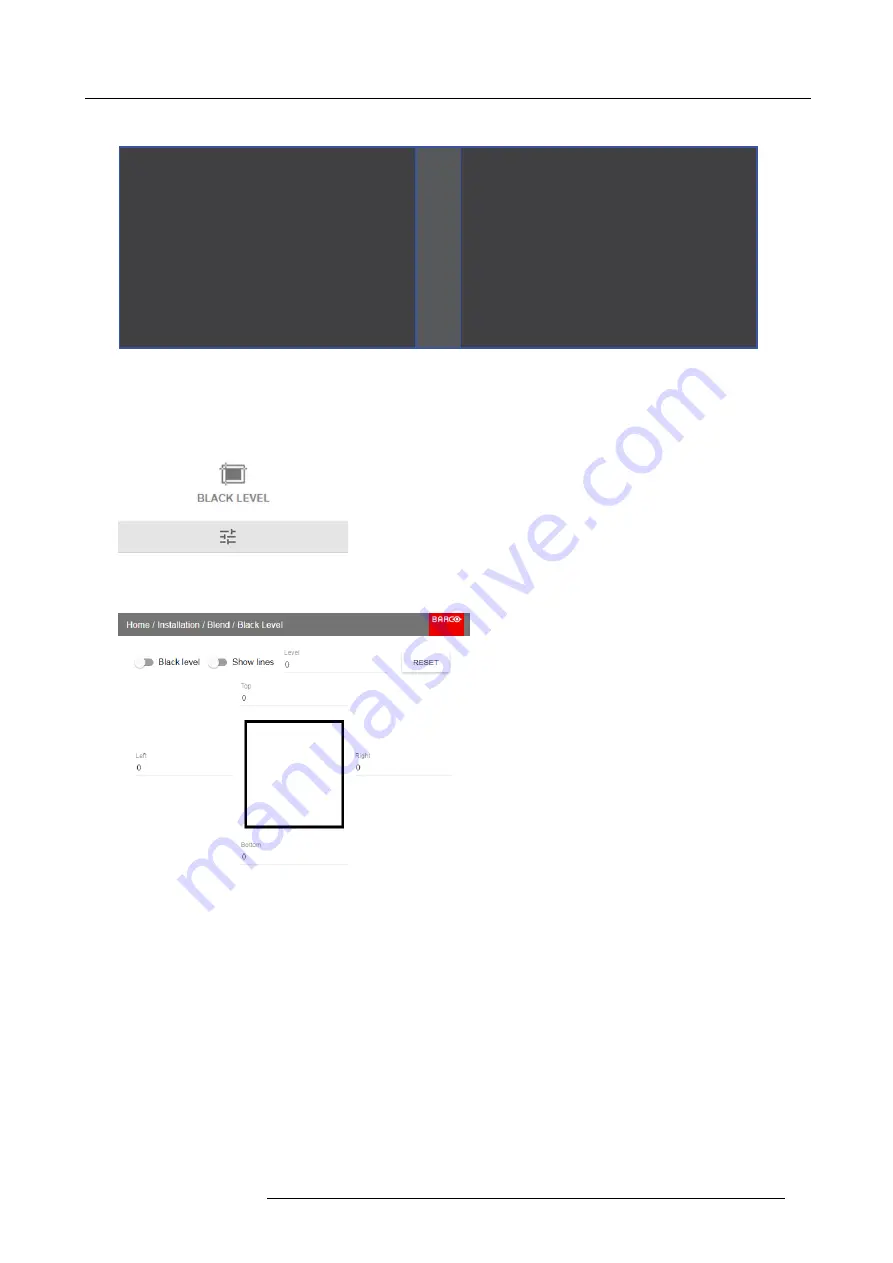
Picture Left
Picture Right
Blend Zone
Image 7-49
How to adjust the black level manually
1. In the main menu, select
Installation
→
Blend and Mask
→
Black Level
.
Image 7-50
Blend and Mask menu — Black Level
The Black Level menu is displayed.
Image 7-51
Black Level menu
2. Enable the
Black level
button. If you want a visual aid, enable the
Show lines
button as well.
3. Move the cursor to the side where the overlapped area occurs (left/right/top/bottom) and press enter.
4. Adjust the level with the arrow keys and press enter when the desired black level zone is reached.
Or,
enter the black level value with the numeric keys in the remote control.
5. Move the cursor to “Level”, press enter and adjust this level until the black level equals the level in the blend zone.
This value can also be entered by the numeric keys on the remote control.
6. Repeat the same procedure for any other projector connected to this projector, but on the opposite side.
Note:
Do not forget to disable the
Show lines
button after you achieved the desired blend zone.
7.8.3
Black Level Files
About custom Black Level Files
Next to setting your speci
fi
c Black Level Adjustment in the GUI, you can also upload or download a custom Black Level adjustment
fi
le in png, jpeg or tiff format to/from the projector.
R5906102 WODAN 10/04/2018
67


