


7. Advanced operations
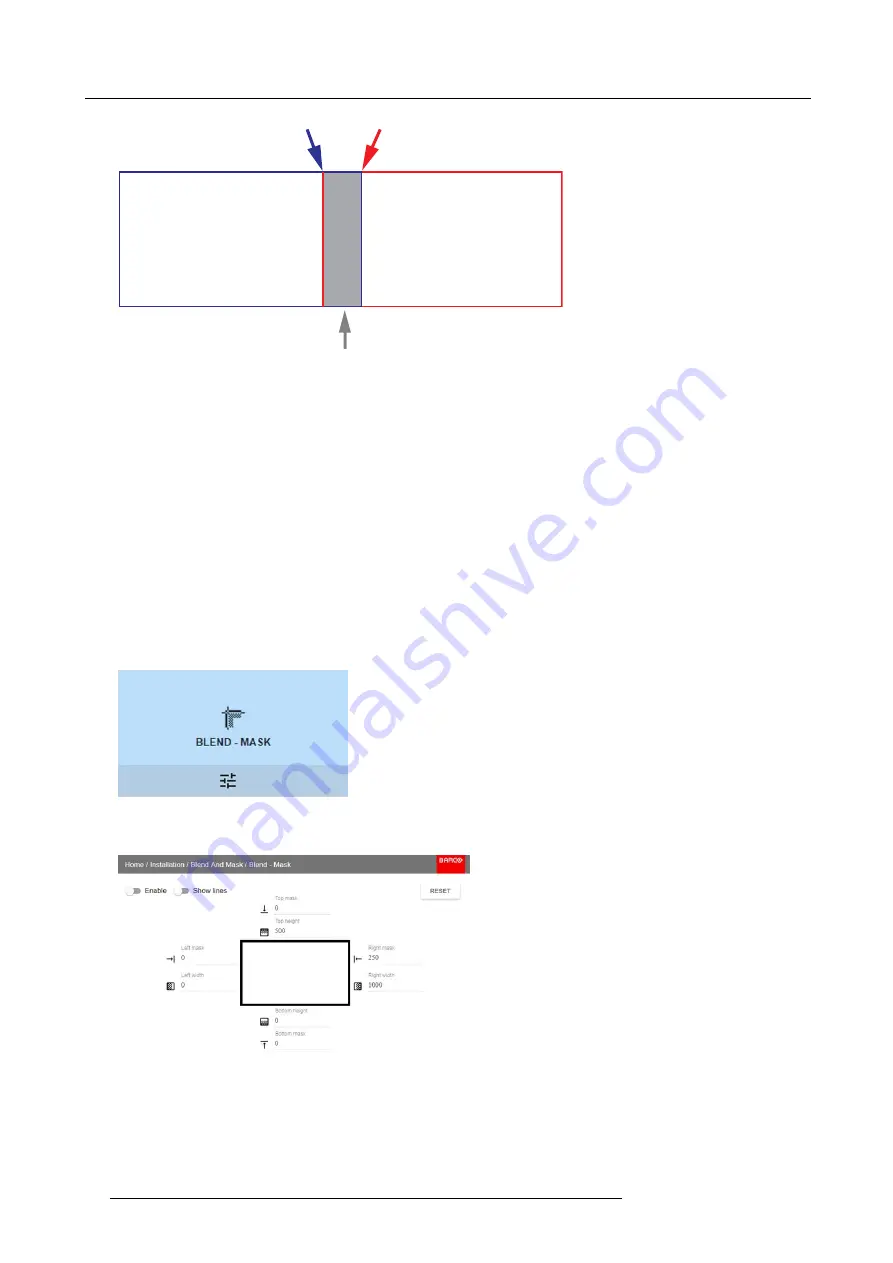
Picture frame
Projector 1
Picture frame
Projector 2
Width, Projector 2
Width, Projector 1
Overlap / Blend Zone
Image 7-43
From the start (mask) position, you can blend zone size per edge (left, top, right, bottom). For each edge there will be a drop-off
curve for the blend zone.
7.8.1
Blend & Mask
About masking and blending width or height
Offset is used to clip the image on one or multiple sides (masking). This is used to hide parts of the picture that should not be shown
on the screen. For example: if the source is a Windows PC, you can hide the menu bar using this method.
The larger the Mask value, the more the image is masked (by black bar) at the corresponding side. E.g. Top mask of 100 will blank
the top 100 lines.
Height or width is used to create a blending zone with a smooth brightness drop off. This is used to compensate for the double
brightness in overlap areas. The value is the size of the blended area in pixels.
How to adjust blend zones?
1. In the main menu, select
Installation
→
Blend and Mask
→
Blend – Mask
.
Image 7-44
Blend and Mask menu, Blend – Mask
The Blend – Mask menu is displayed.
Image 7-45
Blend & Mask menu
2. To enable blending, put the
Enable
switch to the right. The color of the switch becomes blue when enabled.
3. To project masking lines on the screen, put the
Show lines
switch to the right. The color of the switch becomes blue when
enabled.
64
R5906102 WODAN 10/04/2018


