


R5912128 /03 SP4K-B
112
10.1 Opening the sealed compartment
This procedure assumes that the side and top cover have been removed.
CAUTION:
This procedure may only be done by a qualified and trained service technician.
Required tools
Torx screwdriver T20
How to open the sealed compartment
1.
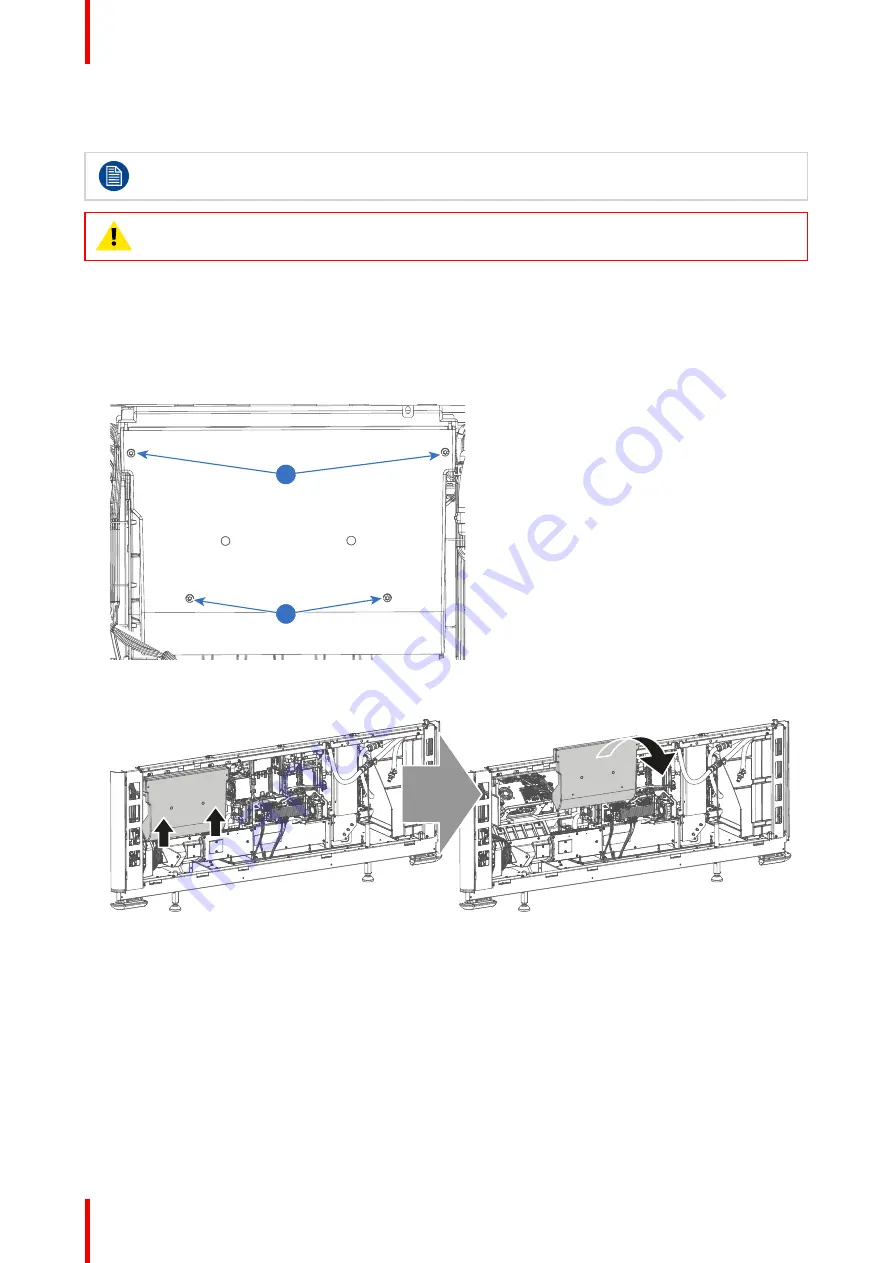
Remove the four screws holding the side cover (reference 1). Use a T20 Torx screwdriver.
1
1
Image 10–1 Sealed cover fixation
2.
Lift the cover up slightly using both lips. Then remove the cover by taking it away from the projector.
Image 10–2 Sealed compartment side cover, remove
3.
Slightly slide the top cover a bit outwards. Then lift it up and remove it.
Summary of Contents for SP4K-B
Page 1: ...ENABLING BRIGHT OUTCOMES Installation manual SP4K B...
Page 4: ......
Page 8: ...R5912128 03 SP4K B 8...
Page 22: ...R5912128 03 SP4K B 22 Safety...
Page 54: ...R5912128 03 SP4K B 54 Physical installation projector...
Page 68: ...R5912128 03 SP4K B 68 Lenses and Lens holder...
Page 76: ...R5912128 03 SP4K B 76 ICMP X...
Page 96: ...R5912128 03 SP4K B 96 ICMP X...
Page 104: ...R5912128 03 SP4K B 104 Projector Power Cycle...
Page 110: ...R5912128 03 SP4K B 110 Connectivity...
Page 113: ...113 R5912128 03 SP4K B Image 10 3 Sealed top cover remove Convergence...
Page 115: ...115 R5912128 03 SP4K B 1 1 Image 10 6 Sealed cover fixation Convergence...
Page 140: ...R5912128 03 SP4K B 140 1 Image 12 17 Tightening the screws of the side cover Projector Covers...
Page 144: ...R5912128 03 SP4K B 144 Projector Covers...
Page 152: ...R5912128 03 SP4K B 152 List of tools...
Page 156: ...R5912128 03 SP4K B 156 Index...
Page 157: ......


