12. Image Files Menu
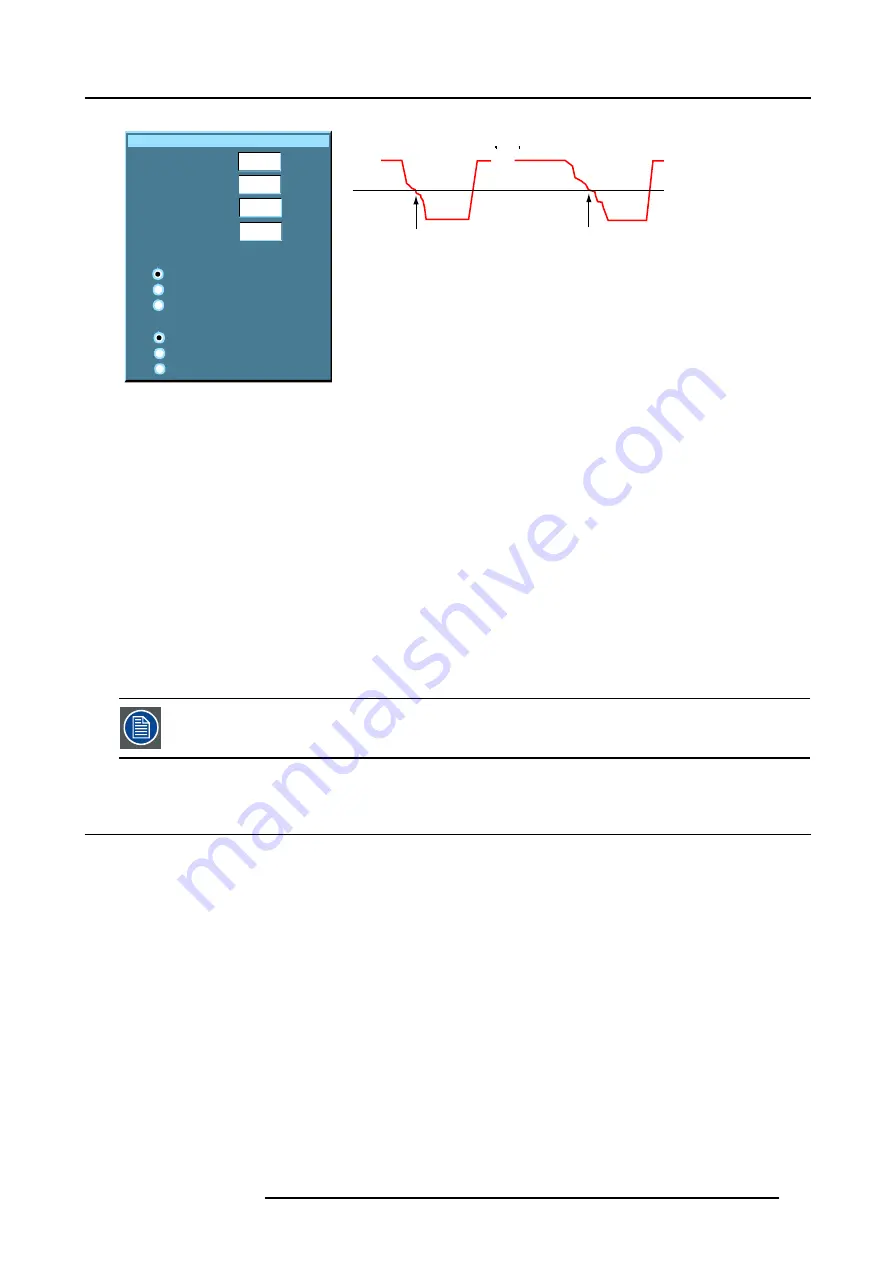
Advanced edit
VCO range
PLL Cpmp
Clamp position
Clamp width
0
0
16
16
Horizontal sync polarity
Determined by ADC
Active low
Active high
Input format
RGB
PR/Y/PB
HDTV-PR/Y/PB
Image 12-11
video info
a
Hs
Hs
b
Image 12-12
Hs horizontal sync pulse
a
active low
b
active high
The
VCO range
setting determines the frequency range of the VCO (Voltage Controlled Oscillator).
The
Cpmp
(Charge pump current) sets the low pass filter current.
Both VCO range & Cpmp are set by the image file, changing these settings is only indicated in for special purposes.
The
horizontal sync polarity
setting can be useful in case of a bad shaped edge, one can choose between the leading (active low)
or trailing (active high) edge.
The input format settings are used to "tell more" about the signals connected on the BNC’s, it completes the information in the source
selection menu.
- RGB is selected by default and means that an RGB signal is connected to the BNC’s
- PR/Y/PB must be selected whenever:
•
a progressive signal (32 kHz frequency video signal ) is connected to the BNC’s (select the source with
Data on BNC’s
in the
Source selection menu).
•
one wants (in PiP mode) to visualize the component video signal in a Data window hereby adding a video image in the PiP
layout.
-HDTV-PR/Y/PB for high definition component video signals.
It is recommended to use the default values.
12.7 Rename file
How to rename a file ?
1. Press
MENU
to activate the menu bar.
2. Press
→
to select the
Image files
item. (image 12-13)
3. Press
↓
to pull down the
Image files
menu.
4. Use
↑
or
↓
to select
Rename.
5. Press
ENTER
A dialog box is displayed. (image 12-14)
6. Use
↑
or
↓
to select the desired file.
7. Press
ENTER
A text box is displayed. (image 12-15)
8. Press
ENTER
to activate the input field.
Use
←
or
→
to select the characters. Use the
↓
or
↑
to change the value.
9. Press
ENTER
to confirm the changes.
R5976817 RLM H5 17/01/2005
113
Summary of Contents for R9010300
Page 1: ...RLM H5 Owners manual R9010300 R5976817 00 17 01 2005...
Page 4: ......
Page 8: ...Table of contents 4 R5976817 RLM H5 17 01 2005...
Page 14: ...1 Packaging and Dimensions 10 R5976817 RLM H5 17 01 2005...
Page 54: ...5 Getting used with the menu structure 50 R5976817 RLM H5 17 01 2005...
Page 60: ...6 Source selection 56 R5976817 RLM H5 17 01 2005...
Page 64: ...7 General Menu Image 7 7 60 R5976817 RLM H5 17 01 2005...
Page 91: ...8 Image Menu Image 8 46 R5976817 RLM H5 17 01 2005 87...
Page 92: ...8 Image Menu 88 R5976817 RLM H5 17 01 2005...
Page 102: ...9 Tools Menu 98 R5976817 RLM H5 17 01 2005...
Page 122: ...12 Image Files Menu 118 R5976817 RLM H5 17 01 2005...
Page 136: ...13 Display Setup 132 R5976817 RLM H5 17 01 2005...
Page 146: ...14 Installation menu 142 R5976817 RLM H5 17 01 2005...
Page 158: ...A Standard Image Files 154 R5976817 RLM H5 17 01 2005...


