RLM W14 17/04/2017
21
3. Projector parts and Functions
3D with a Barco RLM W14
1. You need:
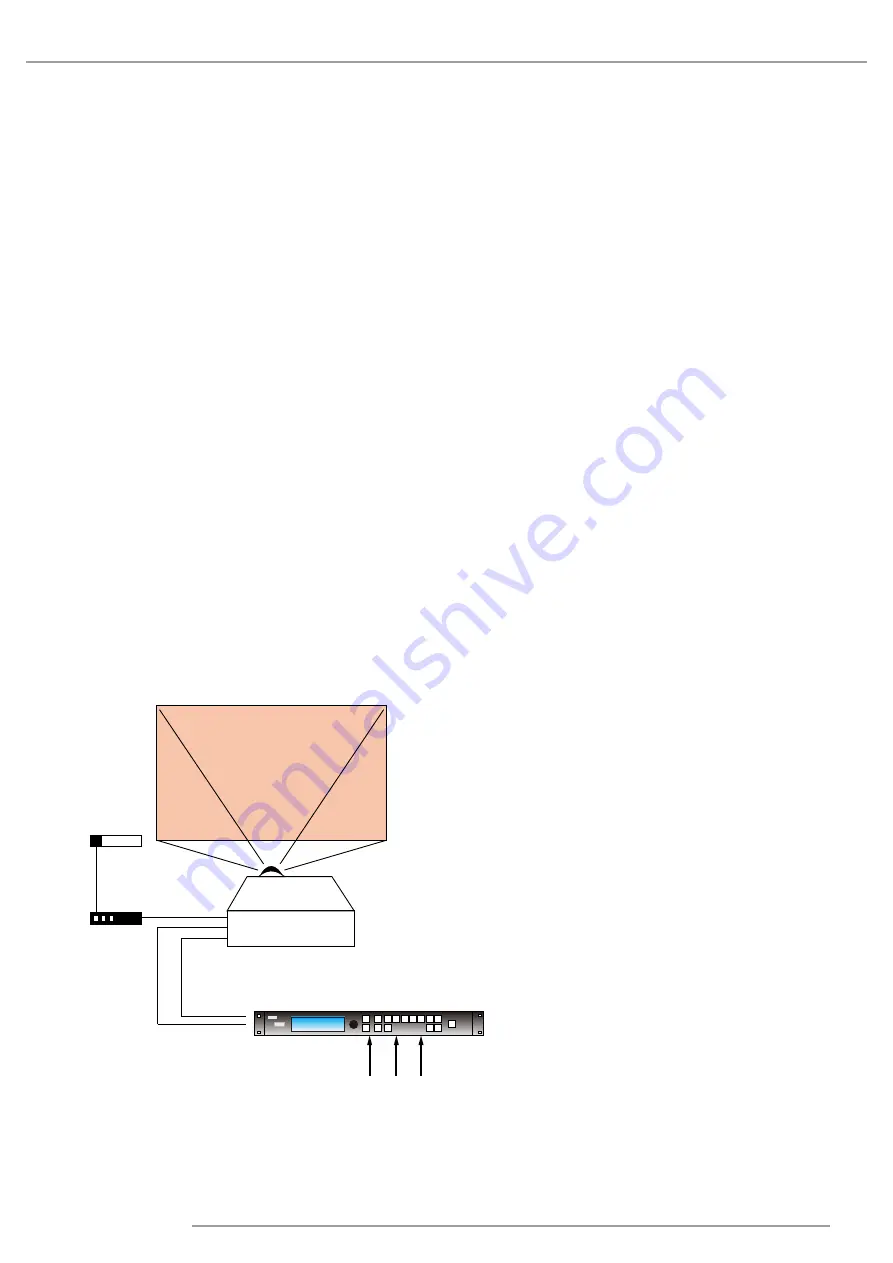
RLM W14 + ImagePRO II with option "dual output card. 3rd party IR Transmitter and 3D glasses.
2. Connection:
Connect the DVI out ImagePRO II to DVI connector (3D) of RLM W14.
This can only be done with a full dual link DVI cable, not with a HDMI-DVI cable or single link DVI cable.
There is no need to connect the projector's sync in.
Connect the sync out of the projector (BNC) to the 3th party IR emitter box.
3. Configure the Output
Switch the ImagePRO II in 3D (menu system/mode) mode. Resolution: 1920x1200@120Hz or 1920x1200@100Hz (do not
configure in another format), 3D mode sequential (default mode).
Test with test pattern 3D 16 x 16 grid. Close one eye and then the other to check the 3D mode and adjust left eye and
right eye if required.
4. Configure the input
Observe that the menu 3D appears in “input/processing” and only for digital sources.
In the menu “processing”, choose the correct type of 3D:
Off (default setting = no 3D),
“Side”, “Top/bottom”,
“sequential”,
“Left/right” (dual stream SDI 1 and 2 or twin DVI and HDMI)
or
“Frame packing” (specific for HDMI) is used only by Blueray players. Some Set-Top boxes can also use this format.
Do remember to adjust the HDCP for input and output of the ImagePRO II with a Blu - Ray or another source HDCP DVI output.
Dual HD-SDI
For an input in left and right stream with dual HDSDI select the input “nr 5” SDI and select in the input menu input/processing
set the 3D Left/right. At that moment input SDI 5 and SDI 6 both get active. Check at the bottom of the “L/R status” if ok in
the menu (if “N/A” or “invalid” there is no input with dual stream detected).
IR
Active system
for 3D glasses
Sync out
DVI IN
(only 3D)
3D Sync wire
DVI DUAL LINK
INPUTS
3D or 2D
IMAGE PRO 2
Summary of Contents for R9006332B1
Page 1: ...RLM W14 User manual...
Page 92: ......


