9. Image
7. Use the
▲
or
▼
key to select
Black balance green
and adjust the Green black level until bright spots appear on the screen.
8. Use the
▲
or
▼
key to select
Black balance blue
and adjust the Blue black level until bright spots appear on the screen.
9. Use the
▲
or
▼
key to select
Black balance red
and adjust the Red black level until bright spots appear on the screen.
The projected image should now be noisy full black
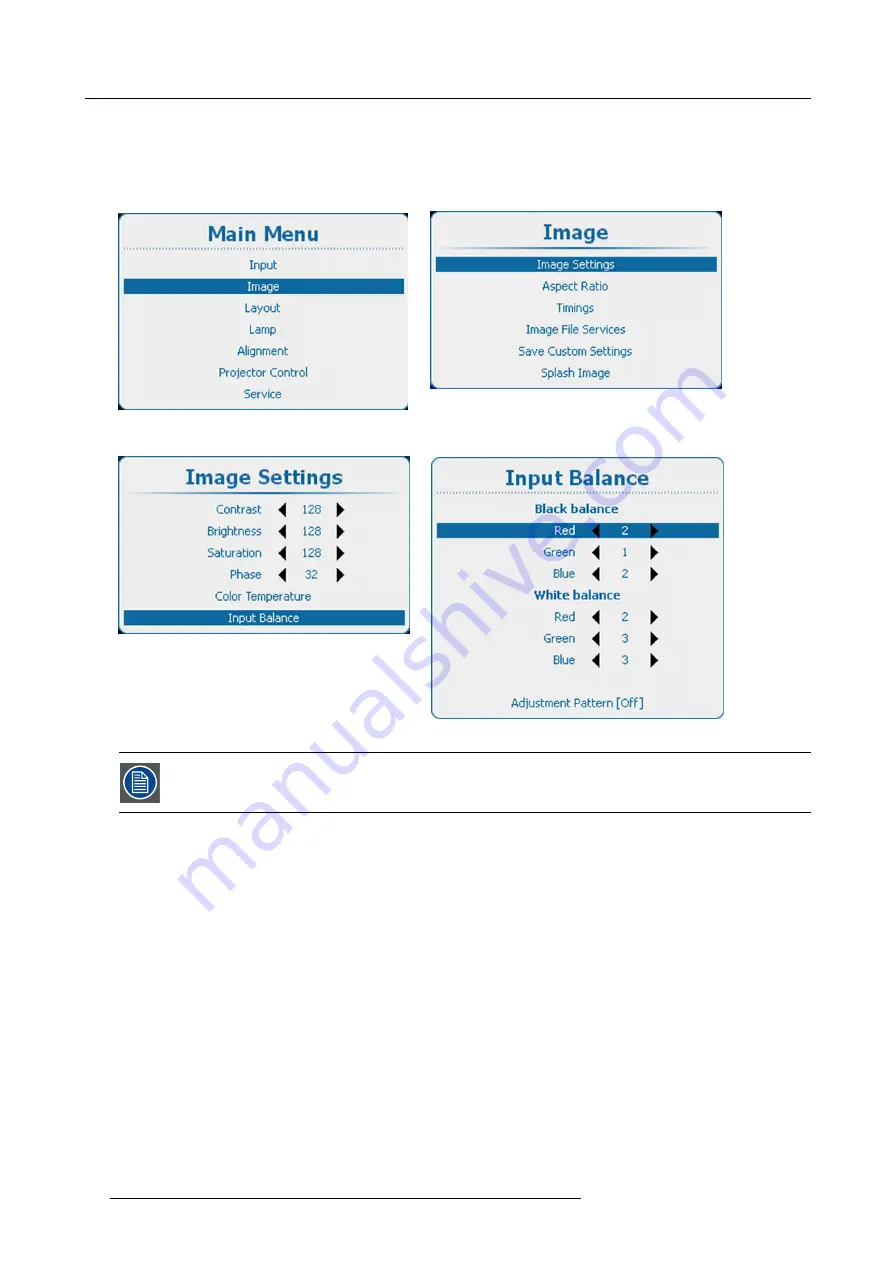
Image 9-33
Main menu, Image
Image 9-34
Image adjustments
Image 9-35
Image settings, input balance
Image 9-36
If one uses a gray scale pattern, the bright spots should appear in the black bar.
Performing White input balance
1. Connect the source you want to project.
2. Press
Menu
to activate the menus and select
Image
→
Image Settings
→
Input Balance
. (image 9-37, image 9-38, image 9-39,
3. Press
ENTER
to select.
4. Do you want to use an internally generated test pattern ?
If yes, use the
▲
or
▼
key to select
Adjustment Pattern
and press
ENTER
to toggle between [on] and [off]
If no, select a white pattern (or gray scale as alternative).
5. Use the
▲
or
▼
key to select
White balance red
.
6. Adjust the red white level (gain) on a minimal value
7. Use the
▲
or
▼
key to select
White balance blue
and adjust the blue white level (gain) on a minimal value.
Note:
This minimal value is not necessary , provided that the 2 other colors are not in
fl
uencing too much the color to be adjusted,
in fact the aim is to minimize the effect of the two other colors since there is a risk of reaching too soon the transition
(bright spots) due to the contribution of these two other colors signals.
8. Use the
▲
or
▼
key to select
White balance green
and adjust the Green white level (gain) until bright spots appear on the screen.
9. Use the
▲
or
▼
key to select
White balance blue
adjust the Blue white level (gain) until bright spots appear on the screen.
10.Use the
▲
or
▼
key to select
White balance red
adjust the Red white level (gain) until bright spots appear on the screen.
92
R5905158 HDF W SERIES 10/07/2012
Summary of Contents for HDF W series
Page 1: ...HDF W series Installation manual R5905158 01 10 07 2012 ...
Page 4: ......
Page 14: ...1 Safety 10 R5905158 HDF W SERIES 10 07 2012 ...
Page 42: ...3 Physical installation 38 R5905158 HDF W SERIES 10 07 2012 ...
Page 60: ...5 Getting started 56 R5905158 HDF W SERIES 10 07 2012 ...
Page 66: ...6 Quick set up adjustment 62 R5905158 HDF W SERIES 10 07 2012 ...
Page 86: ...8 Input 82 R5905158 HDF W SERIES 10 07 2012 ...
Page 126: ...10 Layout 122 R5905158 HDF W SERIES 10 07 2012 ...
Page 136: ...11 Lamp 132 R5905158 HDF W SERIES 10 07 2012 ...
Page 166: ...12 Alignment 162 R5905158 HDF W SERIES 10 07 2012 ...
Page 224: ...14 Service 220 R5905158 HDF W SERIES 10 07 2012 ...
Page 226: ...15 Maintenance 222 R5905158 HDF W SERIES 10 07 2012 ...
Page 243: ...17 Servicing 1 Image 17 14 Z axis alignment R5905158 HDF W SERIES 10 07 2012 239 ...
Page 244: ...17 Servicing 240 R5905158 HDF W SERIES 10 07 2012 ...
Page 254: ...C Standard source files 250 R5905158 HDF W SERIES 10 07 2012 ...
Page 258: ...D DMX chart 254 R5905158 HDF W SERIES 10 07 2012 ...
Page 264: ...E Stacking HDF W series projectors 260 R5905158 HDF W SERIES 10 07 2012 ...


