R5914654 /04
G62 series
76
5.1 Powering On the projector
How to power On the projector
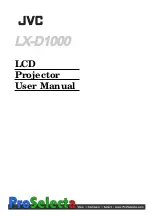
1.
Power on the AC switch (1) and wait until the power button on the control panel is solid red.
1
Image 5–1
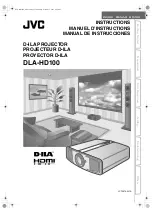
2.
Turn on the projector by pressing the POWER button (2) on the control panel or the ON key (3) on the
remote control.
INPUT
EXIT
MENU
LENS
FOCUS
ENTER
ON
OFF
2
1
3
5
4
6
2
3
Image 5–2
The status LED (4) will flash orange. The startup screen will display and the status LED will turn to solid
green.
4
Image 5–3
3.
Turn on your source. The projector detects the source you selected and displays the image.
Note:
If you connect multiple sources at the same time, press “Input” key on the control panel or on
the remote control to switch inputs.
WARNING:
Do not look directly into the lens when the projector is turned on. The strong light might
cause permanent eye damage.
Summary of Contents for G62
Page 1: ...ENABLING BRIGHT OUTCOMES Installation manual G62 series...
Page 4: ......
Page 12: ...R5914654 04 G62 series 12 Airflow Image 1 9 Introduction...
Page 37: ...37 R5914654 04 G62 series Image 3 6 LSM Type2 UST lens R9801785 1...
Page 44: ...R5914654 04 G62 series 44 LSM Type1 LSM Type2 Image 3 11 UST lens R9801785 1...
Page 78: ...R5914654 04 G62 series 78 Powering On Off the projector...
Page 88: ...R5914654 04 G62 series 88 Adjusting the projected image...
Page 89: ......