1
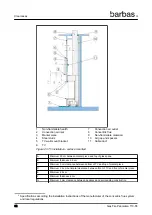
Non-flammable spacer
2
Non-flammable insulation plate
3
Flammable wall
Figure 11. Clearances to flammable wall - Top view
Table 4: dimensions and minimum clearances to a flammable wall
Description
Insulation plate 25
mm
Insulation plate 35
mm
A
Air gap
25 mm
25 mm
B
Thickness plate
25 mm
35 mm
C
Air gap / Spacer
25 mm
15 mm
D
A+B+C
75 mm
75 mm
E
B+C
50 mm
50 mm
F
Minimum 3 mm clearance between appliance and surrounding construction
4.3
Clearance to flammable floor (under the appliance)
Put a non-flammable insulation plate with a minimum thickness of 25 mm under the
appliance. To avoid damage to this non-flammable plate, put ceramic or steel tiles
(approx. 10 x 10 cm) under the feet of the appliance.
Put a non-flammable hearth (floor stone) if the underside of the appliance is less than 10
cm above a flammable floor.
4.4
Clearances to flammable ceiling
Put a non-flammable insulation plate (false ceiling) of minimum 2.5 cm thickness at a
height of minimum 50 cm above the appliance. Keep a free space of minimum 10 cm
between the insulation plate and the flammable ceiling.
Clearances
Gas Fire Panorama 110-55
23
Summary of Contents for Panorama 110-55 PF2
Page 1: ...Installation and maintenance manual Gas Fire Panorama 110 55 PF2 Serial number Production date...
Page 50: ...2 Remove the side panels and front panel Maintenance 50 Gas Fire Panorama 110 55...
Page 71: ...9 3 Gas Fire Panorama 110 55 PF2 with 4 cm frame Dimensions Gas Fire Panorama 110 55 71...
Page 73: ...9 5 Gas Fire Panorama 110 55 PF2 with 6 cm frame Dimensions Gas Fire Panorama 110 55 73...
Page 75: ...9 7 Gas Fire Panorama 110 55 PF2 with 10 cm frame Dimensions Gas Fire Panorama 110 55 75...
Page 78: ...9 10 Operating unit Dimensions 78 Gas Fire Panorama 110 55...
Page 81: ...11 EU Declaration of Conformity EU Declaration of Conformity Gas Fire Panorama 110 55 81...
Page 82: ...EU Declaration of Conformity 82 Gas Fire Panorama 110 55...
Page 83: ...EU Declaration of Conformity Gas Fire Panorama 110 55 83...


