background image

Set

ting

 up

You can fasten the cables to either sides or in the 

middle, depending on stand or wall bracket 

placement. For safety reasons, secure the cables 

with the enclosed cable ties.

When you have made all the connections, mount 
the connection cover.
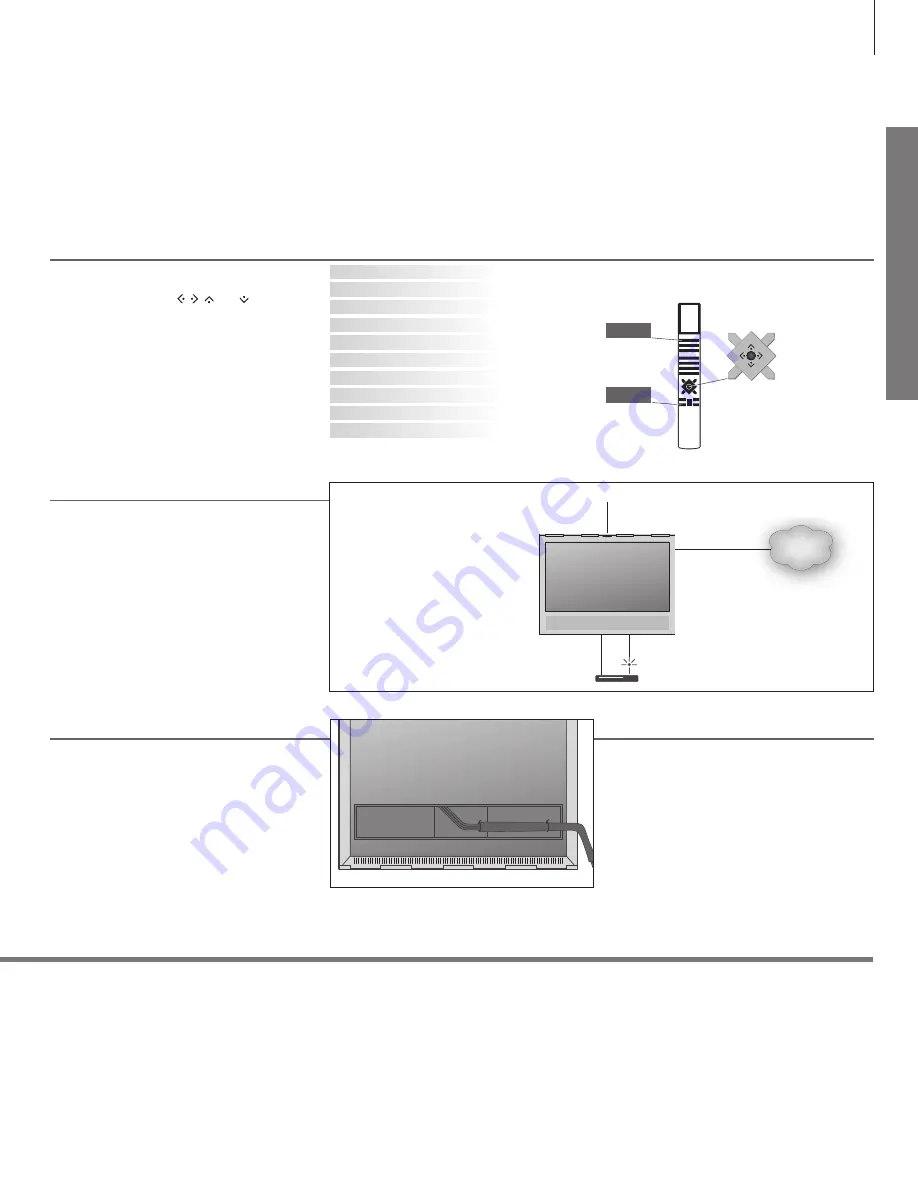
6. Run cables

If you have a wall bracket, make sure that there is 

enough slack in the cables to allow the TV to turn 
before you fasten the cables with cable ties to 
make a neat bundle.

Follow on-screen instructions. When available, press the 

blue

 button 

for help texts. 

MENU LANGUAGE 
SOFTWARE UPDATE (USB)
COUNTRY
LANGUAGE
NETWORK SETTINGS
SOFTWARE UPDATE (INTERNET)
SPEAKER SETTINGS

ACCESS CONTROL

INPUTS (TV TUNING)
NICE TO KNOW

4. First-time setup

You will be guided through a number of menus 

where you must make different settings. Use the 

Beo4 navigation button 

,


,


and


, and press 

in the middle to select settings. In some 

submenus, press 

BACK

 to return to first-time 

setup.

You can change the settings again later if you 

wish. If you receive your TV signal via a set-top 
box, select NONE in INPUTS. Set up your set-top 

box as illustrated below. 

The illustration here is only one example of many 

possible setups. 
When you connect external equipment, for 

example a set-top box, to the HDMI IN socket on 
the television (see next pages), you are prompted 
to configure the source. Follow on-screen 

instructions. 

For information on other setup options, PUC 
tables and IR-transmitters, see the online guide 

available on 

www.beoplay.com/v1/support

.

5. Connect external equipment

For information on your Beo4 remote control, see page 12 or your Beo4 guide.

The indicator light flashes green shortly and the TV is ready to be used. To reduce start up time, see the online guide 

regarding power settings. 

The TV is in standby but leave it connected to the mains supply due to software downloads.
The TV has been disconnected from the mains supply and you must enter the pin code. See the online guide for more 

information on the pin code system, available on 

www.beoplay.com/v1/support

.

Do not disconnect the TV from the mains supply. Could be due to new software being activated or too many failed pin 

code attempts. 

The TV is in standby and you can disconnect it from the mains supply if you want. However, this activates the pin code 

system.

Indicator light – Green

Solid red

Slowly flashing red

Quickly flashing red

Off 

TV

BACK

7

INTERNET

PUC

HDMI

ETHERNET

It is possible to control non-Bang & 
Olufsen equipment using the Beo4 

remote control with a Peripheral 

Unit Controller (PUC) table. For PUC 
to work, an IR-transmitter must be 
placed close to the IR-receiver on 
the connected equipment. Check 
the IR-signal before attaching the 
IR-transmitter. 

Indicator light

Summary of Contents for BeoPlay V1-32

Page 1: ...BEOPLAY V1 BeoPlay V1 32 BeoPlay V1 40...

Page 2: ......

Page 3: ...uide or in the help texts in the television menus The guides are found on www beoplay com v1 support The guides and the on screen help texts are also kept up to date if new software introduces new or...

Page 4: ...or direct artificial light such as a spotlight as this may reduce the sensitivity of the remote control receiver Also if the screen is overheated black spots may appear in the picture These spots disa...

Page 5: ...evision 8 Connection panel BeoPlay V1 32 10 Connection panel BeoPlay V1 40 Daily use 12 How to use your remote control 13 How to navigate in menus 15 Watch television 16 Media browser 17 Change pictur...

Page 6: ...ions are found on www beoplay com v1 support To remove the speaker cover gently push it out using one of the four pins removed from the television If the television is mounted on the table stand or wa...

Page 7: ...the television see next pages you are prompted to configure the source Follow on screen instructions For information on other setup options PUC tables and IR transmitters see the online guide availab...

Page 8: ...deo or music files from for example a NAS device SATELLITE 14 18V 0 4A Aerial input socket for a digital satellite signal Depending on your tuner options you may have either one or no satellite socket...

Page 9: ...tors Ethernet connection 2 Online guide Depending on the type of equipment you connect to the television different cables and maybe also adaptors are needed Cables and adaptors are available from your...

Page 10: ...TV network or for an analogue signal 2 x COMMON INTERFACE CA Module For insertion of a CA module and smart card for access to coded digital channels For more information about compatible smart card a...

Page 11: ...eo equipment Special adaptor needed Cables and adaptors Ethernet connection 2 Online guide Depending on the type of equipment you connect to the television different cables and maybe also adaptors are...

Page 12: ...press to exit menus completely Switch on teletext Display extra buttons for functions or sources in the Beo4 display Use or to step in the list Some buttons can be reconfigured during the setup proces...

Page 13: ...e setting Enter data Bring up sub menu store setting Select option Move backwards through menus or Press and hold to exit menus Some menus take up more space than available on the television screen Th...

Page 14: ...n menu Select option You can select a source just by pressing the dedicated button on the remote control or you can select a source via the menu Select source Select source Bring up main menu Select S...

Page 15: ...mute sound Bring up and use the menu overlay You can bring up the main menu including functions for the active source Press Activate the desired function 1 or Select a channel Select Select channel o...

Page 16: ...MEDIA in your Beo4 display 1 Select storage device with music Select storage device with photos Step between previous and next photo Browse files and folders and press to start slideshow Browse in fi...

Page 17: ...atio the picture will be stretched horizontally SOURCE FORMAT select 3 AUTO WIDE select 2 AUTO select 1 Select between picture formats 1 3 if you remember the number of the format you want Select pict...

Page 18: ...st remove the sides on the stand or wall bracket to remove the speaker cover See guide enclosed with the stand or wall bracket Wipe dust off the screen using a dry soft cloth To remove stains or dirt...

Page 19: ...ttons Press the centre button to add and place the button on its preset position in the list or press 1 9 to insert the button at a specific position in the list ADDED appears indicating that the butt...

Page 20: ...mal household wastage all electrical and electronic equipment parts and batteries must be collected and disposed of separately When disposing of electrical and electronic equipment and batteries by us...

Page 21: ...21...

Page 22: ......

Page 23: ......

Page 24: ......

Reviews: