background image

EDOC-1_NMLM1000 eu-doc-md-multi-lingual_20210720v6 updated

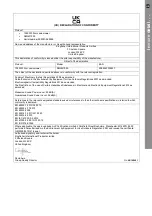
Measured Sound Power Level                                                                  Guaranteed Sound Power Level 

Le niveau de puissance acoustique mesuré                                           Le niveau de puissance acoustique garant

Zmierzony poziom mocy akustycznej                                                     Gwarantowany poziom mocy akustycznej 

Nivel de putere acustic

ă 

m

ă

surat                                                             Nivel de putere acusti

că 

garantat

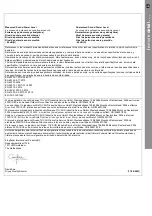
Nivel de potencia sonora medido                                                             Nivel de potencia sonora garantizado

Nível de potência sonora medido                                                             Nível de potência sonora garantido

: 92 dB(A)                                                                                         

: 96 dB(A)

References to the relevant harmonised standards used or references to the other technical specifications in relation to which conformity is 

declared:

Références des normes harmonisées pertinentes appliquées, y compris la date de celles-ci, ou des autres specifications techniques, y 

compris la date de celles-ci, par rapport auxquelles la conformité est déclarée:

Odwo

ł

ania do odno

ś

nych norm zharmonizowanych, które zastosowano, wraz z

 datą

 normy, lub do innych specyfikacji technicznych, wraz z 

datą 

specyfikacji, w odniesieniu do których deklarowana jest zgodno

ść

:

Trimiteri la standardele armonizate relevante folosite, inclusiv data standardului, sau trimiteri la celelalte specifica

ț

ii tehnice, inclusiv data 

specifica

ț

iilor, în l

egătu

r

ă 

cu care se declar

ă 

conformitatea:

Referencias a las normas armonizadas pertinentes utilizadas, incluidas las fechas de las normas, o referencias a las otras especificaciones 

técnicas, incluidas las fechas de las especificaciones, respecto a las cuales se declara la conformidad:

Referências às normas harmonizadas aplicáveis utilizadas, incluindo a data da norma, ou às outras especificações técnicas, incluindo a data 

da especificação, em relação às quais é declarada a conformidade:

EN 60335-1:2012/A2:2019

EN 60335-2-77:2010

EN 62233:2008

EN 55014-1:2017/A11:2020

EN 55014-2:2015

EN IEC 61000-3-2:2019

EN 61000-3-3:2013/A1:2019

EN ISO 3744:1995

Where applicable, the notified body TUV SUD Industrie Service GmbH ,Westendstrasse 199,80686 Munchen.Deutschland, 0036 performed 

2000/14/EC as amended Outdoor Noise Directive and issued the certificate: OR/006931/038

Le cas échéant, l’organisme notifiéTUV SUD Industrie Service GmbH ,Westendstrasse 199,80686 Munchen.Deutschland, 0036 a effectué

Directive 2000/14/CE 

relative aux émissions sonores extérieures et a établi le certificate:: OR/006931/038

W stosownych przypadkach jednostka notyfikowana TUV SUD Industrie Service GmbH ,Westendstrasse 199,80686 Munchen.Deutschland, 

0036 przeprowadzi

ł

2000/14/WE w zmienionej dyrektywie w sprawie ha

ł

asu na zewn

ąt

rz 

i wyda

ł

a certyfikat:: OR/006931/038

După 

caz, organismul notificat TUV SUD Industrie Service GmbH ,Westendstrasse 199,80686 Munchen.Deutschland, 0036 a efectuat 

2000/14/CE, astfel a fost modifica

tă D

irectiva privind zgomotul în aer liber

ș

i a emis certificatul:  OR/006931/038

Si procede, el organismo notificado TUV SUD Industrie Service GmbH ,Westendstrasse 199,80686 Munchen.Deutschland, 0036 ha

efectuado 2000/14/CE modificada Directiva sobre ruido al aire libre y expide el certificado: OR/006931/038

Se for esse o caso, o organismo notificado: TUV SUD Industrie Service GmbH ,Westendstrasse 199,80686 Munchen.Deutschland, 0036

efetuou 2000/14/CE como diretiva de ruído exterior alterada e emitiu o certificado: OR/006931/038
Authorised signatory and technical file holder/signataire et responsable de la documentation technique authorisé/ podmiot uprawniony do 

wystawienia i adres prezechowywania dokumentacji technicznej/semnatar autorizat 

ș

i

 deț

i

năto

r al dosarului tehnic/firmante autorizado y 

titular del expediente tecnico/ signatário autorizado e detentor da ficha técnica

Kingfisher International Products B.V.,

Rapenburgerstraat 175E,

1011 VM Amsterdam,

The Netherlands

David Awe

Group Quality Director                                                     


                                              : [

17/09/2021

]


In

 more

 detail . . .

In

 more

 detail . . .

Summary of Contents for NMLM1000

Page 1: ...Lawnmower 1000W 32cm Original Instructions_NMLM1000_GB_BX220IM_V1_20210927 NMLM1000 EAN 5059340239637 WARNING Read the instructions before using the product BX220IM...

Page 2: ...se and retain them for future reference Getting Started 02 Safety information 03 Your product 10 Before you start 12 In more detail 17 Product functions 18 Operation 22 Care and maintenance 24 Trouble...

Page 3: ...of the product 2 Never allow children or people unfamiliar with these instructions to use the product Local regulations can restrict the age of the operator 3 Never operate the product while people es...

Page 4: ...oduct in wet grass 3 Always be sure of your footing on slopes 4 Walk never run 5 Mow across the face of slopes never up and down 6 Exercise extreme caution when changing direction on slopes 7 Do not m...

Page 5: ...the product after striking a foreign object Inspect the product for damage and make repairs before restarting and operating the product 17 If the product starts to vibrate abnormally check immediatel...

Page 6: ...reduce the impact of noise and vibration emission limit the time of operation use low vibration and low noise operating modes as well as wear personal protective equipment Take the following points i...

Page 7: ...s of injury and damage remain The following dangers can arise in connection with the structure and design of this product 1 Health defects resulting from vibration emission if the product is being use...

Page 8: ...Protection against solid foreign bodies as well as against splashed water from all directions L Litre Lock to tighten or secure Unlock to loosen Caution Warning Read the instruction manual Wear heari...

Page 9: ...e after the product is switched off Wait until all components have completely stopped before touching the product Pay special attention when working on the cutting device 96 Guaranteed sound power lev...

Page 10: ...10 NMLM1000 Safety information Getting Started Your product 1 2 3 4 5 9 8a 6 11 10a 13 12 14 15 16 8 17a 17b 17 18 7 Your product 10...

Page 11: ...o the respective section in the instruction manual Unpack 1 Unpack all parts and lay them on a flat stable surface 2 Remove all packing materials and shipping devices if applicable 3 Make sure the del...

Page 12: ...nts Keep them secure to avoid loss Wheel assembly WARNING Always check the mounting plates 8b before assembling the wheels Never attach the wheel on a damaged or loose mounting plate The wheels must b...

Page 13: ...13 NMLM1000 Getting Started Before you start Fig 1 5 Place the lawnmower on its side when tightening each wheel Important Ensure all four wheels are securely tightened before each use 8a 8 8b...

Page 14: ...ted Before you start Lower handle bar 1 Insert the lower handle bars 4 into the slots on both sides of the lawnmower housing Fig 2 2 Use the 2 screws 4a provided to lock each handle into position in t...

Page 15: ...r handle bars Fig 3 2 Secure the upper handle bar 2 with the mounting sets 3 to the lower handle bars 4 and tighten the knobs 3a clockwise Fig 3 Fig 3 3 Fix the power cord 13 with the cord clips 12 to...

Page 16: ...will help to keep the two halves of the box aligned 3 Fit the handle 10a into the top of the grass box 4 Before you fit the grass box onto the mower you mast ensure that the motor is switched off and...

Page 17: ...e detail Before you start Product functions 18 Operation 22 Care and maintenance 24 Trouble shooting 29 Recycling and disposal 30 Guarantee 31 Technical specifications 32 EC declaration of conformity...

Page 18: ...e only not for any commercial trade use It must not be used for any purposes other than those described Cutting height adjustment Adjust the cutting height according to the needs of your lawn The cutt...

Page 19: ...ith bolt 8a and remove them together the wheel 8 3 Align the axle hole of the wheel 8 with the required height adjustment hole in the mounting plate 8b and tighten the knob 8a Fig 7 4 Repeat the heigh...

Page 20: ...1 Disconnect the plug from the extension cord and loosen the knobs 3b anti clockwise to fold the handle assembly for storage Figs 8 9 2 Ensure the power cord 13 is not squeezed and then tighten the k...

Page 21: ...e grass clippings from the discharge chute 18 into the grass catcher 10 Use a proper tool such as a brush WARNING Ensure that the lever engages between two of the prongs Switch the engine off and wait...

Page 22: ...the working area Always let the product come to complete stop before averting 5 Do not overwork yourself Take regular breaks to ensure you can concentrate on the work and have full control over the pr...

Page 23: ...of the sides This will keep the rows even and ensures that all the lawn is cut without missing any spots Fig 11 Fig 11 6 Circle around beds When reaching a bed in the middle of the lawn cut a row or...

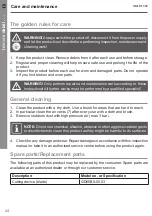
Page 24: ...ed specialist General cleaning 1 Clean the product with a dry cloth Use a brush for areas that are hard to reach 2 In particular clean the air vents 7 after every use with a cloth and brush 3 Remove s...

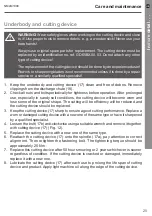
Page 25: ...ting device will become worn and lose some of the original shape The cutting will be efficiency will be reduced and the cutting device should be replaced 3 Keep the cutting device 17 sharp to ensure a...

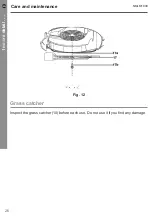
Page 26: ...26 NMLM1000 In more detail Fig 12 Grass catcher Inspect the grass catcher 10 before each use Do not use it if you find any damage Care and maintenance...

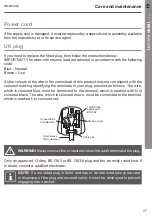
Page 27: ...in your plug proceed as follows The wire which is coloured blue must be connected to the terminal which is marked with N or coloured black The wire which is coloured brown must be connected to the ter...

Page 28: ...vering the product with a suitable cloth or enclosure to protect it against dust 5 Fold the upper handle bar 2 and fix it in storage position as described above Transportation 1 Switch the product off...

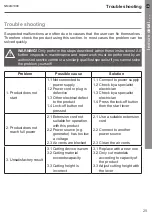
Page 29: ...defective 1 3 Other electrical defect to the product 1 4 Lock off button not pressed 1 1 Connect to power supply 1 2 Check by a specialist electrician 1 3 Check by a specialist electrician 1 4 Press...

Page 30: ...contribution to saving resources and protecting the environment by handing in this appliance at an equipped collection centre if there is one available The product comes in a package that protects it...

Page 31: ...piry of the original period guarantee period This guarantee covers product failures and malfunctions provided the product was used for the purpose for which it is intended and subject to installation...

Page 32: ...ucts Limited 3 Sheldon Square W26PX London United Kingdom www kingfisher com products Distributor B Q plc Chandlers Ford Hants SO53 3LE United Kingdom www diy com Screwfix Direct Limited Trade House M...

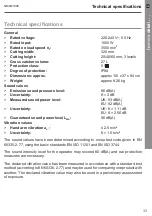
Page 33: ...y UK 93 dB A EU 92 dB A UK K 1 11 dB EU K 2 56 dB Guaranteed sound power level LWA 96 dB A Vibration values Hand arm vibration ah 2 5 m s2 Uncertainty K 1 5 m s2 The sound values have been determined...

Page 34: ...ing cycle such as the times when the tool is switched off and when it is running idle in addition to the trigger time Depending on the actual use of the product the vibration values can differ from th...

Page 35: ...lations 2016 as amended The Restriction of the use of Certain Hazardous Substances in Electrical and Electronic Equipment Regulations 2012 as amended Measured Sound Power Level 93 dB A Guaranteed Soun...

Page 36: ...ymieniony powy ej przedmiot niniejszej deklaracji jest zgodny z odno nymi wymaganiami unijnego prawodawstwa harmonizacyjnego Obiectul declara iei descris mai sus este n conformitate cu legisla ia rele...

Page 37: ...55014 2 2015 EN IEC 61000 3 2 2019 EN 61000 3 3 2013 A1 2019 EN ISO 3744 1995 Where applicable the notified body TUV SUD Industrie Service GmbH Westendstrasse 199 80686 Munchen Deutschland 0036 perfor...

Page 38: ...fr www bricodepot fr Pour consulter les manuels d instructions en ligne rendez vous sur le site www kingfisher com products www castorama pl Aby zapozna si z instrukcj obs ugi online odwied stron www...

Reviews: