background image

RS-232 Connections/Operation 

56 

Chapter 7 

Manual Documentation Number 3PCIoUx-1008 

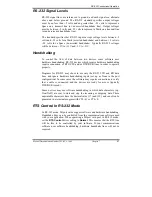
RS-232 Signal Designations 

The primary RS-232 signals are 

TD

 (transmit) and 

RD

 (receive). Together 

with GND (ground), they often are referred to as a “3-wire” interface. 

The 

RTS

 (Request to Send) and 

CTS

 (Clear to Send) signals are handshaking 

lines used to indicate to the other device that data can be sent or received. 
These lines may be enabled or disabled on a byte-by-byte basis and are used 
to prevent buffer overrun or the loss of data. 

Two secondary handshaking signals are 

DTR

 (Data Terminal Ready) and 

DSR 

(Data Set Ready). They are usually enabled when the device is powered 

up and the port is open. They may be used for flow control by some devices 
instead of RTS and CTS. 

DCD

 (Data Carrier Detect) is used by a modem to indicate Carrier to the 

computer so data can be sent/received.  

RI

 (Ring Indicator) is output by a modem to indicate that the phone or FAX 

line has a incoming call, so it can be handled. 

DTE and DCE 

There are two types of RS-232 ports: 


DTE

 (Data Terminal Equipment) which is typically a computer 


DCE 

(Data Communications Equipment) which is typically a modem.  

Data Terminal Equipment (DTE) 

When a DTE is connected to a DCE they are linked directly together using a 
modem cable wired pin to pin so that the inputs match the outputs of the 
other. 

Data Communications Equipment (DCE) 

When two pieces of equipment of the same type are interconnected (a DTE 
connected to a DTE, or a DCE to a DCE), a crossover (often called a null 
modem) cable is needed to route the outputs of one to the inputs of the other. 
This type of cable is needed to interconnect two computers with RS-232.  

Note: Refer to Appendix B for straight-through and null modem cable 
diagrams and pinouts. 

Summary of Contents for MIPort Universal PCI Cards 3PCIOU1

Page 1: ...r ri ia al l C Ca ar rd ds s R RS S 2 23 32 2 R RS S 4 42 22 2 R RS S 4 48 85 5 M Mo od de el ls s 3 3P PC CI IU U2 2 3 3P PC CI IU U4 4 3 3P PC CI IU U8 8 N No on n I Is so ol la at te ed d a an nd d...

Page 2: ...lectronics Mfg Co Inc 707 Dayton Road Ottawa IL 61350 USA Phone 815 433 5100 General Fax 815 433 5105 Website www bb elec com Sales e mail orders bb elec com Fax 815 433 5109 Technical Support e mail...

Page 3: ...puter before inserting the card 2008 B B Electronics No part of this publication may be reproduced or transmitted in any form or by any means electronic or mechanical including photography recording o...

Page 4: ...n RS 422 485 Only Ports 12 INSTALLING THE SERIAL CARD 14 CHAPTER 3 DRIVER SOFTWARE INSTALLATION 15 INSTALLING WINDOWS VISTA DRIVER SOFTWARE 15 Pre Installation Steps 15 Using the Found New Hardware Wi...

Page 5: ...Driver 44 Installing the Driver 45 CHECKING THE DRIVER INSTALLATION 47 USING THE EXAR SERIAL GUI EXAMPLE APPLICATION 48 Preparing the Example Application Files 48 Running the Exar Serial Test GUI 48...

Page 6: ...e RS 485 Connection 66 CHAPTER 9 TROUBLESHOOTING MIPORT CARDS 68 STARTING UP 68 CHECKING CONNECTIONS 68 RS 232 422 485 Operation 68 RS 232 Operation 68 RS 422 485 Operation 69 CHECKING THE MIPORT CARD...

Page 7: ...two four or eight non isolated serial ports can be added MIport PCI serial cards are Plug and Play compatible which allows the Windows Operating System and driver to set the addresses and IRQ used by...

Page 8: ...peration half or full duplex Automatic Send Data Control for RS 485 operation Buffered high speed XR17D15x PCI Bus UARTs 16C550 compatible with 64 byte FIFOs for input output with programmable trigger...

Page 9: ...Models and Features Model Number Ports Interface Connectors 3PCIOU1 1 RS 232 422 485 DB 9 male 3PCIOU2 2 RS 232 422 485 DB 9 male 3PCIOU4 4 2 RS 232 422 485 ports 2 RS 422 485 ports 2 x DB 9 male 2 x...

Page 10: ...el Number Ports Interface Connectors 3PCIU2 2 RS 232 422 485 2 x DB 9 male 3PCIU4 4 RS 232 422 485 DB 37 female plus DB 37 to 4x DB 9 male cable 3PCIU8 8 4 RS 232 422 485 ports 4 RS 232 ports DB 78 fe...

Page 11: ...S 485 b Data transmission mode Two wire or four wire c Cable lengths connectors pinouts Note For information on cables and pinouts refer to Chapter 5 RS 232 or Chapter 6 RS 422 RS 485 2 Set the operat...

Page 12: ...Advanced Settings set Buffer RTS Control and Hysteresis Level Change the COM port name if necessary 14 If your card was not connected to a peripheral device in Step 5 make your connections now Powerin...

Page 13: ...other ports on the same card Connectors 3PCIOU1 1 DB 9 male 3PCIOU2 2 DB 9 male 3PCIOU4 2 DB 9 male RS 232 422 485 ports 2 DB 9 male via ribbon cable on 2nd expansion slot bracket RS 422 485 ports 3PC...

Page 14: ...the standard ESD precautions outlined below CAUTION This is an Electrostatic Sensitive Device Use ESD precautions for safe handling Before removing the card from the anti static protective packaging D...

Page 15: ...lways enabled TX ON RX ON RS 422 operation is suitable for interconnecting a computer and one device for full duplex point to point bi directional communication or a computer and several devices for u...

Page 16: ...up to 32 standard nodes Typical input resistance Rin for each load is 12k Provisions are made for custom biasing and or termination Note For more information on RS 485 Mode refer to Chapter 6 Operatin...

Page 17: ...ion This switch is the only one that is required to be set for RS 232 operation The positions of switches 2 and 3 do not matter when switch 1 is set for RS 232 operation DIP Switch 2 RS 232 422 485 po...

Page 18: ...eiver is disabled when its transmitter is sending preventing the port from receiving its own data Setting the DIP Switches on RS 422 485 Only Ports The 3PCIOU4 MIport card provides a combination of RS...

Page 19: ...operation or full duplex four wire RS 422 RS 485 operation Placing the bottom DIP switch in the RX ON position configures the port for four wire operation In this mode the port s receiver is continuo...

Page 20: ...ecessary to set the configuration DIP switches Remove AC power from the computer before inserting the card 1 Shut down your computer 2 Unplug the power cord to remove power to prevent accidentally tur...

Page 21: ...veral possible methods for installing the software The procedure outlined here is recommended for most situations Note If at some point in the future you want to update these drivers remove the old dr...

Page 22: ...ure of Vista simply indicates that these drivers have not yet undergone the Microsoft testing procedure required to use the Windows Vista Logo on the packaging Diver compatibility is not affected 8 Cl...

Page 23: ...ard There are several possible methods for installing the software The procedure outlined here is recommended for most situations Note If at some point in the future you want to update these drivers r...

Page 24: ...d New Hardware Wizard Windows will detect the PCI card and start the Found New Hardware Wizard to begin the driver installation The following dialog box will appear Figure 7 The XP Found New Hardware...

Page 25: ...click Install the software automatically Click Next Windows will find the appropriate files on the CD then display a dialog box concerning Windows Logo testing for XP This feature of XP simply indicat...

Page 26: ...on the PCI card Repeat the steps above to install the port driver software If the card you are installing has more than one port Windows XP will find each port in sequence and re launch the Found New...

Page 27: ...the Device Manager click Multi port serial adapters All serial adapter cards should appear in the list Additional information about the cards can be obtained by double clicking the name of the card 4...

Page 28: ...ter 6 for driver removal procedures Windows Settings Windows Classic settings are used in the following screenshots To configure Windows for Windows Classic settings position the mouse pointer over th...

Page 29: ...1 The Windows 2000 Add New Hardware Wizard The driver installation goes through several steps after finding the driver files The first part installs the driver for the card then after Finish the secon...

Page 30: ...1008 Figure 12 The What do you want Windows to do dialog 11 To begin the installation of the software for the PCI card click Search for a suitable driver for my device then click Next Figure 13 The Wi...

Page 31: ...file search for the device dialog 13 To begin the installation of the software for the PCI card click Next Windows will display the Digital Signature Not Found dialog box This feature simply indicates...

Page 32: ...leting the Found New Hardware Wizard dialog appears click Finish Port Driver Installation The Add New Hardware Wizard will appear again indicating it has detected a port on the PCI card Repeat the ste...

Page 33: ...operties dialog box click the Hardware tab then click the Device Manager button The Device Manager window will appear Figure 16 System Properties Screen 3 In the Device Manager click Multi port serial...

Page 34: ...iver removal procedures Windows Settings Windows Classic settings are used in the following screenshots To configure Windows for Windows Classic settings position the mouse pointer over the Taskbar at...

Page 35: ...17 The Add New Hardware Wizard dialog The driver installation goes through several steps after finding the driver files The first part installs the driver for the card then after Finish the second par...

Page 36: ...ion Number 3PCIoUx 1008 Figure 18 The What do you want Windows to do dialog 8 To begin the installation of the software for the PCI card click Search for the best driver for your device then click Nex...

Page 37: ...he E Windows Drivers MIport 98_ME folder NOTE In Windows ME you will need to select the Driver from this folder E Windows Drivers MIport 98_ME Windows will find the appropriate files on the CD Figure...

Page 38: ...ftware If the card you are installing has more than one port Windows will find each port in sequence and re launch the Found New Hardware Wizard for each port Repeat the previous steps for each port C...

Page 39: ...In the Device Manager click Multiport Serial Cards All serial adapter cards should appear in the list Additional information about the cards can be obtained by double clicking the name of the card 4 C...

Page 40: ...card for the desired mode RS 232 RS 422 or RS 485 using the three DIP switches on the card 2 If configuring for RS 422 or RS 485 Modes and bias or termination resistors are needed add them at this tim...

Page 41: ...er 3PCIoUx 1008 Chapter 3 35 Figure 23 The Install exe file in Windows NT Explorer 2 Double click the install exe file The MIport Driver v1 0 0 for Windows NT 4 0 Installation Welcome dialog will appe...

Page 42: ...4 Click Next on the Copyright Information dialog The Select Destination Directory dialog will appear 5 Click Next to install the files in the suggested directory Figure 25 The Select Destination Direc...

Page 43: ...he NT Control Panel Showing the BB Electronics MIport Card Applet Icon 2 Double click the BB Electronics MIport Card applet icon The B B Electronics Multiport Boards dialog will appear showing the por...

Page 44: ...unications Port Settings dialog that appears set the bits per second data bits parity stop bits and flow control if they need to be changed from the default values Figure 28 Communications Port Settin...

Page 45: ...pter 4 Figure 29 The Advanced Port Setting Dialog 9 Click OK to return to the Communications Port Settings 10 Click Cancel to return to the Assign Ports dialog 11 Repeat the procedure for any addition...

Page 46: ...alog a variety of information can be obtained and several port parameters can be configured 1 On the Ports COM LPT list double click the name of the port to be configured 2 On the Port Properties dial...

Page 47: ...ow parameter in the Advanced Port Settings dialog allows you to set the minimum value at which the UART will request more data from the computer As the MIport card is transmitting data the number of b...

Page 48: ...transmission line in a know idle state until the data has reached its destination If the line is released too soon it can pick up noise that could cause problems on the communications system This par...

Page 49: ...erial adaptors PCI cards or other hardware may have reserved a COM number The device may need to be added back to the system then the software removed Advanced editing of the registry may required to...

Page 50: ...MIport cards is a three step process 1 Preparing the Linux files 2 Compiling the driver 3 Installing the driver Preparing the Linux Files The following procedure assumes you have mounted your MIport d...

Page 51: ...5 45 2 Remove any temporary files make clean 3 Make a dependency file make dep 4 Make the driver file make Installing the Driver 1 If the user is not root switch to the root user su 2 Install the dri...

Page 52: ...rial if it already exists Note These scripts will create the device nodes dev tty M0 and dev cum0 for each port where the 0 is the number of the port If etc rc d rc serial already exists append the co...

Page 53: ...d b Modify or create etc rc serial to call etc rc d rc bb 17d15x WARNING DO NOT OVERWRITE AN EXISTING etc rc serial If etc rc serial already exists in etc rc d then add the following commands to the...

Page 54: ...lication Files 1 Open a terminal window and execute the following steps at the command prompt 2 Change to a user directory on your system cd home username 3 Untar the driver files tar zxpf mnt cdrom L...

Page 55: ...Application Window 6 Click File Open The Open Device dialog will appear Figure 35 The Open device dialog box 7 Type the name of the device in the File name box The name will be ttyM0 ttyM1 etc Click O...

Page 56: ...figuring Port Settings 1 Click Serial Port Settings The Serial port parameters dialog will appear The dialog will display the current serial port settings Enter the parameters required for your applic...

Page 57: ...will not show up in the Device Manager 2 In the pop up menu that appears click Uninstall 3 On the Confirm Device Removal dialog that appears click OK 4 After a few seconds the dialog will disappear I...

Page 58: ...rating system names these files during the installation process To locate the correct INF files search for files in C Windows Inf and its subdirectories for a file named INF that contains the text Dis...

Page 59: ...Number 3PCIoUx 1008 Chapter 6 53 Figure 39 Setting the Folder Options to Display Hidden Files 3 Delete the oemx inf and oemx pnf files found in Step 2 CAUTION Be careful to delete only the files asso...

Page 60: ...n directory The default installation directory is C Program Files B B Electronics MIport Figure 40 Uninstall exe in the B B Program Files 2 Double click the Uninstall exe file name The Select Uninstal...

Page 61: ...f sale devices RS 232 Signal Designations and DB 9 Pinout RS 232 Mode supports eight single ended signal lines and signal ground The DB 9 male connector is configured as a standard RS 232 DTE serial p...

Page 62: ...ect is used by a modem to indicate Carrier to the computer so data can be sent received RI Ring Indicator is output by a modem to indicate that the phone or FAX line has a incoming call so it can be h...

Page 63: ...e connection of RTS CTS and or DTR DSR lines in order to operate properly Programs for RS 232 may chose to use only the RS 232 TD and RD data lines and ignore hardware handshaking inputs set up as Non...

Page 64: ...RS 232 Connections Operation 58 Chapter 7 Manual Documentation Number 3PCIoUx 1008 Figure 42 RTS Control Select Normal for RS 232 Operation...

Page 65: ...communication RS 422 interfaces are commonly used for video editing control camera control electronic signage television studio satellite dish control performance lighting and audio equipment control...

Page 66: ...Sensing differentially across the two lines the voltage will be 4 4V representing a Mark state When the transmitter changes to the Space state TD A goes to 4 4V and TD B goes to 0V In that state the...

Page 67: ...itter is active all the time Even when the transmitter is not sending data it will assume the idle or Mark state in which TD A is at 0V with respect to ground and TD B line is at about 4 4V with respe...

Page 68: ...RS 485 driver and receiver This is hardware controlled based on the contents of the UART output buffer When data is present the driver is enabled when the output buffer becomes empty it is disabled Th...

Page 69: ...s When adding termination resistors the value of biasing resistors must be appropriately sized as well RS 485 Network Biasing Unlike RS 422 where the transmitter holds the TD B line high and the TD A...

Page 70: ...ds are provided on MIport cards for adding termination resistors and bias resistors The photograph below shows the layout of through hole pads for installing termination and bias resistors On all MIpo...

Page 71: ...the Device Manager Port Settings Advanced Note that the EIA RS 422 Specification labels data lines with an A and B designator Some RS 422 or RS 485 equipment uses a and designator In most cases the A...

Page 72: ...nts Connection In a multi slave RS 422 connection TD B and TD A connect to RD B and RD A on all the slaves If the slaves have Transmit connections only one device can be connected back to the master F...

Page 73: ...RS 422 485 Connections Operation Manual Documentation Number 3PCIoUx 1008 Chapter 8 67 Figure 51 4 Wire RS 422 or RS 485 Connections...

Page 74: ...Ensure your system is set for PnP OS Windows NT and Linux should be set to non PnP Checking Connections RS 232 422 485 Operation 1 Ensure that you have set up your card for the correct mode of operat...

Page 75: ...e set correctly Checking the MIport Card Using ComTest and a loopback connection you can check the operation of your MIport card separate from the rest of your communications system Note Refer to Appe...

Page 76: ...ng lines in RS 422 RS485 mode the input lines CTS DSR DCD RI are not pulled high 4 Some manufacturers label their data connections for A and B reverse of the standard for RS 422 or RS 485 so that the...

Page 77: ...ort USA Office Technicians are available at 815 433 5100 to answer your questions from 8 AM 5 PM weekdays Central Time Email support bb elec com European Office Technicians are available at 353 91 792...

Page 78: ......

Page 79: ...X On RX On 232 TX SD RX SD 2 wire RS 485 Mode Figure 54 RS 232 422 485 DIP Switch Settings DIP Switch 1 RS 232 422 485 ports The top DIP switch 1 configures the port for RS 232 or RS 422 485 operation...

Page 80: ...e communications line Since the transmitter sends data on the other wire pair the port does not receive its own transmissions Placing the bottom DIP switch in the RX position configures the port for t...

Page 81: ...he communications line to transmit without interference DIP Switch 2 RS 422 485 only The bottom DIP switch 2 configures the port for half duplex two wire RS 485 operation or full duplex four wire RS 4...

Page 82: ......

Page 83: ...Data Input 2 TD Transmit Data Output 3 DTR Data Terminal Ready Output 4 GND Signal Ground 5 DSR Data Set Ready Input 6 RTS Request to Send Output 7 CTS Clear to Send Input 8 RI Ring Indicator Input 9...

Page 84: ...ble must jumper TD A to RD A and TD B to RD B Connect from TD A and TD B to the Data A and Data B wires of your RS 485 network Note Refer to Chapter 2 for example connections Note that the EIA RS 422...

Page 85: ...Connector Pinouts Manual Documentation Number 3PCIoUx 1008 Appendix B B 1 Figure 60 2 Wire RS 485 Wiring...

Page 86: ......

Page 87: ...rks with USB Serial Converters ISA or PCI Serial Cards Serial Port Access under Windows 98 2000 2003 Server XP Vista COM1 COM8 or above Dual Windows show typed transmit characters in a separate window...

Page 88: ...etup exe file on the MIport CD Figure 61 Loading ComTest 2 Run Setup exe to install ComTest on your program menu under B B Electronics Loopback Testing with ComTest To familiarize yourself with the op...

Page 89: ...parity data bits stop bits Defaults are common settings 6 Type characters They will appear in the upper window If you are performing a loopback test you should see the characters appear in the lower w...

Page 90: ...with ComTest C 4 Appendix C Manual Documentation Number 3PCIoUx 1008 9 When testing is completed close the program Note For more information on using ComTest to troubleshoot MIport cards and software...

Page 91: ...OF CONFORMITY Manufacturer s Name B B Electronics Manufacturing Company Manufacturer s Address P O Box 1040 707 Dayton Road Ottawa IL 61350 USA Model Numbers 3PCIoUx Universal PCI Cards Description O...

Page 92: ...eneral Fax 815 433 5105 Website www bb elec com Sales e mail orders bb elec com Fax 815 433 5109 Technical Support e mail support bb elec com Fax 815 433 5104 European Headquarters B B Electronics Wes...

Reviews: