43
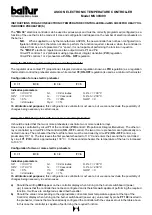
Configuration
This operation enables setting of controller functions C - D - E - F in accordance with required use; The number
specified in the table above is set for each function.
C = 1 = Use of probe PT 100 (temperature can be set within the range - 100 to + 300 °C).
D = 0 = Use of relay output Y1 (3A - 250V), terminals 13 - 14.
E = 4 = “Reverse” control of circuit Y1, contact closed with probe “cold” and open with probe “hot”. PID control
(Proportional, Integral, Derivative).
Safety = 0% = in case of failure of probe PT 100, contact Y1 opens and therefore cuts off power supply to the load
(contactor and thyristor that controls the resistors).
F = 5 = ON-OFF control (independent of Y1) for circuit Y2, terminals 11 - 12.
Contact closed with probe “hot” (active high) and therefore contact open with probe “cold”.
F = 6 = ON - OFF control (independent from Y1) for circuit Y2, terminals 11 - 12. Contact closed with probe “cold”
(active low) and contact open with probe “hot”.
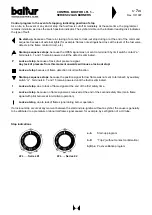
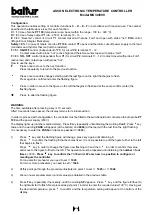
How to use the keys:
F
Press once to move to the next function.
Press repeatedly to return to the previous function.
8
Press once to enable changes starting with the last figure on the right that begins to flash.
Press again to confirm and enter the flashing figure.
w
Press in order to move to the figure on the left that begins to flash and at the same confirm (enter) the
flashing figure.
t
t
t
t
t
Press to alter the flashing figure.
WARNING:
The time available after pressing a key is 10 seconds.
After10 seconds have passed, the display returns to its initial position.
In order to proceed with configuration, the controller must be fitted to the switchboard and connected to both probe PT
100 and the power supply (230V).
The display lights up (numbers and/or letters). Press F key repeatedly until obtaining the wording ConF. Press
8
key
twice and the wording PASS will appear (at the bottom) and 9999 (at the top) with the last 9 on the right flashing.
It is necessary to enter the PASSword (access password = 3333).
1)
Press
t
key and the flashing figure will change, press key again until obtaining 3.
Press
w
to confirm the flashing 3 that becomes fixed. It is now possible to edit the figure further to the left
that begins to flash.
Press
t
key in order to change the figure now flashing to 3 and then
w
in order to confirm this value
and move to the figure further to the left. This operation must be repeated until obtaining the number 3 four
times = 3333. Press
8
8
8
8
8
key to confirm the PASSword. We are now in a position to configure or
reconfigure the controller.
For one electric preheater you need to set n° 1045.
For two or more preheaters you need to set n° 1046.
2)
At this point go through the procedure illustrated in point 1 to set n° 1045 or n° 1046.
3)
We can now set parameters (control values) as detailed in the previous table.
4)
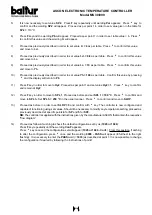
Press F key, repeatedly if necessary, until the wording SP appears. Press
8
key and the figure furthest to
the right will start to flash. Next proceed as per point 1 in order to enter the required value (130 °C). Having set
the desired temperature, press
8
to confirm and the temperature setting will appear at the bottom of the
display.
ASCON ELECTRONIC TEMPERATURE CONTROLLER
Model MS 30/099
Summary of Contents for TS 0 GN
Page 2: ......
Page 47: ......
Page 48: ......
Page 49: ......
Page 50: ......
Page 51: ......
Page 52: ......
Page 53: ......
Page 54: ......
Page 55: ......
Page 56: ......
Page 57: ......
Page 58: ......
Page 59: ......
Page 60: ......
Page 61: ......
Page 62: ......
Page 63: ......
Page 64: ......
Page 65: ......
Page 66: ......
Page 67: ......
Page 68: ......
Page 69: ......
Page 70: ......
Page 71: ......
Page 72: ......
Page 73: ......
Page 74: ......
Page 75: ......
Page 76: ......
Page 77: ......
Page 78: ......
Page 79: ......
Page 80: ......
Page 81: ......
Page 82: ......
Page 83: ......
Page 84: ......
Page 85: ......
Page 86: ......
Page 87: ......
Page 88: ......
Page 89: ......
Page 90: ......
Page 91: ......
Page 92: ......
Page 93: ......
Page 94: ......
Page 95: ......


