background image

23

1) If not already done at the moment of connecting the burner to the gas  pipeline, it is indispensable to carry out a

purge of the air contained in the pipeline. As a precaution, special care should be taken and doors and windows
should be opened. Open the pipe union on the pipeline situated near the burner and then open a  little the gas
cut-off cock (or cocks). When the characteristic odour of gas can be smelled, close the cut-off cock.
Wait until the gas present in the room has dispersed, and then reconnect the burner to the gas pipeline.
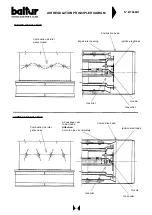
Subsequently, re-open the gas cut-off cock.

2) Check that there is water in the boiler and that the system’s gas valves are  open.

3) Check, with absolute certainty that the discharge of combustion products can take place freely

(boiler and chimney lock-gates should be open).

4) Make sure that the voltage of the electric line to which the burner is to be connected, corresponds to that required

by the burner and that the electrical connections (motor or principle line) have been prepared to match the voltage
rating available. Also check that all the electrical connections carried out on the spot are in accordance with our
electric wiring diagram.

5) Make sure that the combustion head is long enough to enter the furnace to the extent specified by the boiler manufacturer.

6) Remove the protective cover from the disk on which are inserted the screws which regulate the gas and air

delivery, and unloosen the locking screws.

7) Check that the device which regulates the air on the combustion head is in theposition considered necessary for

the fuel delivery required (air passage between the disk and the head should be considerably reduced when the
fuel delivery is reduced;  on the other hand, when the fuel delivery is fairly high, the air passage between the disk
and the head should be relatively open). See Chapter “Air Regulation on the Combustion Head”.

8) Apply a manometer with an adequate scale (if the entity of pressure forecast  allows it, it is preferable to use a

column of water instrument, do not use a pointer instrument for moderate pressure) to the pressure plug on the
gas pressure switch.

9) Open, to the quantity considered necessary, the flow regulator incorporated in  the ignition flame valve(s) (pilot).

Check that the combustion air regulation shutter is in the right position;  if necessary, modify it by operating the
adjustable screws of the regulating disk.

10) With the switch on the burner’s control panel in the “O” position and the main switch inserted check, by manually

closing the relay, that the motor rotates in the right direction.
If it does not, exchange the places of two cables of the motor’s supply line in order to invert its sense of rotation.

11) Now insert the switch on the commend panel and put the modulating switches  in the MIN (minimum) and MAN

(manual) positions. The control box receives voltage in this way and the programmer turns on the burner as
described in Chapter “Description of Operations”. During the pre-ventilation phase check that the air pressure
switch effects a changeover (it should pass from a closed position without measurement of pressure to a closed
position with measurement of air pressure). If the air pressure switch does not measure sufficient pressure (it will
not effect the changeover) and neither the ignition transformer nor the gas ignition flame valves will be inserted
and the control box will go to “shut down”. It should be pointed out that “shut downs” during the first ignition phase
are considered normal. This is because air still exists in the pipeline of the valve incline and must be expelled
before it is possible to have a stable flame. To unblock the control box, press the relevant pushbutton.

UV Cell
The flame detection is carried out with the UV Cell and the following should be taken into consideration.
Even the slightest greasiness will compromise the passage of the ultraviolet rays the UV photoelectric cell bulb,
thus preventing the sensitive internal element from receiving the quantity of radiation necessary for it to function
properly. Should the bulb be fouled by light oil, fuel oil, etc., it is indispensable to clean it thoroughly.
It should be pointed out that even by simply touching the bulb with the fingers, it is possible to leave a slight
greasiness which could compromise the working of the UV photoelectric cell. The UV Cell does not “see” daylight
or light from an ordinary lamp. It is possible to verify its sensibility with a flame (or cigarette lighter or a candle) or
with the electric spark that occurs between electrodes in an ordinary ignition transformer. To ensure that the UV
Cell works properly, its current value should be sufficiently stable so as not to fall below the minimum value
required for the specific control box. It may be necessary to search experimentally for the best position by sliding
(axial or rotation movement) the body that contains the photoelectric cell in respect to the fastening clamp. An
inspection can be carried out by inserting a microammeter, with an adequate scale, in series to one of the two UV
photoelectric cell connection wires. It is obviously necessary to respect the polarity ( + e - ). The value of the cell
current to ensure functioning of the control box is shown on the wiring diagram.

12) With the burner operating at a minimum (principle flame valves open, modulation regulator at a minimum),

immediately check visually the entity and appearance of the flame and, if necessary, proceed with correcting it by
operating the adjustable screws of the modulation disk which regulates the gas and air delivery.

STARTING UP AND REGULATION WITH METHANE GAS

Summary of Contents for TS 0 GN

Page 1: ...Instruction for industrial dual fuel Natural gas Heavy oil burners model Edition 2007 07 Cod 0006080240 en TS0GN TS1GN TS2GN TS3GN TS4GN ...

Page 2: ......

Page 3: ...o di Sorveglianza secondo la Direttiva Gas 90 396 CEE CE0085 DVGW Statement of Conformity We hereby declare under our own responsibility that our CE marked products Series Sparkgas BTG BGN Minicomist Comist RiNOx BT BTL GI GI Mist PYR TS Description domestic and industrial blown air burners fired by gas oil and dual fuel respect the minimal regulation of the European Directives 90 396 EEC G A D 92...

Page 4: ... provided with steam pre heater to heat the fuel oil 23 Starting up and regulation with methane gas 24 Regulation of the combustion head and flame disk 27 Reading gas methane meter 28 Use of the burner Maintenance 29 Details TS N 30 The gas valve unit 32 SQM Servomotor 36 Gas valve seal control devices 37 Control box 39 Electronic temperature controller model MS 30 44 Electric wiring diagram 47 Re...

Page 5: ...5 330 260 10 80 TS 1 N 853 568 285 870 580 290 1525 385 320 490 M16 330 723 400 435 365 10 80 TS 2 N 853 568 285 870 580 290 1515 375 400 490 M16 410 723 400 435 365 10 80 TS 3 N 920 595 325 910 580 330 1700 455 450 570 M18 460 750 455 490 420 10 95 TS 4 N 1025 645 380 1085 700 385 2115 580 550 680 M18 560 1040 555 590 520 10 120 TS 0 G 1165 525 640 660 430 230 350 1095 265 285 390 M12 300 465 295...

Page 6: ...e following table TS series burners are modulating with a modulation range of 1 5 for the gas versions For the light oil and heavy oil versions the modulation range is 1 3 A servomotor adapts to changing heat requirements by simultaneously regulating the amount of combustion air and fuel as indicated by the probe in the boiler The burners are fitted with a device that automatically modifies the pa...

Page 7: ...urner Check that the main line the relevant switch with fuses essential and the current limited are capable of with standing the maximum current absorbed by the burner For details refer to the specific electric diagram for each single burner FASTENING THE BURNER TO THE GAS PIPELINE When the burner has been fastened to the boiler keeping in mind that the burner head should penetrate the combustion ...

Page 8: ...he burner to be maintained at a constant level even if only one burner is operating at the time Consequently it is possible to accurately regulate the delivery and therefore the combustion and thus improve yield The dimension of the gas pipeline should be in function with the quantity of gas it has to delivery We advise maintaining the load loss at a low value it should be kept in mind that the lo...

Page 9: ...ide in a suitable place 8 Emergency interception installed outside 9 Ball cock 10 Anti vibration joint 11 A couple of flange 1 Measuring and reducing unit 2 Interception 3 Filter 4 Reducer 5 Meter 6 Emergency interception installed outside 7 Ball cock 8 Filter 9 Final reducer or stabilizer 10 Anti vibration joint 11 A couple of flane D Distance between pressure stabilizer and valve about 1 5 2 m D...

Page 10: ...andstill or when it is operating at the maximum fuel delivery required by the boiler The feed circuit must be realized according to the drawing shown in the following pages even when utilizing low viscosity fuels The dimension of the pipelines should be in function with their length and with the output of the pump utilized Our instructions cover the basic requirements needed to ensure efficient op...

Page 11: ...perature value sufficient for the flow in the piping N BT 8866 4 rev 31 05 01 HYDRAULIC DIAGRAM FOR BURNERS GI 1000 TS PYR SERIES OPERATING WITH HEAVY OIL 50 E AT 50 C WITH AUXILIARY HEATER 1 Filter 2 Circulation pumps one spare 3 Starter resistance with thermostat 4 Burner pushing central unit 5 Pressure regulator from 0 5 to 3 bar 6 By pass normally closed 7 Steam or hot water coil to heat oil 8...

Page 12: ... keep the oil at a temperature at which it can flow through the pipes even while the machine is down 9 Degasifier Ø 100 H 300 10 Thermometer Heating electric cable N BT 8911 1 rev 30 05 01 HYDRAULIC DIAGRAM TO THE BURNER GI 1000 TS PYR OPERATING WITH LIGHT OIL OR HEAVY OIL WITH MAX NOMINAL VISCOSITY 5 E AT 50 C 1 Filter 2 Circulation pumps one spare 3 Burner pushing central station 4 Main tank 5 O...

Page 13: ...turn pipeline has reached the temperature at which the TRU thermostat thermostat on the nozzle return has been set This special device does not allow the fuel to pass through the nozzle until it has reached at least the temperature at which the TRU thermostat has been set Normally intervention of the TRU thermostat takes place within the pre ventilation time if it doesn t pre ventilation and fuel ...

Page 14: ...sure if steam boiler be reached even with fuel and combustion air delivery at a minimum the thermostat pressure switch if steam boiler will intervene when the value at which it has been set is reached and bring the burner to a standstill When the temperature pressure if steam boiler drops below the intervention limit of the shut down device the burner will start up again as previously described It...

Page 15: ...PYR 8 PYR 9 10 N Steam preheaters 1 2 3 4 5 Model GI 1000 N Steam preheaters 3 16 Maximum oil pressure pressostat adjust at 28 bar on request 17 Electric preheaters Model TS 0 1 2 TS 3 4 N Electric preheaters 1 2 Model PYR 2 3 4 5 PYR 6 7 8 PYR 9 10 N Electric preheaters 1 2 3 Model GI 1000 N Electric preheaters 2 18 Self cleaning filter 19 Thermometer and thermostat probe 20 Preheater safety valv...

Page 16: ...14 N BT 8867 BURNER DETAIL VIEW WITH ATOMIZING GROUP MODULATION MOTOR RETURN PRESSURE REGULATOR AIR SHUTTER REGULATOR ...

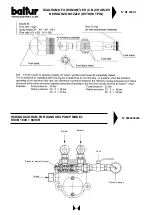
Page 17: ...T 9353 1 DIAGRAM OF A DISMANTLED C B CHARLES BERGONZO NOZZLE WITHOUT PIN WIRING DIAGRAM FOR DANDOSS PUMP MODEL KSVB 1000 6000 R N 0002900430 Return Delivery Cock Pressure gauge Intake Pressure regulator screw ...

Page 18: ...voltage to the principle valves which then open Gas flows through the principle valves with the flow regulator set in the minimum position and comes out of the combustion head The burner is now operating at minimum output The pilot circuit is disconnected after the principle valves open The modulation servomotor is connected after the principle valves open and if the modulation thermostat or press...

Page 19: ...4 1 Modulation servomotor 2 Disk with screws to regulate air and gas throughtput modulator 3 If fitted valve seal control unit and relative pressurestat DW 4 Main flame valves with regulator 5 Min and Max gas pressurestats with pressure outlet ports 6 Gas supply regulator valve 7 Gas pressure reducers or stabilizers 8 Vibration damping union 9 Ball cock 10 Filter 11 Air pressurestat 12 Pilot flame...

Page 20: ...perature 15 20 C higher with respect to the minimum thermostat After starting up the burner check that the thermostats operate correctly by controlling the thermometer on the pre heater Regulate at about 50 C the control thermostat of the resistance which is incorporated in the line filter N B For the preheater s thermostat s adjustment see the specific instructions of the MS 30 electronic regulat...

Page 21: ...electric cell connection wires It is obviously necessary to respect the polarity e The value of the cell current to ensure functioning of the control box is shown on the wiring diagram 18 When the burner is operating at minimum proceed with regulating the air to the quantity considered necessary to ensure efficient combustion Tighten more or loosen more the adjusting screws in correspondence to th...

Page 22: ...ormation see the Viscosity Temperature diagram with regard to the type of oil used REGULATION OF THE COMBUSTION HEAD AND FLAME DISK See BT 8869 1 The burner is equipped with a combustion head which can be regulated by moving it backwards or forwards in such a way as to close more open more the air passage between the disk and the head By throttling the passage it is possible to achieve high pressu...

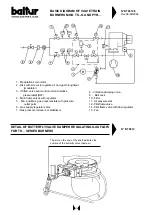
Page 23: ...et gates closed Big air inlet opening Combustion head CORRECT REGULATION Combustion air inlet gates open Air passage near to be closed Attention Avoid to close it completely Combustion head Ignition electrodes Ignition electrodes Nozzle Nozzle Gas pilot Gas pilot Gas outlet Gas outlet ...

Page 24: ...ater the following a gate valve a suitable pressure reducer adjustable from 1 to 8 bar and a control manometer end of the scale 10 bar Do not recuperate the condensate which is discharged from the heater to avoid in case there is a leak in the coil fuel oil going into the steam system Regulation When the boiler has reached sufficient pressure open the gate valve which allows the steam inflow to re...

Page 25: ...11 Now insert the switch on the commend panel and put the modulating switches in the MIN minimum and MAN manual positions The control box receives voltage in this way and the programmer turns on the burner as described in Chapter Description of Operations During the pre ventilation phase check that the air pressure switch effects a changeover it should pass from a closed position without measureme...

Page 26: ...sively by the automatic commend of the boiler s probe Normally it is not necessary to alter the internal regulations of the Potentiality Regulator RWF See instructions relative 18 The air pressure switch has the job of bringing the control box to a safety shut down if the air pressure is not at the correct value Therefore the air pressure switch must be regulated in such a way as to intervene by c...

Page 27: ...is evident from the above that the device which closes the air on the combustion head should be put in such a position as to always obtain a decidedly high air pressure value behind the disk It is advisable to regulate in such a way as to achieve a throttling of the air in the head this will necessitate a considerable opening of the air shutter which regulates the flow to the burner s fan suction ...

Page 28: ...he burner to operate for a long time only a few minutes if the output exceeds the maximum allowed for the boiler to avoid possible damage to it it would be timely to stop the burner immediately after having taken the two meter readings Correcting the value indicated by the meter If the meter measurer the gas delivery at a pressure above 400 mm W C it is necessary to multiply the value by a correct...

Page 29: ...the burner first check that there is fuel in the tank and then call the local service to repair the defect MAINTENANCE The burner does not require special maintenance but it is good practice to perform the following operations at the end of the heating season 1 For burners which use light oil remove and wash thoroughly with solvents petrol trichloroethylene oil the filters the nozzle the turbulato...

Page 30: ... switch 4 Electromagnet 5 Main gas valves 6 Pilot gas valves 7 Min pilot gas pressure switch 8 Max gas pressure switch 1 Gas pilot 2 Ignition electrodes 3 Flame disk 4 Nozzle at fuel oil return 5 Device for the air regulation at the combustion head COMBUSTION HEAD TS GL GN N 0002933080 ...

Page 31: ...justment of the fuel oil back pressure delivery adjustment 3 Modulation disks 4 Screws for the regulation of the combustion air gates 5 Driving screws of the motion of the air regulation device at the head 6 Driving micro cam of air min position 7 Fuel oil return 8 Manometer for the return pressure gauge 9 Pressure adjuster of fuel oil return delivery adjustment 10 Inlet plug at the adjustment scr...

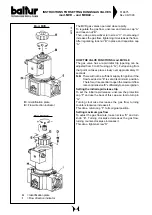
Page 32: ...ficient supply for ignition if the flow feed device E is set at its minimum position Therefore it is essential to open the maximum flow rate control device E sufficiently to ensure ignition Setting the initial rapid release trip To set the initial rapid release unscrew the protection cap F and use the back of this cap as a tool to turn pin G Turning clockwise decreases the gas flow turning counter...

Page 33: ...ins in the open position while the pump and magnetic valve remain powered When the unit receives the signal to close or if power supply is cut off the pump shuts down the magnetic valve opens decompressing the chamber above the piston The plate is closed both by the return spring and by gas pressure The flow rate for this valve is calculated to ensure full closure in less than one second This type...

Page 34: ...ure regulator are in cast aluminum DESCRIPTION OF HOW GAS VALVES FITTED WITH PRESSURE REGULATOR OPERATE When a valve fitted with a pressure regulator is used the valve outlet pressure presses against a spring assisted diaphragm acting as a reference value The force of this spring can be adjusted and is set at the prescribed value The diaphragm activated by an oscillating piston system presses agai...

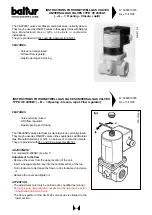
Page 35: ...lve normally closed With flow regulator Rapid opening and closing The VE4000B1 valves are Class A solenoid valves normally closed They may be used as ON OFF valves in the supply trains with Natural Gas Manufactured Gas or GPL on burners or combustion plants They are provided with M I and CE Approval for EN 161 ADJUSTMENT For models VE 4000B1 see fig 1 Adjustment to the flow Remove the cover from t...

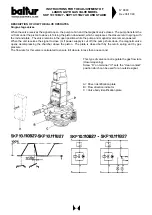
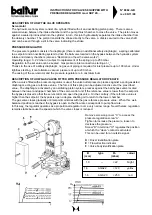
Page 36: ...desired each red ring will rotate with respect to the reference scale The index of the red ring indicates on the respective reference scale the rotation angle taken up for each cam Reference index Camshaft Adjustable cams Maximum air opening end of the run Total air closure burner at a standstill Air ignition opening B Leva di inserzione ed esclusione accoppiamento motore albero camme Position 1 d...

Page 37: ...During the second verification stage this pressure must remain constant Should it drop this means that the burner on the furnace side has a blow by fault when closing Therefore the DW pressure switch operates and the tightness control equipment prevents burner start up and stops in blocked state red pilot lamp lit If second stage verification is positive the LDU 11 equipment closes the internal co...

Page 38: ...rol up to burner operation consent t20 22 5s Return of programmer to rest position fresh verification is enabled AL remote alarm signalling AR main relay with ar contacts AS equipment fuse BR blocking relay with ar contacts DW outer pressure switch tightness control EK unblocking button GP outer pressure switch for mains gas pressure HR auxiliary relay with ar contacts L1 equipment trouble signall...

Page 39: ... tolerated post combustion period The tests will end only at the end of the pre ventilation time of the next start up The validity of working of the flame control circuit is checked each time the burner starts up The fuel valve control contacts are checked for wear during the post ventilation time A built in fuse in the appliance protects the control contacts from any overloads that may occur As r...

Page 40: ...Auxiliary commutation contact for air damper MIN position M Motor fan or burner NTC NTC resistor QRA UV probe R Thermostat or pressure probe RV Fuel valve with continuous regulation S Fuse SA Air damper servomotor SB Safety limiter temperature pressure etc SM Programmer synchronous motor v In the case of servomotor auxiliary contact for consensus for fuel valve depending on air damper position V F...

Page 41: ...4 and consensus at power regulator or at valve on terminal 20 18 t6 Post ventilation time with M2 3 t7 Time between consensus for start up and voltage at terminal 7 start delay for fan motor M2 72 t8 Start up duration without t11 and t12 3 t9 Second safety time for burners that use pilot burners 12 t10 Time from start up to beginning of air pressure control without air damper travel time t11 Air d...

Page 42: ...air damper is in the CLOSED position determined by limit switch z of the air damper servo motor During the probe test and false flame test the flame supervision test is also powered terminals 22 23 and 22 24 Safety standards In association with the use of QRA earthing of terminal 22 is compulsory The power cables must conform to existing national and local standards LFL1 is a safety device and it ...

Page 43: ...ignal was not sent to terminal 8 by limit switch contact a Terminals 6 7 and 15 remain powered until the defect is eliminated P Lock out stop because of lack of air pressure signal Any lack of pressure from this moment onwards will cause a lock out stop Lock out stop because of flame detection circuit malfunction Start up sequence stops because the position signal for low flame was not sent to ter...

Page 44: ...c preheaters It should be noted that the two or more preheaters constitute two or more resistor arrays One array is controlled by circuit Y1 of the controller PID control Proportional Integral Derivative The other ar ray is controlled by circuit Y2 of the controller ON OFF control The two or more preheaters are hydraulically con nected in series The preheater that the fuel first enters must be con...

Page 45: ...itial position In order to proceed with configuration the controller must be fitted to the switchboard and connected to both probe PT 100 and the power supply 230V The display lights up numbers and or letters Press F key repeatedly until obtaining the wording ConF Press 8key twice and the wording PASS will appear at the bottom and 9999 at the top with the last 9 on the right flashing It is necessa...

Page 46: ...confirm and remain at Hy2 12 Press F key in order to move to SPL 1 Proceed as before and set SPL 1 100 C Press 8 to confirm and move to SPL h Set SPL h 250 C in the usual manner Press 8 to confirm and move to SLOP 13 Proceed as before in order to set SLOP 0 and confirm with 8 key The controller is now configured and capable of functioning using set values Should it be necessary to modify any tempe...

Page 47: ......

Page 48: ......

Page 49: ......

Page 50: ......

Page 51: ......

Page 52: ......

Page 53: ......

Page 54: ......

Page 55: ......

Page 56: ......

Page 57: ......

Page 58: ......

Page 59: ......

Page 60: ......

Page 61: ......

Page 62: ......

Page 63: ......

Page 64: ......

Page 65: ......

Page 66: ......

Page 67: ......

Page 68: ......

Page 69: ......

Page 70: ......

Page 71: ......

Page 72: ......

Page 73: ......

Page 74: ......

Page 75: ......

Page 76: ......

Page 77: ......

Page 78: ......

Page 79: ......

Page 80: ......

Page 81: ......

Page 82: ......

Page 83: ......

Page 84: ......

Page 85: ......

Page 86: ......

Page 87: ......

Page 88: ......

Page 89: ......

Page 90: ......

Page 91: ......

Page 92: ......

Page 93: ......

Page 94: ......

Page 95: ......

Page 96: ...R S p A Via Ferrarese 10 44042 CENTO Ferrara ITALIA Tel 051 684 37 11 Fax 051 685 75 27 28 International Tel 39 051 684 37 11 Fax 39 051 683 06 86 http www baltur it http www baltur com E MAIL info baltur it ...

Reviews: