5-10 Applications
MN1917
5.5.6
Opening the example VBA file
It is recommended that the file
VBA.xls
is used to continue the demonstration. The file contains comments to explain
each section of code, together with an error handling routine. All code assumes that the Flex+Drive
II
is connected to
the host PC’s COM1 port. Confirm that the Flex+Drive
II
SW1 DIP switches 1-4 are all in the off position.
Before opening
VBA.xls
, it will be necessary to close the current test file’s windows.
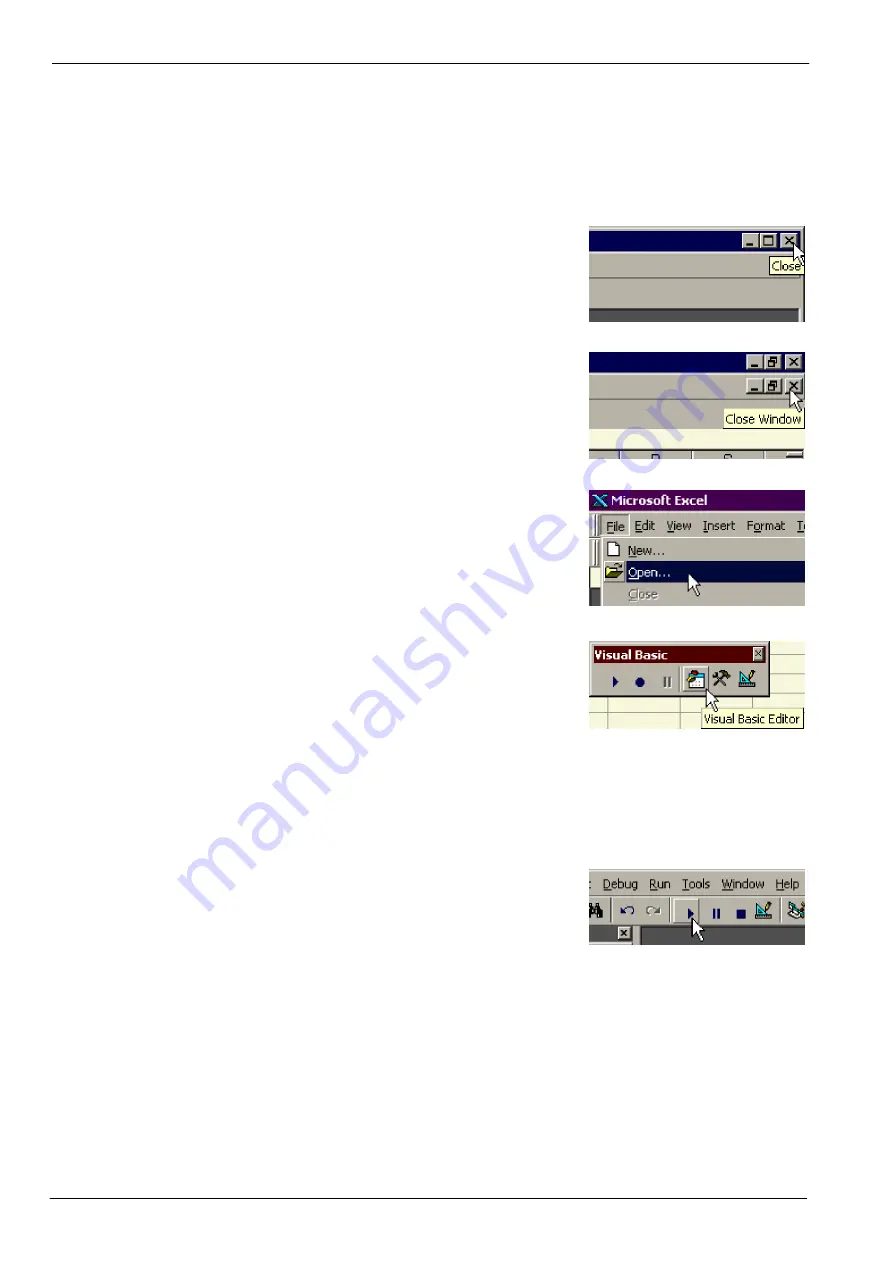
1. Click the Close button at the top of the main Visual
Basic editing window.
This will return the application to the normal
spreadsheet view.
2. Click the Close Window button at the top of the Excel
spreadsheet window.
3. Choose File, Open.
Locate the example file
VBA.xls
and click
Open
.
4. Click the Visual Basic Editor button.
Ensure that UserForm1 is the currently selected
window.
5.5.7
Testing the form
Excel can ‘run’ the form, almost as if it were a separate application. If any errors occur Excel will stop the program
and highlight the error.
1. Click the Run Sub/UserForm button.
The form will now become active.
2. Click the
Init
button.
The Init button’s code will be executed, initializing the Flex+Drive
II
. The other buttons will also become active.
3. Click the
<<
or
>>
button.
The button’s code will be executed, causing the motor to jog in the positive or negative direction.
4. Click the
Stop
button to stop motion.
Summary of Contents for Flex+DriveII
Page 1: ...Flex DriveII Demonstration Unit SERVO DRIVE Operating Manual 03 02 MN1917...
Page 2: ......
Page 6: ...1 2 General Information MN1917...
Page 8: ...2 2 Introduction MN1917...
Page 22: ...4 8 Basic Demonstrations MN1917...
Page 34: ...6 2 Specifications MN1917...
Page 40: ...Index MN1917...
Page 41: ......


