21
21
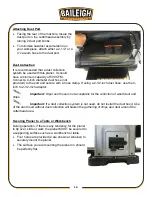
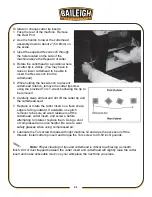
To rotate or change cutter tip inserts:
1. Face the rear of the machine. Remove
the Dust Port.
2. Use the handle to lower the cutterhead
assembly down to about 2” (50.8mm) on
the scale.
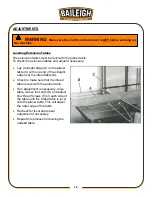
3. Insert the supplied Hex wrench through
the hole located on the side of the
machine above the Repeat Cut slider.
4. Rotate the cutterhead to a position where
a cutter tip is visible. (You may have to
raise or lower cutterhead to be able to
insert the Hex wrench into the
cutterhead)
5. While holding the hex wrench to prevent
cutterhead rotation, remove the cutter tip screw
using the provided Torx T-wrench allowing the tip to
be removed.
6. Carefully clean all dust and dirt off the cutter tip and
the cutterhead seat.
7. Replace or rotate the cutter insert so a fresh sharp
edge is facing outward. If available, use pitch
remover to be sure all wood residue is off the
cutterhead, cutter insert, and screws, before
attempting to rotate or replace them. Using a shot
of compressed air is also helpful. Be sure to wear
safety glasses when using compressed air.
8. Lubricate the Torx screw threads with light machine oil and wipe the excess oil off the
threads. Install cutter tip insert and torque the Torx screw to 48-50 inch/ pounds.
Note: Proper cleaning of tips and cutterhead is critical to achieving a smooth
finish. Dirt or dust trapped between the cutter insert and cutterhead will slightly raise the cutter
insert and make noticeable marks on your workpiece the next time you plane.
Summary of Contents for IP-1306
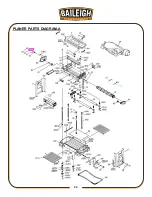
Page 38: ...35 35 PLANER PARTS DIAGRAM A...
Page 43: ...40 40 MOTOR PARTS DIAGRAM B...
Page 47: ...44 44 NOTES...

