www.BabyLock.com
Getting Started | 17
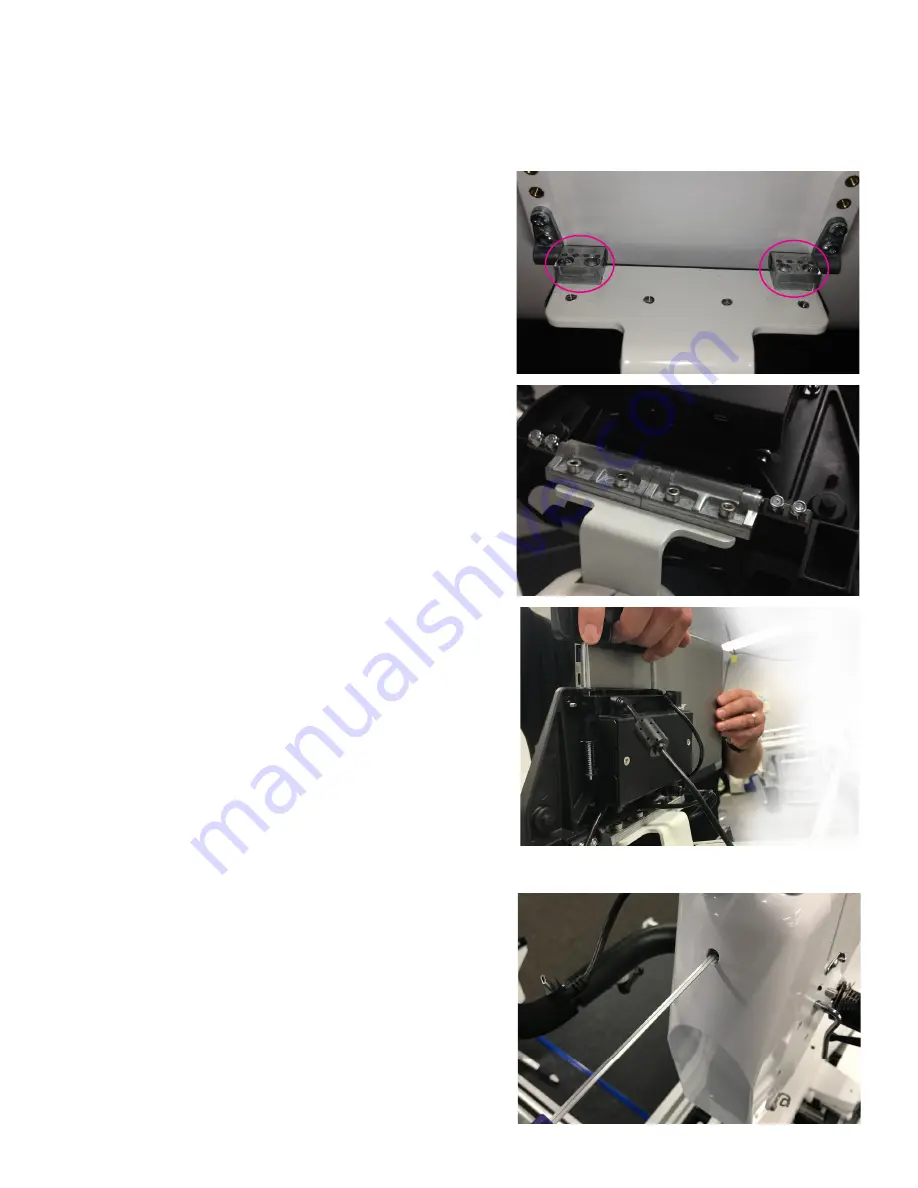
To attach the tablet computer
NOTE
: Steps 1 and 2 are only required if the 7” display is attached to the quilting machine
1. Remove the front display USB cable from the bottom of the display.
2. Using a Phillips head screwdriver, remove the
four small front-hinge screws from the front
display bracket. Set the front display aside in a
secure place.
NOTE
: The display will be useful as a backup,
should the Pro-Stitcher require service.
3. Position the Pro-Stitcher tablet mount with the
black box toward the back of the machine. Place
the four M4x10 screws
(see Parts List, item
R)
through the large hinge and into the front
mounting bracket. Use a 3mm Allen wrench to
tighten the screws firmly.
4. Remove the computer from its packaging.
Determine the top of the tablet. Lift up slightly
on the center of the top bracket and install the
computer into the bracket by sliding it from the
side until it is centered.
Installing the front power cable
1. Remove the screw from the front face cover of the
machine with a 3mm Allen tool and lift the cover
up and out towards the front
Summary of Contents for Regalia BLPS4-RG
Page 1: ...Getting Started Guide for the Regalia Model BLPS4 RG...
Page 26: ......


