Attaching the Embroidery Frame
49
2
— — — — — — — — — — — — — — — — — — — — — — — — — — — — — — — — — — — — — — — — — — — — — — — — — — — —
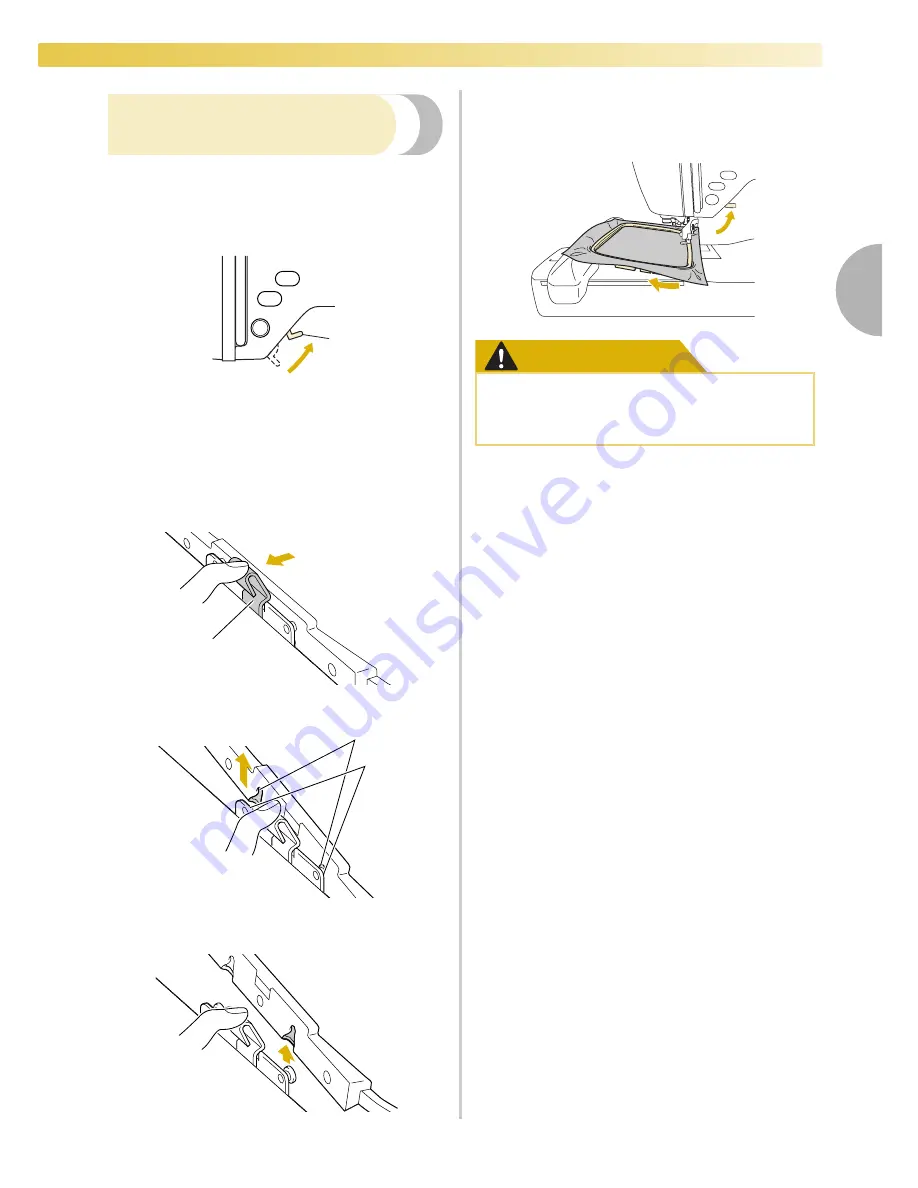
Removing the embroidery
frame
Make sure that the machine is completely stopped
and follow the instructions below.
a
Raise the presser foot lever.
a
Presser foot lever
b
While pushing the lever of the embroidery
frame holder to the left, lift the embroidery
frame up to remove it.
Remove the back mounting bracket from the
pin, and then remove the front mounting
bracket from the pin.
a
Lever
a
Mounting brackets
b
Pins
c
Pass the embroidery frame under the presser
foot while raising the presser foot lever even
further.
CAUTION
a
1
1
2
1
2
3
●
Do not hit the needle with your finger or
the embroidery frame. It may cause injury
or needle breakage.
Summary of Contents for emore BLMR
Page 1: ......
Page 8: ...6...
Page 16: ...14...
Page 42: ...GETTING READY 40...
Page 74: ...72 EMBROIDERY...
Page 91: ......
Page 92: ......


