


10
AZT
POS Desktop Receipt Printer User Guide
AZT
POS Desktop Receipt Printer User Guide 11
• FEED button – Press this button to feed the paper out
of the printer. Hold the button down to activate the
continuous paper feed.
• Power switch – This switch turns the printer on and off.
2.3. Turning the Printer On and Off
Before powering on the printer, ensure the following:
1. The power cord and AC adapter are plugged in to the
printer and the outlet.
To turn the printer on, perform the following:
1. Press the Power switch on
the front of the printer
to the left to turn on the
printer.
2. A blue light will appear
above the POWER label
on the front of the printer
when it is turned on.
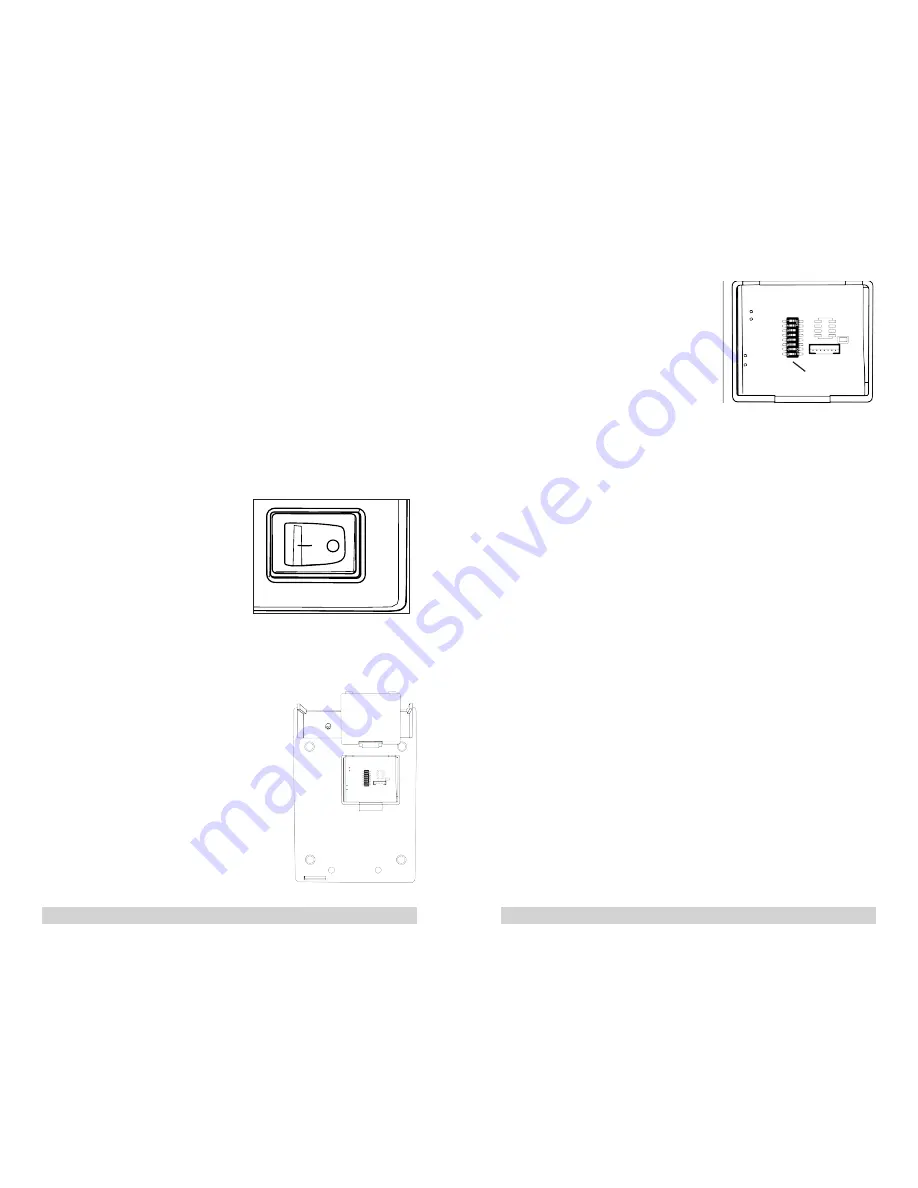
2.4. Accessing the DIP Switches (For Serial
Connections)
To access the DIP switch, perform the
following:
1. Ensure that the printer is powered
off.
2. Turn the printer upside-down to
reveal the bottom panel of the
printer.
3. Press up on the plastic clasp on
the cover to remove the DIP
switch cover.
4. Slide the DIP switches
to your desired settings.
Settings can be found in
section 2.5.1 or on a Self-
Test printout, as explained in
section 2.4.1.
2.4.1. Self-Test Printing
Print a self-test sheet to ensure that the printer head and
cutter are operating properly. To conduct a self-test, perform
the following:
1. Turn off the printer.
2. Hold the FEED button, and then turn on the printer.
After 3 seconds, release the FEED button, the printer will
print a self-test sheet.
2.5. Dip switch settings possible (for Serial
Connections)
Use the DIP switch to adjust the printer settings. The DIP
switch controls can adjust settings that include the following:
• COM port baud rate
• Print mode
• Beeper
• Print density
• Print speed
Power
Error
Feed
DIP Switch
Summary of Contents for AZT-805W
Page 15: ......


