VIDEO VIEWER MISCELLANEOUS CONTROL PANEL
-16-
NO. Function
Description
1
IP Address / Port / User Name / Password
Select the IP address of the desired network camera from the
drop-down list and check if the network information is correct.
2
HDD Number / Channel
Specify the hard disk (HDD Number) and channel number (Channel)
within which have the video data you need.
3
Filter the recorded video by time
Specify the time range within which has the video data you want in the
“Start Time” and “End Time” columns.
4
Filter the recorded video by event
Select an event type from the event list. This list shows all logs in the
specified network storage device from the latest to the earliest.
‧
To quickly find the events you need, check or uncheck the event type
“System” / “Manual” / “Alarm” / “Motion”, and select the log you want.
‧
To view the earlier or later logs that are not shown in the current page,
click “Prev. Page” or “Next Page”.
‧
To refresh the event list, click “Reload”.
5
File Path
Assign the location where the backup files are saved.
6
Simultaneous Playback
To view the backup images simultaneously when the download process
is in progress, select the checkbox “Simultaneous Playback”. You will
see the backup images while the images are being downloaded to the
PC or notebook.
To simply backup images without previewing, deselect the checkbox
“Simultaneous Playback”. You will only see a message box indicating
the total time needed, the current status and the saving location.
7
Download / Cancel
Click “Download” to start or “Cancel” to discard the video backup.
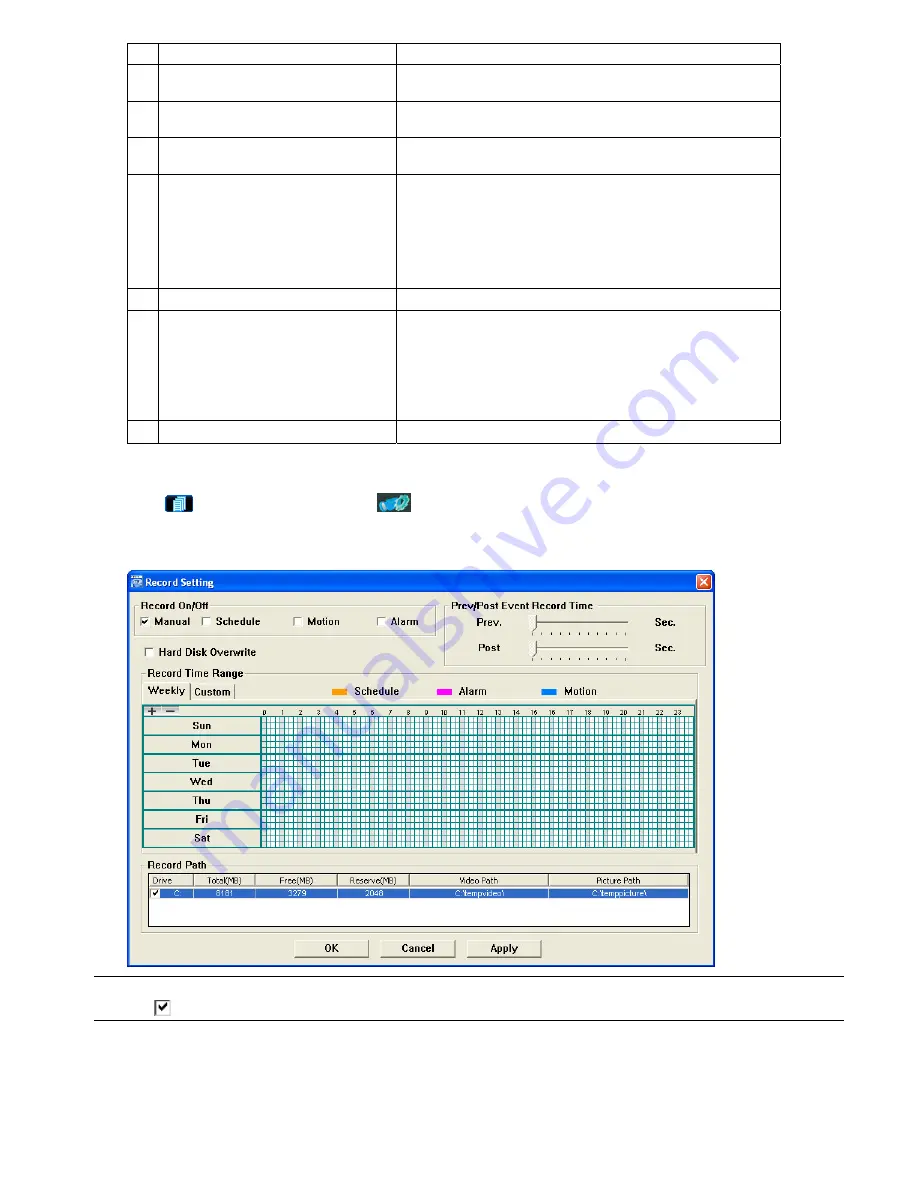
5.3 Record Setting
Click “
” (Miscellaneous Control)
→
“
” (Record Setting) to go into the “Record Setting” page, and you can set
which type of the recording is enabled (Manual / Schedule / Motion / Alarm), and where the recorded data / snapshots
are saved.
Note:
Once all the record settings are finished, please check the “REC” checkbox in the address book panel
“
” to start manual recording. Please refer to “Address Book” on Page 8.
Record On/Off
In this section, you can select which type of the recording will be enabled. There are 4 options: Manual / Schedule /
Motion / Alarm.
Prev / Post Event Record Time
In this section, you can set the pre- / post-event record time from 0 ~ 10 seconds by pressing and dragging the slider.


