


10
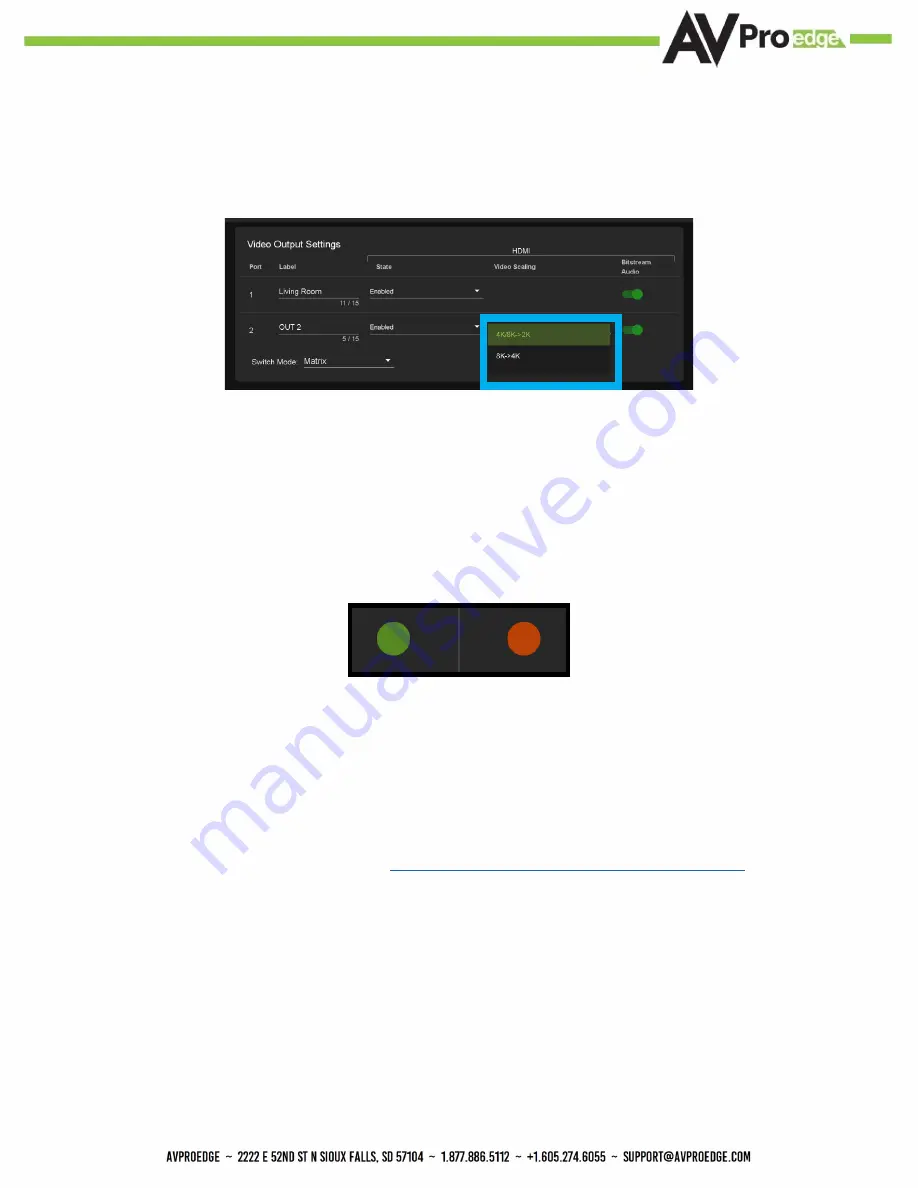
16. Set the HDMI Video Scaling if needed. HDMI OUT 2 has two options for scaling, they are:
·4K/8K->2K This will downscale both 4K and 8K resolutions down to 2K (1080P).
·8k->4k
This will downscale an 8K signal down to 4K
17. With the system and all it’s components powered up it’s time to verify signal path from source to the
sync. For now leave EDID settings to their default 1080P 2CH, the next section Advanced Setup will
cover the more advance settings.
18. Navigate to the Diagnostics Page and use the Signal Present indicator light under HDMI INPUTS
to verify the connection. Green means HDMI source is detected, red means that the source is not
detected. If red verify that the input is powered on and that the HDMI cable is properly connected to
the source and to the back of the matrix.
19. Now verify that the connections to the HDMI outputs. If detected the HDMI OUT tab will display some
of the connected sync’s EDID information like Manufacturer, Preferred Timing, and Deep Color Support.
If these fields are blank verify that the sync devices are powered on and that the HDMI/HD cables are
properly connected to the back of the matrix.
20.
With everything connected and powered on, verified you are getting all of your sources on all of your
displays.
21. Problems with a source or sync, see the
Summary of Contents for AC-MX-42X
Page 1: ...User Manual AC MX 42X 1...
Page 5: ...Specifications 5...
Page 30: ...30...
Page 33: ...33 Command List Baudrate 57600 Checksum None Bit Num 8 Stop Bit 1...
Page 34: ...34 Command List Continued...
Page 36: ...Bandwidth Chart 36...
Page 37: ...37 Bandwidth Chart Continued...
Page 42: ...42...
Page 43: ...43...


