


User’s Manual
3-12
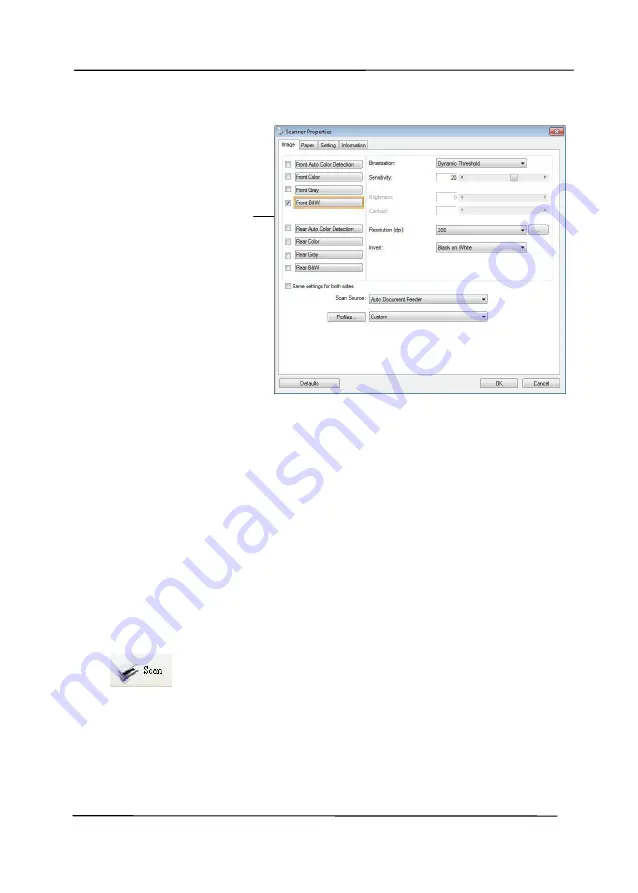
6.
From the Image Selection Box, choose your desired image
type for your scanned image. (Default is Front B&W) If you
have a duplex scanner, choose Front and Rear to scan both
sides of your document.
7.
Click OK to quit the Scanner Properties dialog box. (To learn
more details about the Scanner Properties dialog box, please
see the subsequent chapter,
Using the Scanner Properties
Dialog Box
.)
8.
Place your document face down on the document glass or
face up in the auto document feeder.
9.
In the Scan Validation dialog box, click the Scan button
(
) or choose Scan from the File menu.
10.
The document will be scanned and displayed in the Scan
Validation screen. After the scanned images have been
displayed, your scanner installation verification is completed.
Image
Selection
Box
Summary of Contents for DL-2011B
Page 1: ...Document Scanner User s Manual Regulatory model DL 2011B Avision Inc ...
Page 59: ...User s Manual 4 5 ...
Page 68: ...User s Manual 4 14 Error Diffusion Image Dynamic Threshold Dynamic Threshold AD ...
Page 71: ...User s Manual 4 17 Normal Photo Document Threshold 230 Normal Photo Document Threshold 230 ...
Page 84: ...User s Manual 4 30 The Compression tab dialog box ...
Page 88: ...User s Manual 4 34 The Color Dropout dialog box ...
Page 152: ...User s Manual 7 12 The thumbnail view and file name ...


