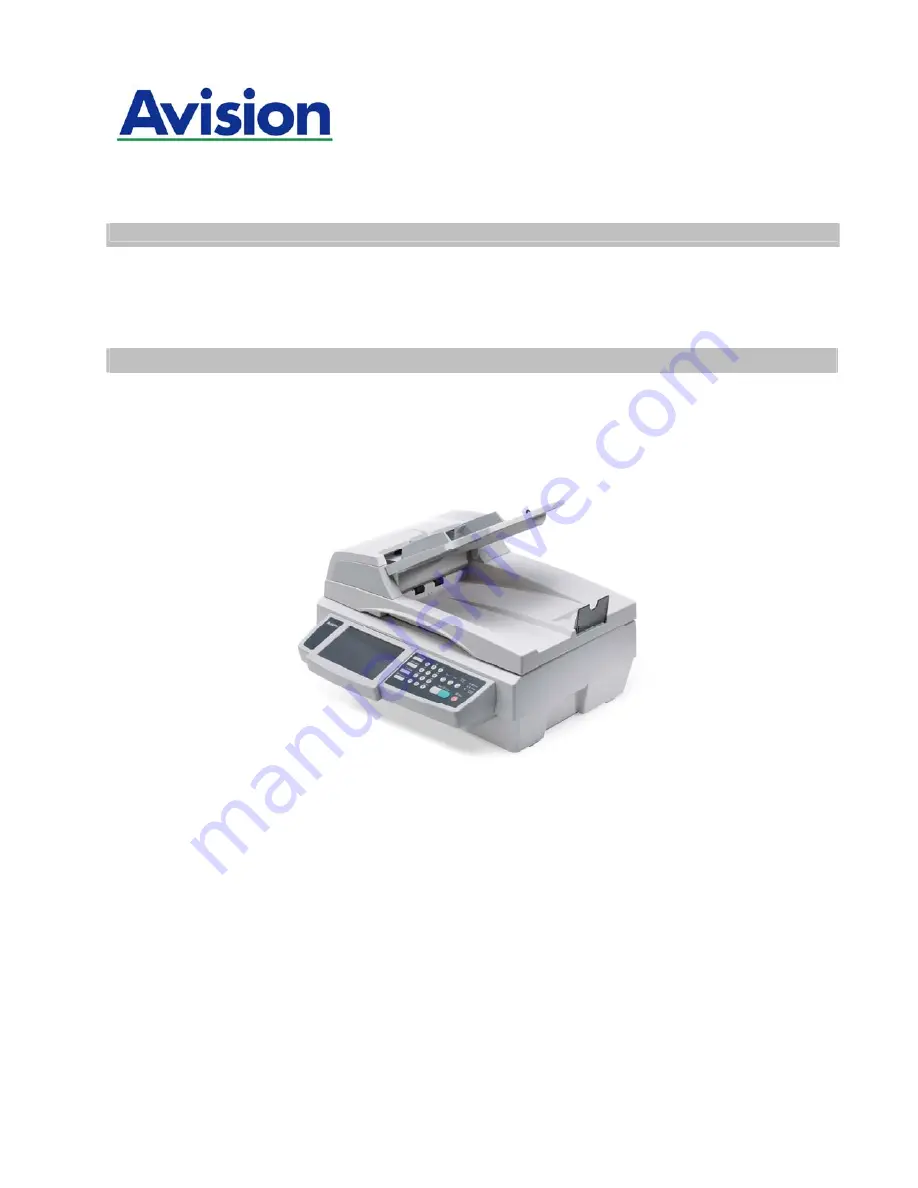
Network Scan Station
User's Manual
Avision Inc.
Regulatory: DL-0906H
Manual-en-250-0638-E-6600v2
Page 1: ...Network Scan Station User s Manual Avision Inc Regulatory DL 0906H Manual en 250 0638 E 6600v2 ...
Page 2: ... property Important Indicates operational requirements and restrictions Please read and follow these instructions to ensure a proper operation and to avoid damage to the machine Note Indicates further explanation or clarification Reading this is highly recommended WARNING To avoid hazardous electric shock or fire do not remove any covers or screws other than those specified in this manual CAUTION ...
Page 3: ...ped with a function that prevents making counterfeit bank bills Due to this images similar to bank bills may not be copied properly Copyrights and Trademarks Ethernet is a registered trademark of Xerox Corporation Microsoft Windows Windows NT Windows XP and Windows Vista are registered trademarks of Microsoft Corporation in the United States and or other countries Other product names used herein a...
Page 4: ...cations However there is no guarantee that interference will not occur in a particular installation If this equipment does cause harmful interference to radio or television reception which can be determined by turning the equipment off and on the user is encouraged to try to correct the interference by one or more of the following measures Reorient or relocate the receiving antenna Increase the se...
Page 5: ... other household waste Instead it should be sent to appropriate facilities for recovery and recycling in an effort to protect human health and the environment Fore more information about where you can drop off your waste equipment for recycling please contact your local city office your household waste disposal service or the shop where you purchased the product ...
Page 6: ...15 Connecting the Power and Turning on the Machine 15 3 Configuring the Machine 16 Specifying the Product s Network Settings 17 Specifying More Administrator Settings by the Product s Web Page 20 Specifying Administrator Settings by the Vision Manager 22 Summary of the Web Pages 24 Specifying A Filing Destination 38 Settings the Servers to Store Your Image 38 Editing a Folder by the Product s Web ...
Page 7: ...the Advanced Features 109 Using Other Tools 117 5 Troubleshooting 118 Clearing a Paper Jam 118 Removing the Abnormal Line On Your Scanned Image 119 Information Message 120 Information Messages During Scanning and Copying 120 Information Messages During Networking 121 Information Messages During E Mailing 122 Information Messages During Filing 124 6 Maintaining Your Machine 128 Cleaning the Glass 1...
Page 8: ...viii Account Management 145 Setting up Account Management By the Product s Web Page 145 Specifications 151 Index 154 ...
Page 9: ... an intuitive control panel and a quality LCD Touch Panel making digital copy becomes fast and easy E mailing Connected to an ethernet network and a SMTP server the product allows you to transmit document s to your e mail as attachment With a touch of the e mail key and the selection of your recipients e mail addresses the document s is are first scanned and converted into an image file and then t...
Page 10: ...ned documents to multiple recipients Using Convenient Shortcuts By assigning your frequently used working modes as shortcut buttons the product allows you to scan your document and send the scanned images to your desired destination seconds Scanning and Saving Your Images to a USB Flash Drive By plugging a USB flash drive into the USB port of the product the product allows you to scan your documen...
Page 11: ...3 External View The Front View 1 Input Paper Tray and Paper Support 5 Control Panel 2 Paper Stopper 6 LCD Touch Panel 3 Document Cover 7 ADF Unit 4 Handle 1 5 2 4 7 3 6 ...
Page 12: ...Power Jack To connect power with a power cable 2 LAN Port To connect network with a network cable 3 Power Switch To turn on and off the machine 4 ADF Port To connect the ADF cable 5 USB Port To plug a USB flash drive 1 2 3 4 5 ...
Page 13: ...ent operation Part B Function Keys Used to select a working mode Function Keys Press to make copy Press to send your scanned document to e mail Press to send your scanned document to a designated server Press to show the Shortcut screen Part A Part B Part C Part D ...
Page 14: ...rrent settings and return to the default settings Press the button for over 5 seconds to return to the factory default settings Select to enter energy saving mode The Power LED Used to indicate power on and ready status The Alarm LED Used to indicate error The Energy Saving LED Used to indicate energy saving status Select to stop processing Select to start copying e mailing or filing in black and ...
Page 15: ... the product properly on your network for e mail and filing function The following network parameters have to be set Important Make a copy of the following table and ask your Network Administrator to complete the information 1 DHCP Enable 2 IP Address 3 Subnet Mask 4 Gateway IP 5 DNS Server 6 WINS Server 7 SMTP Server 8 SMTP Port 25 9 LDAP Server 10 LDAP Port ...
Page 16: ... or by DHCP server 4 Gateway IP The gateway IP address assigned by your network administrator or by DHCP server or by DHCP server 5 DNS server The IP address of DNS server assigned by your network administrator 6 WINS Server The IP address of WINS server assigned by your network administrator 7 SMTP Server The IP address of your SMTP mail server assigned by your network administrator 8 SMTP Port T...
Page 17: ...ually written as four numbers separated by periods Each number can be zero to 255 For example 10 1 30 186 could be an IP address 3 SMTP Stands for Simple Mail Transfer Protocol It is the main communication protocol used to send and receive e mail on the internet 4 DNS Stands for Domain Name System The DNS server identifies hosts via names instead of IP addresses If the DNS server is available on y...
Page 18: ...le page PDF JPEG TIFF or MTIFF Multi page TIFF file format and then transmitted to remote recipients simultaneously as an e mail attachment When you send an e mail to someone via the product the product uses Simple Mail Transfer Protocol SMTP to transfer your outgoing e mails to your SMTP mail server and then send these e mails to your recipients through internet Intranet E mail Server PC PC Inter...
Page 19: ... scanned document directly to a designated server or a personal computer on the network in a standard PDF JPEG TIFF or MTIFF file format CIFS is the sharing system of Microsoft Windows What s unique about this filing function is to let entire corporate users share one machine to send documents to each desired file folder on a designated server or individual computer Intranet FTP HTTP HTTPS servers...
Page 20: ...re installing the machine Minimum Configuration Requirements To make the best use of the product the following configuration is required To send e mails from the product TCP IP network A SMTP server To file document s via intranet FTP FTPS HTTP HTTPS or CIFS protocol environment Windows 98SE Windows NT Windows 2000 Windows Me Windows XP Windows Vista HTTP or FTP server To make copies A network pri...
Page 21: ...sition Note If you need to move the product for repair or any other reason be sure to lock the product before moving To lock the product please do the following 1 Turn off the product 2 If the scan unit is not located at the front of the glass turn on the product After the scan unit returns to the front end turn off the product 3 Move the lock switch to the Locked Position Locked Position Unlocked...
Page 22: ...les Connecting the Ethernet Cables Connecting to the Network 1 Connect one end of your Ethernet LAN cable to an available port of your Ethernet Hub 2 Connect the other end to the LAN port at the back of the product LAN Port ...
Page 23: ...indicated Connecting the Power and Turning on the Machine 1 Connect one end of the power cable to the Power jack of the product 2 Connect the other end to an appropriate power outlet 3 Press the power switch to the position to turn on the product After showing the booting up message the LCD Touch Panel prompts the preset ready status ADF Port Power Jack ...
Page 24: ...etwork Management Tool the Vision Manager provided in the supplied Scanner Driver CD ROM The product s embedded web page Web Image Monitor allows the administrator to configure each machine remotely with a web browser while the Network Management Tool allows the administrator to update the product and manage several MFPs on the network For more information on how to use the product s network manag...
Page 25: ...led Shortcut screen is prompted on the touch panel as shown below 2 Touch the Login icon to pop up the administrator Login screen since you need the administrator privilege to make initial setup Enter your login name and password respectively in the Login Name and Password fields via the soft keyboard and then touch OK ...
Page 26: ...18 3 Press the Menu button on the control panel This prompts the following Menu screen 4 Touch Network Settings to prompt the following Network Settings screen 5 Touch IP to prompt the following screen ...
Page 27: ...ring up the soft keyboard and then enter the relevant values Of course you don t need to specify the first three settings if you enable DHCP by touching the ON button under the DHCP Enable label 7 Touch Return to return to the Network Settings screen after entering your information 8 In the Network Settings screen press OK to return to the Menu screen ...
Page 28: ...dded web page to allow the system administrator to remotely manage the product Simply type the IP address of the product in the URL field of your browser and then press Enter The product s embedded web page with limited options appears as shown below 3 Click Login since the Configuration Account Management Address Book Manager Folder Manager Shortcut and Clear All are blocked by login name and pas...
Page 29: ...ministrator s login name and password later 9 Please note that some of the settings in the Menu can also be set by users while they are making copies sending individual mails or sending individual files to folder when they press the Copy E mail or Folder button on the control panel However if the users fail to set these settings then the default settings will be automatically applied to the copier...
Page 30: ...plete the installation 3 Start Vision Manager by choosing Start All Programs Vision Manager Vision Manager 4 In a second the Vision Manager main screen appears as follows 5 Choose New Device from the File menu to prompt the following New Device dialog box Or you may click the new device tool from the toolbar Or double click the large new device icon 6 Enter the IP address of your device as illustr...
Page 31: ... following ways to prompt the product s embedded web page to specify your desired settings Select the device s icon and choose the Menu Settings tool in the toolbar Select the device s icon and click your right mouse button and choose Menu Note For more information on how to use the Vision Manager please refer to the online help of the Vision Manager ...
Page 32: ...mber Displays the product s serial number System F W Version Displays the system s firmware version Scanner F W Version Displays the scanner s firmware version DSP F W Version Displays the DSP s firmware version Home Page Version Displays the home page s version Page Count Displays the counters for B W PC Scan Color PC Scan B W Email Color Email B W Filing Color Filing B W Copy Color Copy Scan Tot...
Page 33: ...dress The Internet Protocol IP address assigned to your machine by your network administrator Subnet Mask The net mask address assigned by your network administrator Gateway IP The gateway IP address assigned by your network administrator DNS Server The Domain Name Server assigned by your network administrator WINS Server The WINS Windows Internet Naming Service assigned by your network administra...
Page 34: ... None SMTP POP3 Login Name Enter the login name for SMTP or POP3 authentication Password Enter the password for SMTP or POP3 authentication External Address Book LDAP Server IP or URL Enter your LDAP server IP or URL address here SSL Enable Enable or disable SSL Choice ON OFF Login Name Enter the login name of the LDAP server Note 1 In Microsoft Active Directory some servers may require you to add...
Page 35: ...e 1 The login name and password are case sensitive and are up to 28 characters 2 LDAP Search y This machine supports two types of authentication simple and anonymous to login your LDAP servers y This machine allows up to 100 match results in a single search y The attributes such as cn and mail have been predefined as the search field Therefore if your search text is m the LDAP search engine will s...
Page 36: ... Enter your base DN Base DN distinguished name identifies the starting point of a search A dn indicates what record to view in an LDAP tree The top level of the LDAP directory tree is the base referred to as the base DN For example you could indicate a base of dc com dc net for a search that starts at the top and proceeds downward Login Name Enter the login name Password Enter the password Factory...
Page 37: ...e purpose to set file separation is to avoid the file size limitation of SMTP servers Use the combo box to select from the list Choice 5MB 10M 30MB Unlimited Default Scan Options Item Description Color File Format Choose the file format for your scanned image Choice includes JPEG PDF S PDF Note Choose PDF when you need to scan multi page document and convert it to a single image file S PDF file fo...
Page 38: ...00 400 600 dpi File Format Choose the file format for your scanned image Choice includes MTIFF TIFF PDF S PDF JPEG Compression Level Low Medium High G4 G3 Raw If you choose Grayscale the file formats include JPEG PDF and S PDF If you choose Monochrome the file formats include S PDF PDF TIFF and MTIFF and the compression Level of MTIFF or TIFF includes G4 only Paper Size Choose your original paper ...
Page 39: ... field File Name The file name for your scanned document without extension Using Y M D h m s n makes file name change as time goes Y M D h m s and n represent year month date hour minute second and series number respectively For example type file name test D n will bring your filing file name as test0500001 Color File Format Choose the file format for your scanned image Choice includes JPEG PDF S ...
Page 40: ...mat for your scanned image Choice includes MTIFF TIFF PDF S PDF JPEG Compression Level Low Medium High G4 G3 Raw Raw is an available option in TIFF or MTIFF format If you choose Monochrome the file formats include S PDF PDF TIFF and MTIFF and the compression Level of MTIFF or TIFF includes Raw G3 and G4 Report to E mail Enter an e mail address if you wish to send the filing report to the e mail Pa...
Page 41: ... are allowed and is case sensitive Password Enter the password to access the User Tools Up to 8 characters or digits are allowed and is case sensitive E mail Address Enter the e mail address of the administrator of the product so that system can send the error or warning message Up to 64 characters or digits are allowed and is case sensitive Remove Activity Report Specify when to remove the activi...
Page 42: ...34 Language Choose the language you wish to show in the LCD Touch Panel Choice English Chinese Factory Default ...
Page 43: ...le List Public Folder If you choose the Public Folder to save your scanned image by following the steps of the Sending Your Document to Filing Servers section you can download the files in the Public Folder inside the product memory via the File List of the web pages File List Item Description File Name Show all the scanned image files in the Public Folder Date Time Show the date time when the sca...
Page 44: ... to set CIFS URL Port Enter the port number for the server which you want to store your scanned document Default value FTP 21 HTTP 80 CIFS 139 HTTPS 443 FTPS 990 If the default value is different from the real case input the correct port number in this field Touch anywhere on the Port field to bring up the soft keyboard to enter the text Login Name Enter the login name to access the folder Passwor...
Page 45: ...yscale if you wish to make gray copies or Monochrome to make a B W single bit copies Resolution Choose scanning resolution for your scanned document The higher the resolution the greater details for the scanned image yet it requires more disk space Choice 150 200 300 400 600 dpi File Format Choose the file format for your scanned image Choice includes MTIFF TIFF PDF S PDF JPEG Compression Level Lo...
Page 46: ...ses RFC 2616 HTTP 1 1 as the protocol and the default port is usually 80 If you are not using the HTTP port to save the files you must change the HTTP Port of the product to the port for the Web Server Generally speaking Web Server such as IIS or the other HTTP server will use anonymous account for authentication so that the user can link directly to the web page without entering the user name and...
Page 47: ...uct to save files in addition to making some settings in Web Server you will have to confirm the account with the privilege of writing for connecting Web Server otherwise the product will not be able to write the scanned file in the file system The following uses the IIS setting for anonymous access to Microsoft Windows 2000 as an example and assumes the HTP application is installed in the root di...
Page 48: ...d Authentication Control Please make sure Anonymous Access is selected in Authentication Methods dialog box 3 Click on Edit to Open Account for anonymous access Please make sure that the account stored in your computer system in the username filed is with sufficient privilege to access the file system ...
Page 49: ...ccount is with sufficient privilege You may make the following settings 1 Select C Inetpub wwwroot Xcabinet directory in Windows Explorer and right click to select Properties 2 Select Security tab in the File dialog box and select Everyone Select the privileges for Read and Execute Folder Properties List Read and Write After that every user has the privilege to manage all files in the directory of...
Page 50: ...rivacy HTTPS solves this problem by adding SSL a secure transport layer over insecure TCP To send scanned document to servers using HTTPS you must install SSL on the destination servers How to install SSL properly on the server please refer to the server s manual After SSL has been installed well please check if the SSL port is editable and the directory security has been selected The following il...
Page 51: ...ure communication field The Secure Communication dialog appears 4 Check if Require secure channel SSL and Ignore client certificates have been selected Or You may simply type netstat in a MS DOS command If the https has been established as below then the server is ready to receive scanned document from the product via HTTPS ...
Page 52: ...red directory per the network settings for sharing in MS Windows Generally on the shared directory Properties dialog box under the Windows XP select Sharing tab and select Share this folder Click Permissions button to open Permissions for the shared directory dialog box Check the Full Control to have full privileges of the shared directory Check Full Control ...
Page 53: ...o set the HTTP PUT Method for IIS7 X 1 For security it is recommended to add a new group which allows editing the root directory and also add the user name and password to login the server 2 Start IIS Manager by clicking the Start menu and then choose Administrative Tools Internet Information Services IIS Manage Choose Sites Default Web Site and then double click Authentication ...
Page 54: ...46 3 Enable Basic Authentication and Windows Authentication 4 Double click Authorization 5 Make sure all users are allowed ...
Page 55: ... is embedded in Windows 7 and Windows Server 2008 R2 You can install WebDAV 7 5 in Programs and Features Windows 7 or Server Manager Windows Server 2008 z Windows Vista or Windows Server 2008 Please download WebDAV 7 5 from Microsoft s web site or use Web Platform Installer 2 0 to install WebDAV 7 5 ...
Page 56: ...alled it can be found in the IIS Manager 8 As the WebDAV feature has been disable by default please enable it by double clicking WebDAV Authoring Rules and select Enable WebDAV on the right panel 9 Select Add Authoring Rule on the right panel ...
Page 57: ...uthoring Rule dialog box choose All Content All users and make sure the Read Source and Write have all been selected 11 Select Site Default Web Site and then the Edit Permissions from the Action option in the right panel ...
Page 58: ...50 12 Add previously set new group such as Admin and allow the privilege of modification 13 Press OK to complete the IIS setting ...
Page 59: ...HTTP server it is necessary to create a html file in a specified folder of the HTTP server Refer to Default Document to name the html file For example you can name it from a list of Default htm Default asp index htm index html iisstart htm or default aspx as indicated below ...
Page 60: ... 1 Start IIS Manager by clicking the Start menu and then choose Administrative Tools Internet Information Services IIS Manager Choose the entire web site and then double click Server Certificates 2 Double click Create Self Signed Certificate from the Actions option on the right panel ...
Page 61: ... For example HTTPS Put Method 4 Start IIS Manager by clicking the Start menu and then choose Administrative Tools Internet Information Services IIS Manage Choose Site Default Web Site and then click Bindings from the Actions option on the right panel ...
Page 62: ...te Bindings by clicking the Add button and then choose https and HPPTS PUT Method from SSL Certificate 6 Start IIS Manager on the Control Panel and choose Sites Default Web Site and then double click SSL Settings ...
Page 63: ...55 7 Do not select Require SSL and select Ignore on Client certificates 8 This will complete the HTTPS PUT Method settings for uploading files to HTTPS servers ...
Page 64: ...HTTP server it is necessary to create a html file in a specified folder of the HTTP server Refer to Default Document to name the html file For example you can name it from a list of Default htm Default asp index htm index html iisstart htm or default aspx as indicated below ...
Page 65: ...folder 1 Type the IP address of the product in the URL field of your browser and then press Enter The product s embedded web page with limited options appears as shown below 2 Click Login since the Configuration Account Management Address Book Manager Folder Manager Shortcut and Clear All are blocked by login name and password You will be prompted to enter a login name and password ...
Page 66: ... Login since the machine is shipped with no specific login name and password and then the web page will be automatically updated to contain full options 4 Click Filing Manager to prompt the Filing Manager screen ...
Page 67: ...y to scroll through all folders in the folder list 6 Enter your folder information respectively For simplicity suppose you want to use the same settings as in the Filing Default 7 Click Add to temporarily save the latest data and return to the main screen Your new folder name will be displayed in the main screen Click Update to permanently save all the latest change or Exit to leave without saving...
Page 68: ...om the previous section Editing a Folder by the Product s Web page 2 Choose a folder you wish to edit from the folder list and click Modify to prompt the following Modify Folder screen Or you may double click the folder to prompt the Modify Folder screen ...
Page 69: ...to temporarily save the latest data or Cancel to exit and then return to the Filing Manager screen 4 In the Filing Manager screen click Update to permanently save all the latest changes on the product or Exit to leave without saving any latest change ...
Page 70: ... 2 Choose the folder you wish to delete in the Filing Manager screen 3 Click Delete to erase the folder A warning message appears to confirm your deletion Click OK to confirm or Cancel to exit 4 Click Update to permanently save all the latest changes on the product or Exit to leave without saving any latest changes ...
Page 71: ... your favorable settings Before using the shortcut buttons you need to first create the shortcut buttons via the product s web page or on the LCD Touch Panel To create a new shortcut on the LCD Touch Panel 1 Press the Shortcut button on the control panel The following Shortcut screen appears 2 Press the Login icon to enter the administrator s login name and password 3 When login is successful the ...
Page 72: ...Enter your desired settings on the E mail main screen 6 If all settings have been set satisfactory touch the Save as Shortcut button to invoke the Save as Shortcut screen 7 Enter your desired shortcut name in the box of Shortcut Name for example e mail and then touch the OK button to complete 8 On the Shortcut screen a new Shortcut button is added Up to eight Shortcut buttons can be created ...
Page 73: ...For example http 10 1 30 83 The product s embedded web page with limited options appears as shown below 3 Click Login and you will be prompted to enter a login name and password 4 Click Login since the machine is shipped with no specific login name and password and the web page will be automatically updated to contain full options 5 Click ShortCut to prompt the Shortcut screen You can assign your ...
Page 74: ...de will be displayed 8 Enter name memo and e mail addresses in the To CC or BCC box if necessary 9 Enter your subject and specify your desired paper size and ADF scan mode if necessary 10 Click the E mail Options or the Scan Options tab if you wish to define more settings for your Shortcut button 1 11 If all settings have been set satisfactory click Update to permanently save the settings or Cance...
Page 75: ... assigned To edit your current shortcut button simply click the button number and make your changes and click Update to save your changes To delete your current shortcut button click the button number and choose your working mode to be Undefined ...
Page 76: ...ogin name and password 2 If login is successful a Delete Shortcut button will appear on the screen as shown in below 3 Touch the Shortcut button you wish to delete The selected button will be highlighted 4 Touch the Delete Shortcut button A Confirmation dialog box appears 5 Touch the OK button to delete your selected Shortcut button ...
Page 77: ... s web page appears click Login to enter the administrator s user name and password and click OK 3 If login is successful click the Shortcut item to prompt the Shortcut page 4 Choose the Shortcut button which you wish to delete and choose your working mode to be Undefined 5 A Warning message appears Choose OK and the selected Shortcut button is deleted ...
Page 78: ...ADF or on the glass 2 Press or on the control panel 3 If you are pressing enter an e mail address or select one address from the address book If you are pressing choose your desired folder to save your image 4 Press Black White or Color button to start scanning and send the scanned document to your printer e mail address or filing server The following sections describe the advanced steps on how to...
Page 79: ...se make sure that your paper meets the following specifications Document s can range in size from 5 8 by 8 3 inches to 8 5 by 14 inches Document s can range in weight from 13 to 32 lbs 49 120 g m2 Document s should be square or rectangular and in good condition not fragile or worn Document s should be free of curl wrinkle tears wet ink or punch holes Document s should be free of staples paper clip...
Page 80: ...ips and is not tore out 2 If you have multiple pages fan your document s to avoid occasional paper jam 3 Place your document s with the text FACE UP in the ADF and make sure that the top of each page feeds in first 4 Adjust the Paper Guides to center the document s in the ADF Paper Guide ...
Page 81: ...per Stopper If you are using legal size paper pull the paper stopper to its upright position as shown below The paper stopper is designed to keep your document from falling to the floor during operation Paper Stopper ...
Page 82: ...Glass 1 Open the document s cover to reveal the glass 2 Place your document with the text FACE DOWN on the glass and align the document in the upper left corner 3 Close the document cover Document Cover Document with Text Face Down ...
Page 83: ...the Shortcut button on the control panel The LCD Touch Panel shows the following Shortcut screen 2 Select your desired Shortcut button 3 Press Black White or Color button to start scanning and send the scanned document to your printer e mail address or filing server ...
Page 84: ...s been connected to the network and that the power of the printer has been turned on FIRST Otherwise the copy function may not work properly Using the Default Settings 1 Place your document s with text FACE UP in the ADF or FACE DOWN on the glass 2 Press the Copy button on the control panel to prompt the Copy main screen ...
Page 85: ...ng box and then touch the Search button to list all printers that have similar names and then select and add your desired printer Or type a printer s URL path in the Assign URL box and touch the Add button to add the printer 5 Press the B W Start or Color Start button on the control panel to copy your document s ...
Page 86: ...a printer touch and select a printer in the printer list and then touch the Print Test Page button to print the test page 6 If you need to delete a printer in the printer list touch and select a printer in the printer list and then touch the Delete Printer button A warning dialog box will confirm whether to delete the selected printer Click OK to delete the selected printer or Cancel to return to ...
Page 87: ...t sequence Otherwise the colors may not look correct on your color copies Delete Printer Touch a printer in the printer list and then touch the Delete Printer button to delete the selected printer LDAP Setting Set up all the LDAP settings LDAP Server IP or URL Enter your LDAP server IP or URL address here Port Enter the port number of the LDAP server Login Name Enter the login name of the LDAP ser...
Page 88: ...ou can delete and rescan that page Uncheck this item to disable this function The Preview Screen Paper Tray Sets which paper tray will be used for current Copy job Choice Auto Select paper tray automatically Tray 1 MP Multi purpose Tray Please confirm if the paper size of the scanner s LCD has changed when you change the paper size of the printer Paper Size Choose your original paper size Choice A...
Page 89: ...ided 1 to 2 Sided 2 to 2 Sided 2 to 1 Sided 1 to 1 Sided Copy single sided originals onto one side of one sheet of paper 1 to 2 Sided Copy single sided original onto two sides of one sheet of paper 2 to 1 Sided Copy double sided original onto one side of one sheet of paper 2 to 2 Sided Copy double sided original onto two sides of one sheet of paper 1 to 1 Sided 1 to 2 Sided 2 to 1 Sided 2 to 2 Sid...
Page 90: ...nding to long edge binding Long Edge to Short Edge Turn your documents from long edge binding to short edge binding Short Edge to Long Edge Turn your documents from short edge binding to long edge binding Short Edge to Short Edge Turn your documents from short edge binding to short edge binding Note The selection of orientation varies depending on type of duplex printing Duplex Type Availability o...
Page 91: ...gs as your stamp please enter text in this option for your scanned document Note In the Stamp field there is a small Soft Keyboard icon shown at the upper right corner Touch anywhere on the Stamp field to bring up the soft keyboard to enter your stamp characters Factory Default ...
Page 92: ...d to type your email address Press Enter to type the 2nd e mail address and then click Return to return to the E mail main screen You may also touch the Address Book button to bring up the address book and then select from the list You can also select multiple addresses at one time You can delete the E mail address by touching the Delete button after you input your email address 4 Press the B W bu...
Page 93: ...Enter or select CC and BCC address as well if necessary Enter the subject of your e mail via the soft keyboard If not the Default Subject will be displayed in recipients e mail message 5 On the Basic screen check if the original size or ADF scan mode meets your requirement If not change the settings to suit your needs 6 Press the E mail Options tab to prompt the E mail Options screen Enter the fil...
Page 94: ...ble sided document which is bound along the long edge of paper choose Duplex Long to scan your document in the front and the rear side Duplex Short If your original is a double sided document which is bound along the short edge of paper choose Duplex Short to scan your document in the front and the rear side Enable Preview Check Enable Preview if you wish to display the reduced size of your scanne...
Page 95: ...rator has not set the device s email account in the Mail Server settings you can enter the email address here This is the From address in your e mail when you receive an email from the product Reply To Enter a Reply to address if you wish to specify a reply address which is different from the From address Up to 60 characters can be entered in the field To enter the address you may press anywhere o...
Page 96: ...e Compression Level Choose the compression level for your scanned image Choice Low Medium High Resolution Choose scanning resolution for your scanned document The higher the resolution the greater details for the scanned image yet it requires more disk space Choice 150 200 300 400 600 dpi Note If you are scanning duplex two sided paper in color mode the max resolution is 400 dpi Black White Choose...
Page 97: ...on 9 The machine allows you to send the scanned document s to multiple e mail addresses After finishing entering your first e mail address simply press Enter to type your next address in the next line 9 Up to 64 characters can be entered in the File Name of Attachment To From Reply to Subject and the Text fields 9 If you wish to scan a multi page document and convert it to a single image file choo...
Page 98: ...d for example the following Subject field on the E mail screen touch anywhere on the blank field to bring up the soft keyboard 2 To enter small letters or other characters press the A Switch button to bring up the small letter keyboard or the 1 Switch button to bring up the special letter keyboard 3 To return to the E mail main screen press the Return button The blank field Soft keyboard icon A Sw...
Page 99: ... mail address or group The selected one will be highlighted You may touch another address or group for multiple selections 3 Touch OK to return to the E mail main screen Note 9 E mail address group includes many E mail addresses A group mark will be shown in the email list under the Address column to indicate it is an E mail address group instead of a single E mail address ...
Page 100: ...your search type in the Search box Public means to search the addresses from current Address Book of the product LDAP means to search the addresses from an external address book on a LDAP server 2 Enter your search string via the soft keyboard 3 Touch the G0 button to start searching ...
Page 101: ...n the CF card with the product s web site A folder contains a list of parameters such as your filing protocol directory file name and other scanning parameters On how to set up a new folder please refer to the preceding section Adding a New Folder By the Product s Web page in the previous chapter Basic Operation Using the Default Settings 1 Place your document s with text FACE UP in the ADF or FAC...
Page 102: ...or button to send your document s in color Important If you choose to send your scanned images to a public folder a Pin Number dialog box will be prompted after pressing the B W button Type your desired pin number and file name and then press the Go button The document will be scanned and sent to the public folder Pin number is used to manage and download the image files in the public folder with ...
Page 103: ... size or ADF scan mode meets your requirement If not change the settings to suit your needs 3 Touch the Folder Configuration tab to prompt the Folder Configuration screen If you are a registered user with a different login name displayed on the Folder Configuration screen please enter your own login name and password and the e mail address to send the filing report 4 Touch the Scan Options tab to ...
Page 104: ...er choose Duplex Long to scan your document in the front and the rear side Duplex Short If your original is a double sided document which is bound along the short edge of paper choose Duplex Short to scan your document in the front and the rear side Enable Preview Check Enable Preview if you wish to display the reduced size of your scanned document before distributing them to the network The previ...
Page 105: ... Setting this option back to Standard means using the default settings of the Color and Black White which are described in the following rows of this table Choice Standard Custom Color Space Choose the scanning color space Choice sRGB Color File Format Choose the file format for your scanned image Choice includes JPEG PDF S PDF TIFF MTIFF Note Choose PDF when you need to scan multi page document a...
Page 106: ... 400 600 dpi File Format Choose the file format for your scanned image Choice includes MTIFF TIFF PDF S PDF JPEG Compression Level Low Medium High G4 G3 Raw Raw option is available for Gray image in TIFF or MTIFF format only If you choose Monochrome the file formats include S PDF PDF TIFF and MTIFF and the compression Level of MTIFF or TIFF includes G4 G3 and Raw Remove Blank Page Choose if you wi...
Page 107: ...the scanned images by the product s web page Follow these steps to download the files 1 Type the product s IP address on the URL address and then press Enter the following web page appears For example http 10 1 21 121 2 Click Log in Enter your login name and password and then press Log in The following screen appears ...
Page 108: ...and all the image files will be displayed as follows 5 Press Download on the row of your desired scanned image The file will be stored in your desired folder Note 1 The files stored in the public folder are actually stored in the CF card of the machine These files are active while turning off and then on the machine within 24 hours After 24 hours all the files will be deleted automatically 2 Only ...
Page 109: ...he relevant value and then finally touch the B W Start or Color Start button to start sending your document Note After sending the scanned document to your target server the new folder will not be automatically added to the folder list in the Folder main screen On how to add a new folder to the folder list in the Folder main screen please refer to the preceding section Adding a New Folder By the P...
Page 110: ... Default value FTP 21 HTTP 80 CIFS 139 HTTPS 443 If the default value is different from the real case input the correct port number in this field Touch anywhere on the Port field to bring up the soft keyboard to enter the text Paper Size Choose your original paper size Choice A4 Letter A5 B5 Legal Note The Legal option is available from the ADF only ADF Scan Mode Choice Simplex Duplex Long Duplex ...
Page 111: ...lows you to scan via a TWAIN user interface or a WIA interface Start your TWAIN compatible image editing software application to select a TWAIN or WIA user interface Or you might launch Microsoft s Scanner and Camera Wizard to scan via WIA user interface Installation procedures are as follows 1 Connect the power cable and turn on your product 2 Start Microsoft Windows 3 Insert the supplied CD ROM ...
Page 112: ...rs 4 Select the model name of your product The following dialog box appears 5 Type the IP address of the machine and then click the OK button The TWAIN user interface will be prompted 6 Select the scanning method you want to use on the Scan Method drop down menu 7 Select the mode you want to use for your scans on the Image Type drop down menu 8 Select a scanning resolution on the Resolution drop d...
Page 113: ... Contrast Adjust the contrast level from 100 to 100 6 Further Tools Descreen Sharpen Color Adjustment Auto Level Advanced Settings From left to right 7 Invert Reverse the color of your scanned image 8 Mirror Function Flap your image 9 Preview Auto Area Resize your scanned area 10 Paper Size Select your paper size from Card 4 x2 5 Photo 5 x3 5 Photo 3 5 x5 Photo 4 x6 Photo 6 x4 A5 B5 A4 Letter Lega...
Page 114: ...t this setting if you wish to scan duplex double sided document from the automatic document feeder Selecting a Proper Image Type Black White Choose B W if your original contains only B W text pencil or ink sketch Halftone Halftones are reproduction of image that gives the illusion gray An example of halftone imaged would be the pictures you see in newspapers 8 bit Gray 8 bit Gray images contain ac...
Page 115: ...e bigger the different grayscale Enlarging Previewed Image Enlarge your previewed image to the max of the preview window Note this function only enlarging your preview image This does not enlarge your real image Inverting and Selecting Your Image The invert command reverses the brightness and the color in the image For color images each pixel will be changed into its complementary color at the com...
Page 116: ...een After Descreen Before Sharpen After Sharpen Moire pattern An undesirable pattern in a color printing resulting from incorrect screen angle of overprinting halftone Color Adjustment Adjusts the color quality of the image so that it comes close to the original This function uses default parameters to adjust the image Normal After Color Matching ...
Page 117: ...mize your image Normal After Auto Level Using the Advanced Features The Switch button 1 Click the button to pop up the advanced settings bar at the right side The advanced settings include Highlight Shadow Hue Saturation Lightness Curve Color Balance Color Drop out 2 The Advanced Settings bar 1 2 ...
Page 118: ...r allows you to extend the range of color and reveal more details in a gray or color image 1 Shadow The darkest point of an image 2 Gamma The midtones of the image 3 Highlight The lightest point of an image 4 Pointer Move the pointer to change the value When the value of gamma changes the image changes accordingly Gamma Value 1 0 Gamma Value 1 4 Gamma Value 2 0 1 2 3 4 ...
Page 119: ...ighlight 255 Shadow 0 Normal Highlight 210 Shadow 10 Highlight 200 Shadow 0 Highlight 255 Shadow 50 Adjusting the Brightness Curve Adjusts the midtones of the image without dramatically altering then lightest and the darkest areas Adjust the curve to make a brighter or darker image ...
Page 120: ...r will be changed simultaneously when the hue adjustment is made 2 Saturation Move the triangle to the right to increase the saturation level or to the left to decrease the level The level of saturation decides if the color is pale or rich 3 Lightness Increase the lightness by moving the triangle to the right or to the left to decrease the lightness 1 2 3 Move the Saturation pointer to the right t...
Page 121: ...ng Color Balance The Color Balance allows you to obtain an optimal image quality Move the pointer toward Red the image turns into a reddish hue Move the pointer toward Green the image turns into a greenish hue ...
Page 122: ...channel This function is particularly useful when you need to convert text using OCR software Note that this function supports only black white and gray image Therefore be sure to choose any black white or gray image type while applying this function The effect on the image after removing the G channel The effect on the image after removing the R channel ...
Page 123: ... name for your settings in the File Name text box and click the Save button Your settings will be saved and the file name will appear in the list box Using a scan settings file You can use an existing settings file Right click the file name for the settings you want to use and click the Load button The settings in the file will automatically be specified in the scanning features dialog box Deletin...
Page 124: ...nable energy savings You can specify a time delay in the Minutes box Click the Apply button to save the changes The default setting is 15 minutes Hint Setting check the Show Hints box if you want to have flags that show the name of an item appear when you place the mouse cursor on an item in the dialog box Click the Apply button to save the changes ...
Page 125: ...he button you can change the measuring unit Choice Inch cm Pixel 2 Paper Size Provide frequently used scan sizes Choice Card 4 x2 5 Photo 5 x3 Photo 6 x4 B5 A5 A4 Letter and Scanner Maximum 3 Image Size Display image size for the scanned area 4 Lock Image Fix your output width and height 1 2 3 4 ...
Page 126: ...jam follow the procedures below to remove the paper 1 Pull the ADF Release button 2 Gently open the ADF front cover to the left 3 Carefully pull the paper out of the ADF unit 4 Close the ADF front cover The product is now ready to use ADF Front Cover ADF Release button ...
Page 127: ...t it is probably caused by the dust or toner particle on the strip of document glass To remove the dust or toner particle 1 Dip a soft clean cloth with isopropyl alcohol 95 2 Wipe the strip of document glass as shown below 3 Close the document cover The product is now ready for use The strip of Document Glass ...
Page 128: ... OK button Flatbed cover opens 8007 Close cover Clear paper in the ADF and press the OK button Flatbed Home sensor error 1502 Restart your product If the code still appears contact your nearest dealer Flatbed Lamp error 6001 Restart your product If the code still appears contact your nearest dealer ADF paper jam 8001 ADF paper jam Open the ADF cover and remove the paper from the ADF If the code st...
Page 129: ...t For example type Ping 10 1 20 144 in Dos prompt If the product has no response then perform the following steps 1 Check if the RJ 45 connector is firmly plugged in 2 Check the Ethernet cable 3 Check the product s IP address 4 Check the destination IP address 5 Check Subnet Mask 6 Check Gateway IP Fails to connect e mail server Check network environment Fails to connect network Check network envi...
Page 130: ...r by pressing the User Tools button on the panel SMTP server address is wrong Check the IP address of the SMTP server Unpredicted error Contact your network administrator for help Contact your network administrator or nearest dealer for further help Insufficient System Storage Contact your network administrator for help Contact your network administrator for further help No support SMTP service ex...
Page 131: ... you may contact your network administrator for further help Authentication required Contact network administrator Contact your network administrator on mail server s authentication mechanism Choose SMTP authentication for E mail security or turn off the mail server s authentication and try again User not local Check To address Check To address Service unavailable Contact your network administrato...
Page 132: ...me Check your login name and try again FTP Password error Check Password Check your password and try again Can t check file Make sure you have the privilege Make sure your have privilege to browse this directory Can t change data transfer type Contact your server administrator for help Contact your server administrator for further help Store file error Make sure you have the privilege Make sure yo...
Page 133: ...Check login name and password and try again CIFS fail to create file Make sure you have full control privilege Make sure you have full control privilege on this network share CIFS send data error Contact server administrator Check your network administrator for help CIFS fail to access file attribute Make sure you have full control privilege Make sure you have full control privilege HTTP unauthori...
Page 134: ...n advance HTTP PUT not allowed Contact server administrator for help Contact server administrator to change permission on this privilege HTTP internal error Contact server administrator Contact your server administrator for further help HTTP PUT not implemented Contact system administrator That server does not implement HTTP PUT method This product can t store file on this server contact your syst...
Page 135: ...P3 server Check your login name and password Check login name and password LDAP Server Login Error Check login name and password LDAP Server IP Error Check IP address of LDAP server Or contact your network administrator for help LDAP Port Error Check if the port number is correct LDAP User Password Error Check if the password is correct ...
Page 136: ...um image quality and performance To clean the glass 1 Open the document cover as shown below 2 Dip a soft clean cloth with isopropyl alcohol 95 3 Gently wipe the document glass and the white sheet beneath the document cover to remove the dust or any toner particles 4 Close the document cover The product is now ready for use 1 Document Cover 2 Document Glass 2 1 ...
Page 137: ...129 Cleaning the LCD Touch Panel To clean the display surface use a soft cloth either dry or moistened with neutral detergent or ethanol Do not use any organic solvents acid or alkali solution LCD Touch ...
Page 138: ...ts original state 1 Moisten a clean lintless cloth with isopropyl alcohol 95 2 Pull the ADF Release button 3 Gently open the ADF front cover Wipe the feeding rollers from side to side Rotate the rollers forward with your finger and repeat the above cleaning procedures until the rollers are clean Be careful not to snag or damage the pick springs 4 Wipe the black part of the ADF snap in pad 5 Close ...
Page 139: ...to the left 2 Press the top of the ADF snap in pad as illustrated to raise the holder 3 Press both sides of the holder inwardly to remove it from the slot 4 Press both sides of the ADF snap in pad inwardly with your fingers to pull out the ADF snap in pad from the slot Assembling Procedure 1 Take out the ADF pad module from the box 2 Press both arms of the ADF snap in pad inwardly with your two fi...
Page 140: ...w one Please follow these steps to replace and install the ADF roller Disassembling Procedure 1 Pull the ADF Release Button to open the ADF front cover 2 Move the yellow clamp downward to detach the ADF roller Assembling Procedure 1 Insert the ADF roller to its slot move the yellow clamp upward press it down If it is properly installed you will hear a clear snap in sound 2 Close the ADF front cove...
Page 141: ...dress book it is highly recommended that the administrator read this chapter before manage the product Adding an E mail Address To add an e mail address 6 Start your browser Microsoft I E 5 0 or higher or Netscape Communicator 6 0 or higher or Mozilla Firefox 7 Type IP address of the product in the URL field For example http 10 1 30 83 The product s embedded web page with limited options appears a...
Page 142: ... a login name and password 9 Click Login since the machine is shipped with no specific login name and password and the web page will be automatically updated to contain full options 10 Click Address Book Manager to prompt the Address Book Manager screen ...
Page 143: ...ame e mail address and description and then click Add to temporarily save the latest data or Cancel to return to the Address Book Manager screen 13 Click Update to permanently save the new e mail address or Exit to leave without saving the address Note Up to 2 000 e mail addresses can be entered in the Address Book ...
Page 144: ...dding an E mail Address The Address Book Manager dialog appears 2 Choose the address you want to modify from the list and choose Modify to prompt the Modify an E Mail Address dialog box Or double click the address which you want to modify to prompt the Modify an E Mail Address dialog box 3 Modify your address data ...
Page 145: ...ick Update to temporarily save the latest data or Cancel to return to the Address Book Manager screen 5 Click Update to permanently save all the latest changes or Exit to leave without saving any latest change ...
Page 146: ... you want to delete from the list and then choose Delete to erase the address A Confirmation dialog box appears to confirm your deletion Click OK to confirm or Cancel to exit 3 Click Update to permanently save all the latest changes or Exit to leave without saving any latest change Note You can make multiple selections by choosing one email and then pressing the Shift key to delete them at once ...
Page 147: ... Up to 99 addresses can be included in one group and a total of 20 groups can be created in the Address Book To add a new group 1 Repeat Step 1 to Step 6 from the previous section Adding An E mail Address The Address Book Manager dialog box appears 2 Click the Group icon and choose New to prompt the Add a New Group Set dialog box ...
Page 148: ...3 Enter your group name 4 Choose the address from the right side and click to add a member to the group 5 Click Add to temporarily save the latest data or Cancel to return to the Address Book Manager screen ...
Page 149: ...141 6 Click Update to permanently save all the latest changes or Exit to leave without saving any latest change ...
Page 150: ...dialog box Or you may double click the group to prompt the Modify a Group Set dialog box 2 Modify your group information Choose the group member you wish to add and then click to add the new member or click to delete an old member from the group 3 Click Update to temporarily save the latest data or Cancel to return to the Address Book Manager screen ...
Page 151: ...143 4 Click Update to permanently save all the latest change on the product or Exit to leave the screen without saving any latest change ...
Page 152: ...he group A Confirmation dialog box appears to confirm your deletion Click OK to delete or Cancel to exit 3 Click Update to permanently save all the latest data on the product or Exit to leave the screen without saving any latest data Note You can make multiple selections by choosing one group and then pressing the Shift or the Ctrl key to delete them at once ...
Page 153: ...d web page After the administrator has set up accounts in the Account Management and restarted the product a user is required to create login name and password and quota to use the product The access to the Account Management is blocked by the administrator password It is recommended that an administrator create a password before performing these activities Setting up Account Management By the Pro...
Page 154: ...Login since the machine is shipped with no specific login name and password and the web page will be automatically updated to contain full options 5 Click Account Management to prompt the Account Management screen ...
Page 155: ...e ShortCut Only button Finally click Update to save your settings You may refer to the following table for the details of each setting Basic Settings Item Description Enable Authentication Check to enable authentication for account management LDAP Server IP or URL Assign the URL of the authenticating LDAP server Port Enter the port number of your authenticating server Default Enable Functions Item...
Page 156: ...ount List dialog box as shown below 8 Click the New Account button to open the New Account dialog box as shown below 9 Set up your user name and password respectively in the Name and Password fields The name and password are case sensative and up to 64 characters can be entered in the Name field and up to 16 characters can be entered in the Password field Fill the E mail field if necessary ...
Page 157: ...below 11 Click Update to save the settings and return to the Account List screen Copy Account If you wish to permit other users to use the same privileges as one user simply select the account from the account list and then click the Copy Account button to prompt the Copy Account screen You need to give a new name and password for the new user without retyping the rest Click Update to save the set...
Page 158: ...hout saving any latest changes Delete If you wish to delete a current local user select the account from the account list and click the Delete button A warning message appears to confirm your deletion Click OK to confirm or Cancel to exit Click Update to save the settings or Cancel to return to the Account Management screen without saving any latest changes Note You can make multiple selections by...
Page 159: ...lution 600х600 dpi Network Connection 10 100 1000 Gigabit Ethernet Dimensions W x D x H 531 x 490 x 418 mm Weight 13 6 Kgs Warm Up Time 30 seconds Power Requirement 24Vdc 3 2A Power Consumption Working 69 W Standby 57 W LCD Size 800 480 dots Effective Area 152 4 91 44 mm LCD Touch Panel 7 color TFT LCD LED Indication Power Alarm Energy Saving Copy Port Network Power Saving Mode Time to 0ff 5 15 30...
Page 160: ...RJ 45 UTP connector Protocol TCP IP DHCP 802 1x SSL TLS DNS DDNS SNTP LDAP LDAP SSL SMTP ESMTP HTTP HTTPS MIME FTP FTPS CIFS SMB HTTP Server LPR Port9100 Connection Configuration 1 Enable DHCP or 2 assign physical IP address IP address IP subnet mask IP Gateway Device URL Same as Configuration Device Name Security IEEE802 1x SSL TLS E mail Specification Protocol SMTP MIME SMTPS Mail Sever Authenti...
Page 161: ...tive Directory with SFU Service for Unix OpenLDAP 2 4 15 Lotus Notes Domino 7 8 Specification of Filing Protocol FTP HTTP HTTPS CIFS FTPS Scan to USB drive Scan to internal CF Card File format B W single bit Gray 8 bit Color 24 bit PDF TIFF M TIFF S PDF PDF JPEG TIFF M TIFF S PDF PDF JPEG TIFF M TIFF S PDF Compression Method B W Gray Color None Raw MH MR None Raw JPEG None Raw JPEG Compression Lev...
Page 162: ...justment 96 COLOR BALANCE 101 COLOR DROP OUT 102 Contrast 95 Creating A New Shortcut Button 51 Custom Settings Scan Settings Configuration Settings 103 D Delete Files 35 DELETING AN E MAIL ADDRESS 126 DELETING GROUPS 132 Descreen 96 DHCP server 9 Digital Copying 1 DNS 9 Duplex 1 to 1 Sided 1 to 2 Sided 2 to 2 Sided 2 to 1 Sided 69 E Enable Preview 68 74 ENLARGING PREVIEWED IMAGE 95 Ethernet Hub 14...
Page 163: ...Enable IP Address Subnet Mask Gateway IP SMTP Server SMPT Port 7 Network Settings IP address Subnet mask Gateway IP DNS Server 18 New Account 136 O Orientation Long Edge to Long Edge Long Edge to Short Edge Short Edge to Long Edge Short Edge to Short Edge 70 P Page Count 24 Paper Jams 106 R resolution 29 30 31 32 37 76 85 86 RESOLUTION 95 S Saturation 100 SCAN METHOD FLATBED ADF MULTI PAGE 94 Scan...