


MLN-192 Option Card Installation
7
8
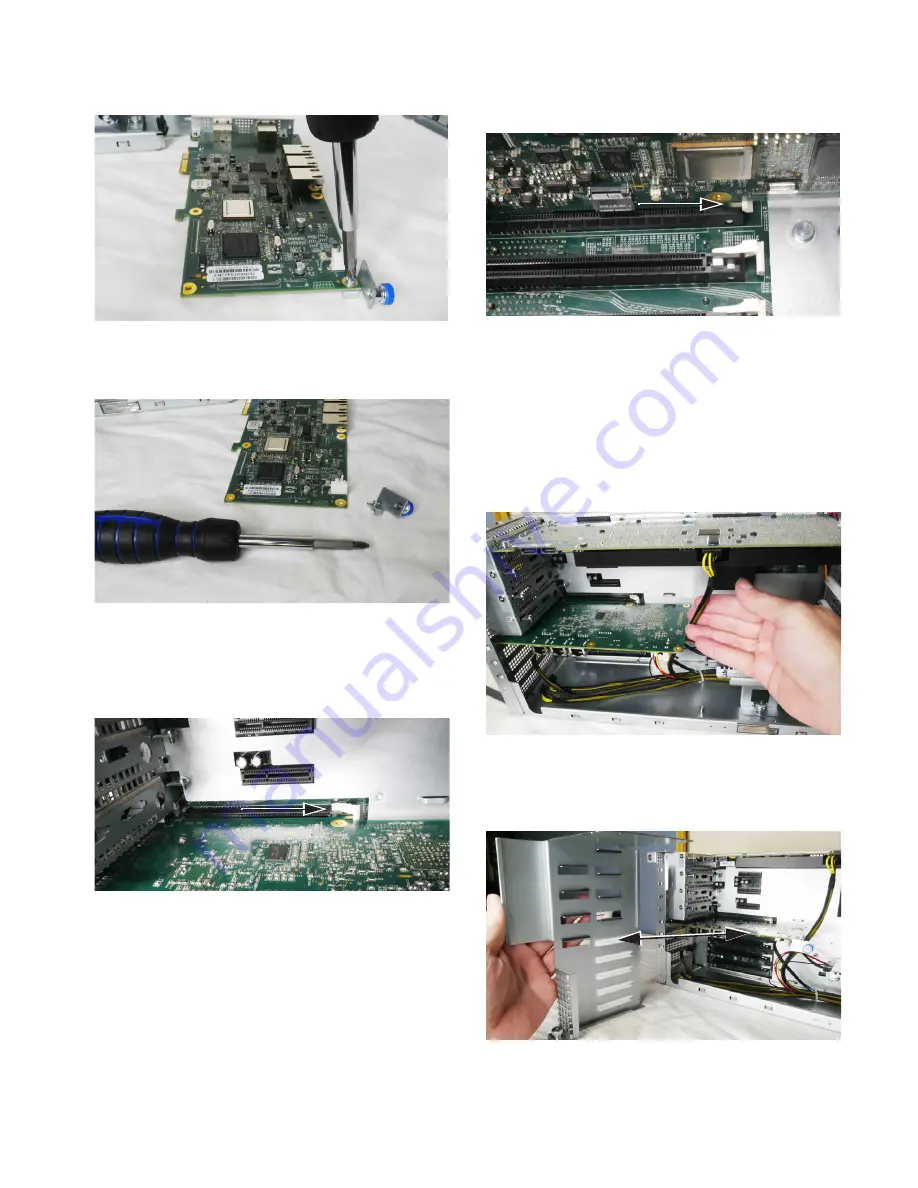
Remove the captive thumbscrew assembly from the rear end
of the card.
Be sure to store this assembly in case you need it in the future
(such as after moving the MLN-192 card to a Network slot).
9
Holding the MLN-192 card by its edges, align the card’s face-
plate in the slot opening of the core and align the card’s PCIe
connectors with the corresponding PCIe expansion slot, then
firmly press the card into the PCIe slot.
Make sure the card is fully seated in the PCIe slot and that the
white retaining clip clicks into position. You can check by
looking underneath the card.
10
From the back of the core, make sure the faceplate of the
MLN-192 card is correctly aligned with the open slot and then
secure the card to the core by tightening the captive thumb-
screw.
11
If you disconnected any power cables to DSP cards, reconnect
them now. Also, make sure the power cables to DSP cards are
safely positioned as shown below, along the back edge of the
MLN-192 card (not along the side).
12
Next, re-install the card retaining bracket. The bracket has
plastic slots on its interior, the top-most of which needs to be
aligned with and receive the edge of the MLN-192 card.
Figure 25. Removing the captive thumbscrew assembly
Figure 26. Rear captive removed
Figure 27. MLN-192 fully inserted into its PCIe slot
Figure 28. Card retaining clip, shown from below the card
Figure 29. Correct positioning of power cables for DSP cards
Figure 30. Card retaining bracket slot for MLN-192


