EZTouch I/O
Jr.
34 / 52
Setting Date/Time
The
EZTouch I/O
Jr. maintains a Real Time Clock (RTC) which can be adjusted from
the
EZTouch I/O
Jr. unit itself. Simultaneously pressing the upper left corner and
the
bottom left corner of the screen will direct you to the language selection
menu. After selecting the appropriate language for the unit, the unit will enter the
Setup
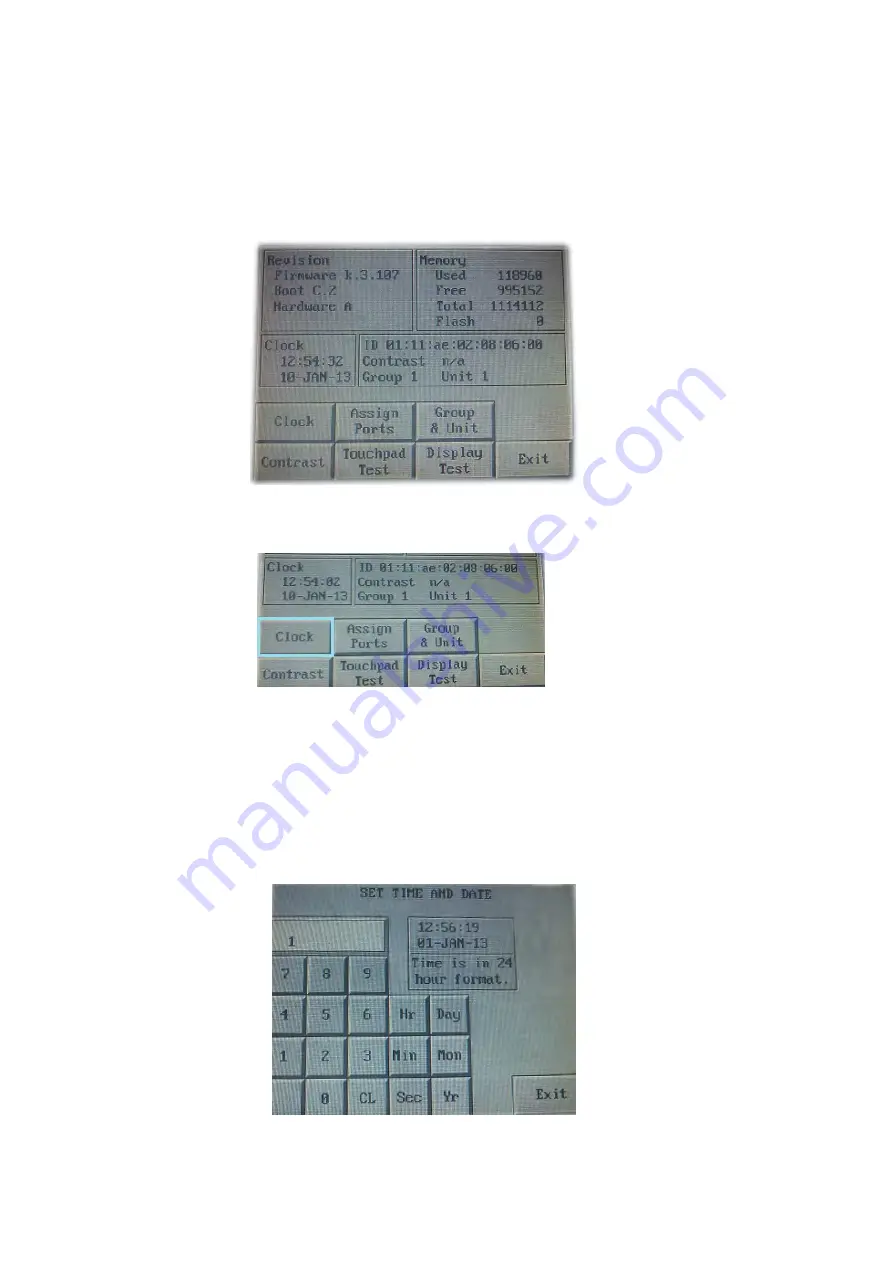
Mode. The screen below will appear displaying the current firmware, the
available
memory as well as the time and date set on the unit.
To change the Time/Date
:
1. Press the
Clock
button.
2. A new screen loads which displays a numeric keypad. Time is displayed in a
24 hour format. Follow the steps below to adjust the
time
.
a Enter the hour first, then select
Hr
to change the hour. For example, to
enter a time of 8:34 am you would press
8
then the
Hr
button.
b Next enter the minutes. Using the example of 8:34 am. Press
3
then
4
followed by the
Min
button. (Seconds can be inputted as well by the
same process.)
NOTE:
If at any time during this process, an incorrect number is pressed,
you may use the
CL
button to clear the entry.
3. From this screen, the user may also adjust the date. Follow the steps below
to adjust the
date
.
a Enter the correct day and then press the
Day
button. For example, to
Summary of Contents for EZTouch I/O Jr.
Page 1: ...Copyright 2012 by AVG Automation All Rights Reserved EZTouch I O Jr ...
Page 19: ...EZTouch I O Jr 19 52 Digital I O Specifications Analog Voltage Specifications and Wiring ...
Page 20: ...EZTouch I O Jr 20 52 Analog Current Specifications and Wiring ...
Page 21: ...EZTouch I O Jr 21 52 ...
Page 23: ...EZTouch I O Jr 23 52 Pinout Information for 26 Pin Connector ...
Page 24: ...EZTouch I O Jr 24 52 Pinout Information for 44 Pin Connector ...


