background image

TK 56579-11-IS-EN (Rev. A, 10/20)

©2020 Trane Technologies

1

Applications:

Precedent™ Trailer Units*

SB Trailer Units (Bracket 401271 is also required and sold separately)

Carrier™ Trailer Units (Kit 903364 is also required and sold separately)

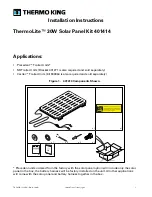
Figure 1.

401414 Components Shown.

x 5

x 4

RCS1540-2

x 1

x 8

x 1

x 1 

x 1

WARRANTY REGISTRATION - MAJOR SERVICE PARTS 

1

PART INFORMATION 

USE DIGITS ONLY 

PART NUMBER 

PART DESCRIPTION 

UNIT SERIAL NUMBER 

PART SERIAL NUMBER 

DATE INSTALLED (Numerals)    
MO.         DAY       YEAR

UNIT MODEL 

2

DEALER INSTALL (to be f

illed out by Dealer only) 

DEALER CODE 

CITY , STATE 

WORK ORDER/INVOICE NUMBER 

CUSTOMER NAME 

CITY , STATE, ZIP 

END USER INSTALL (to be filled out by End User only) 

COMPANY NAME 

ADDRESS: CITY, STATE, ZIP 

CONTACT  NAME 

PHONE NUMBER 
(       ) 

WORK ORDER/INVOICE  NUMBER 

PART PURCHASED FROM DEALER NAME, LOCATION 

WE CERTIFY THAT THE ABOVE INFORMATION IS COMPLETE AND ACCURATE TO THE BEST OF OUR KNOWLEDGE, 
AND UNDERSTAND THAT THE INFORMATION ON THIS FORM MAY BE SUBJECT TO AUDIT . 

WE CERTIFY THAT THE PART DESCRIBED ABOVE HAS BEEN DE LIVERED IN SATISFACTORY OPERATING CONDITION WITH 
ALL NECESSARY PRINTED MATERIAL AND THAT THE END U SER HAS BEEN FAMILIARIZED WITH THE BASIC OPERATION, 
MAINTENANCE REQUIREMENTS, AND PROVISIONS OF THE APPLICABLE WARRANTY. 

X  

X  

          SIGNATURE OF DEALER 

          SIGNATURE OF END USER 

DEALER COPY 

THERMO KING CORPORATION 
314 WEST 90TH STREET • MINNEAPOLIS, MINNESOTA 55420 

TK1073-3 (10-11)

ALTERNATOR 

ENGINE 

COMPRESSOR 

MICROPROCESSOR 

STARTER 

INJECTION PUMP 

BATTERY 

OTHER 

     Solar Panel
Installation Manual


x 1

x 1

* Precedent units ordered from the factory with the solar panel option will include only the solar
panel in the box, the battery harness will be factory installed on the unit. All other applications
will come with the solar panel and battery harness together in the box.

Installation Instructions

ThermoLite

30W Solar Panel Kit 401414

Summary of Contents for ThermoLite 401414

Page 1: ...HAT THE ABOVE INFORMATION IS COMPLETE AND ACCURATE TO THE BEST OF OUR KNOWLEDGE AND UNDERSTAND THAT THE INFORMATION ON THIS FORM MAY BE SUBJECT TO AUDIT WE CERTIFY THAT THE PART DESCRIBED ABOVE HAS BEEN DELIVERED IN SATISFACTORY OPERATING CONDITION WITH ALL NECESSARY PRINTED MATERIAL AND THAT THE END USER HAS BEEN FAMILIARIZED WITH THE BASIC OPERATION MAINTENANCE REQUIREMENTS AND PROVISIONS OF THE...

Page 2: ...tain and support the battery or batteries it is connect to Make sure wire routes are free from abrasive materials and have adequate clearance from hot surfaces Holes used for routing harnesses through metal frames skins or structures should be smooth and non marring and lined with a grommet Remove solar panel fuse located on the solar panel harness prior to panel installation T Tr ra ac ct to or r...

Page 3: ...anel is installed follow test procedure for non LED controllers See Solar Panel Test Procedures p 11 4 Install front tabs of solar panel under the top cap and secure panel with supplied hardware use bolts through top front cap use rivets for the frame 5 Route harness down the rear curbside frame member to the angled frame support and along the frame front member to the starter I Im mp po or rt ta ...

Page 4: ...e factory predrilled mounting holes on the top frame channels for the solar panel option These holes will need to be added by the installer Units built after April 2018 do have mounting holes on the top frame channels proceed to Step 2 1 Position solar panel on top of unit between the condenser fans with the rear mounting tabs against the trailer wall a Using the mounting bracket as a template mar...

Page 5: ...lled follow test procedure for non LED controllers See Solar Panel Test Procedures p 11 2 Secure solar panel to frame with supplied rivets Figure 5 Secure panel with rivets as shown RCS1500 1 3 Route harness down inside the unit under the fuel filter and over to the starter as shown I Im mp po or rt ta an nt t DO NOT attach electrical harnesses to copper tubing exhaust components or fuel lines Fig...

Page 6: ... holder to the existing harness Figure 7 Positive wire and fuse holder shown RCS1504 6 Attach negative black wire with terminal ring to engine block ground stud behind oil filter N No ot te e The black wire with terminal ring should be installed under the flat washer followed by the large ground cable and the external lock washer last Figure 8 Negative wire shown attached to engine block RCS1505 ...

Page 7: ...length in front of the starter and secure with supplied band wraps 8 Clean door surface and attach supplied nameplate as shown 9 Reinstall battery harness fuse and reconnect all power to unit N No ot te e Remaining kit components are not used Figure 9 Install nameplate as shown RCS1501 ...

Page 8: ...onnector to solar panel controller and secure harness to bracket with two band wraps supplied N No ot te e The charge controller for the 30W panel is located under the panel If your controller has LEDs verify solar panel operation before securing panel onto unit If panel is installed follow test procedure for non LED controllers See Solar Panel Test Procedures p 11 2 Secure solar panel with suppli...

Page 9: ...panel on top of unit as shown with one aluminum spacer under each mounting hole 2 Secure panel to the front of the top cover and the rear frame member with the supplied self drilling screws Figure 11 Aluminum spacers shown installed RCS1488 Aluminum spacers and self drilling screws 4x 3 Route harness down inside the unit and over to the starter 4 Attach positive white red wire to the positive term...

Page 10: ...e extra harness length in front of the starter and secure with band wraps 8 Clean door surface and attach supplied nameplate 9 Reinstall battery harness fuse and reconnect all power to unit 10 Perform the Solar Panel Test Procedures p 11 to complete the installation N No ot te e Remaining kit components are not used ...

Page 11: ... io on n table below to verify solar panel operation Also see S So ol la ar r P Pa an ne el l T Tr ro ou ub bl le es sh ho oo ot ti in ng g G Gu ui id de e if necessary Status Light Function Flashing Green Solar panel working properly and charging Solid Green Battery fully charged Flashing Yellow Marginal battery charging Solid Yellow Marginal battery not charging night time Flashing Red Extremely...

Page 12: ... load on the battery Figure 14 Measure battery voltage V 12 8 12 8 V V 12 8 1 2 V RCS1517 2 Move vehicle outdoors into the daylight If indoors put at least a 500W halogen lamp approximately 24 above the solar panel and turn lamp on N No ot te e The solar panel controller may take up to a minute to turn on The solar panel must be connected to the battery in order to turn on the charge controller 3 ...

Page 13: ...The absence of a charge controller will result in unregulated power input to the battery that could under or overcharge the battery 6 Verify cable polarity using the diagrams provided in the installation instructions TK 56127 and TK 56237 applies to 36 100W systems Cable Polarity is swapped in the controller so the polarity from start to finish must be checked If polarity is found to be wrong swap...

Page 14: ...14 2020 Trane Technologies TK 56579 11 IS EN Rev A 10 20 ...

Page 15: ...nufacture Customer installed ThermoLite solar panels registered within the first twelve 12 months of installation receive five 5 years parts warranty coverage from date of installation Customer installed ThermoLite solar panels not registered in that time will automatically receive five 5 years plus 90 days parts coverage from date of manufacture Customer Satisfaction Survey Let your voice be hear...

Reviews: