


Procedure
1. Access the Scopia
®
XT Desktop server administration web interface.
2. Select
Deployment
in the sidebar.
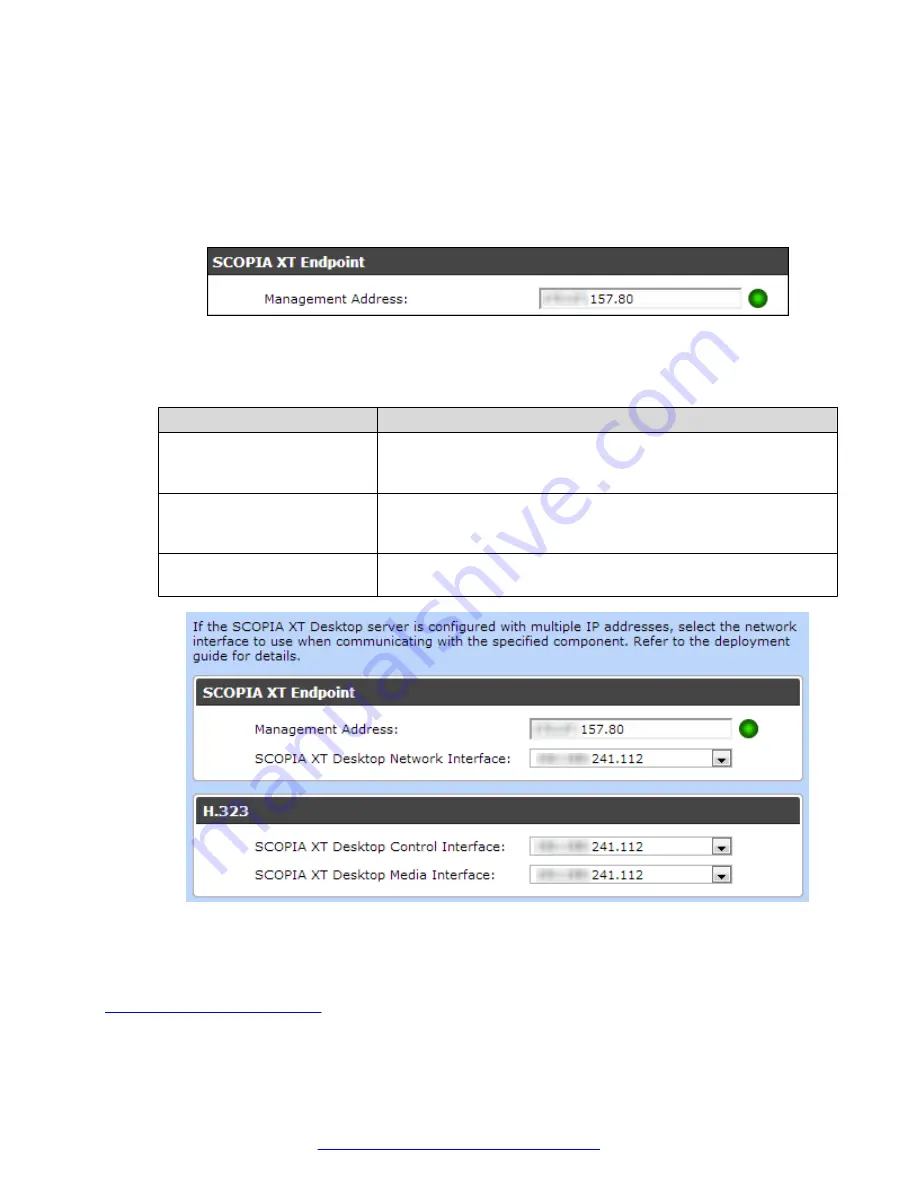
3. Enter the IP address of the XT Series with its built-in MCU in the
Management Address
field.
Figure 14: Setting the address of the managing Avaya Scopia
®
XT Series
4. For dual-NIC deployments only, select the correct NIC address from the drop-down menu for
the following fields:
Field
Description
Scopia
®
XT Desktop
Network Interface
Select the NIC address used to communicate management
messages with the Avaya Scopia
®
XT Series, like configuring via
the administration web interface.
Scopia
®
XT Desktop Control
Interface
Select the NIC address used for signaling and control in your
deployment, such as call routing, establishing media channels
(codecs), starting presentations, and so on.
Scopia
®
XT Desktop Media
Interface
Select the NIC address used to transmit the actual audio and video
media.
Figure 15: Configuring a dual-NIC Scopia
®
XT Desktop server
5. Select
OK
.
Related Links
on page 25
Connecting Scopia
®
XT Desktop with the XT Series
August 2015
Avaya Scopia
®
XT Desktop Server Installation Guide
27