
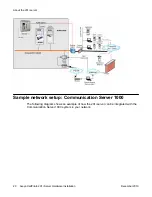


To unpack the 201i server
Important:
As you unpack each item, check it off against the packing list, as well as the following
checklists provided in the CallPilot Installation and Configuration Task List:
• "CallPilot software media and documentation checklist"
• "CallPilot server hardware checklist"
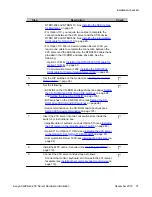
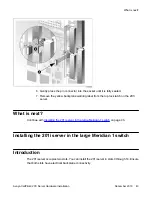
1. Remove the 201i server from the carton and its antistatic bag.
2. Place the 201i server on an antistatic surface.
3. Carefully open the cartons containing the monitor, keyboard, mouse, modem, and
ELAN hub (if supplied), and set the peripherals aside.
4. Put all manuals and CD-ROMs in a safe place.
5. Save all packing materials and cartons in case you must return any equipment to
the carrier.
6. Review
on page 11, and perform a visual inspection as
described in
To inspect the 201i server for shipping damage
on page 33.
To inspect the 201i server for shipping damage
Before proceeding with the installation, visually inspect the 201i server for any damage that
might have occurred during shipping. Ensure also that the items in the following checklists are
secure:
Item
Yes
No
Are all cables securely seated?
hard drive power cable
hard drive data cable
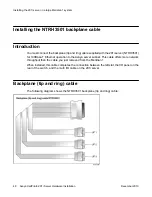
See items 2 and 3 in the diagram in section
page 14.
Is the hard drive and bracket interface secure? See items 6 and 7 in the
diagram in section
Is the software feature key (dongle) securely seated in its bracket?
See 201i server components diagram in section
on
page 14.
To inspect the 201i server for shipping damage
Avaya CallPilot
®
201i Server Hardware Installation
December 2010 33