Monitor, keyboard, and mouse
You must connect a monitor, keyboard, and mouse to run the Configuration Wizard or to install
the operating system on the 201i server as part of a recovery process.
All three peripheral components are hot-pluggable.
MPC-8 card
The MPC-8 card looks like a Type II PC card, and supports the multimedia telephony services
on the 201i server. Four specially-designed card slots are available for the MPC-8. All are
located on the 201i server faceplate.
Important:
You cannot insert MPC-8 cards in Type II PC card slots, or Type II PC cards into MPC-8
card slots. They are not compatible.
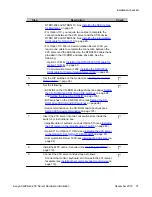
SCSI connections
The SCSI connection is the only permanent faceplate connection. A low-profile right-angle
connector on the SCSI cable allows the cable to be attached with the cabinet covers on. For
more information about how the 201i server and SCSI device connections are achieved, see:
• large Meridian 1 systems (for example, Option 51C):
Installing the SCSI cables for
• Option 11C or Option 11C Mini:
Installing the NTRH3502 SCSI cable for Option 11C
• Communication Server 1000:
Installing the NTRH3502 SCSI cable for Communication
on page 85.
Monitor, keyboard, and mouse
Avaya CallPilot
®
201i Server Hardware Installation
December 2010 25


