


_____________________________________________________________________
©
All Rights reserved
86
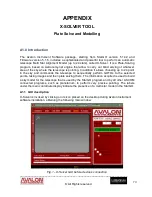
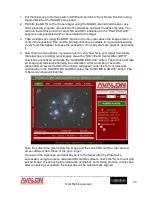
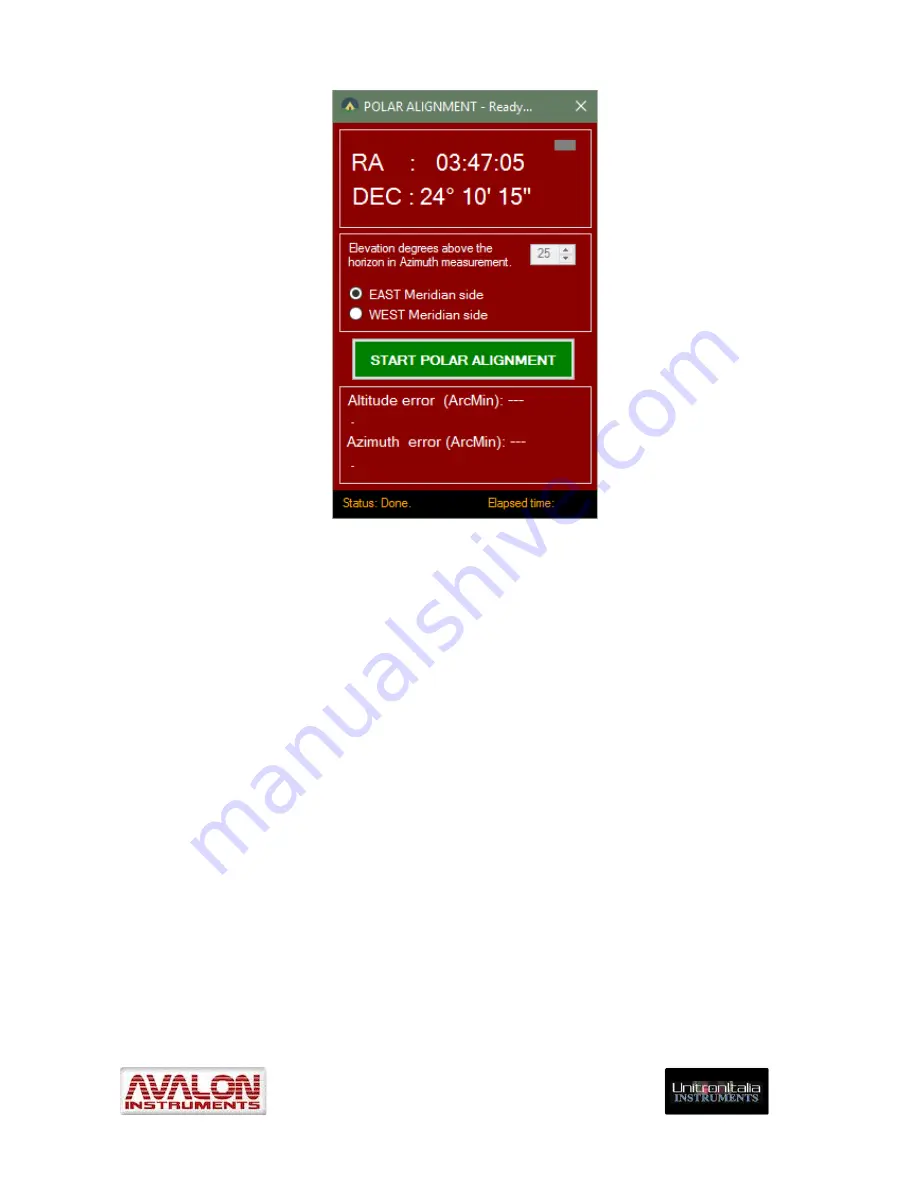
the upper frame of the window shows the present pointing coordinates in RA and DEC. In
the mean frame it is possible to choose the altitude over the horizon at which to take the
images necessary to perform the evaluation of the azimuth polar error. This values should
be the lower possible taking into account the possible obstacle close to the horizon (and the
effect of the atmospheric refraction at lower altitudes). It is also needed to select what side
of the meridian (East or West) must be used. Even this choice shall be based on the local
horizon characteristics. Normally East is better in the first night hours whereas the West
side is preferable at the late night when East begins to become lighted.
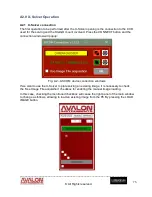
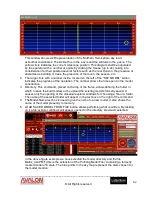
By pressing the “START POLAR ALIGNMENT” button the mount, which has been well
aligned to the sky in advance, will move the telescope to the chosen side of the sky at the
selected altitude, to tale the first images. The XSolver will perform the due calculations to
estimate the Azimuth error.
After this phase the telescope will move to the South meridian where it will automatically
take another series of images and will perform further calculations.
At the end of this phase the calculated errors in both Altitude and Azimuth will be shown in
the lower frame of the Polar Alignment window. If the errors are acceptable the
photographic session can follow. Otherwise it will be necessary to move the mount Alt-
Azimut knobs to try to compensate the errors. Then, with a process of successive
approximations, the error estimation is repeated until a sufficient degree of precision is
reached.
The time spent for this function will be shown in the black status bar at the bottom of the
window.