


_____________________________________________________________________
©
All Rights reserved
80
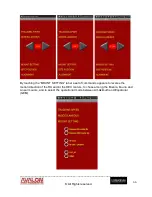
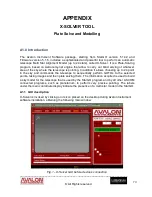
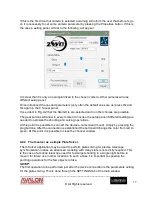
1. Put the telescope in Home position (CWD) and perform a “Sync Home Position” using
the ALIGN tab of the StarGO setup panel.
2. Perform the GOTO to the chosen target using the StarGO internal data base or any
other planetary program connected to the telescope and wait it reaches the stop. You
will note that at this point the Target RA and DEC indication on the “PLATE SOLVE”
panel are now populated with a value related to the target.
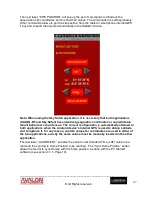
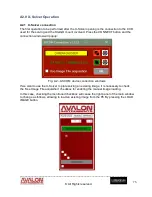
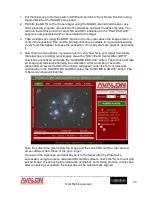
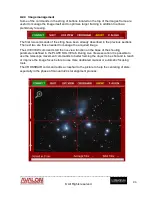
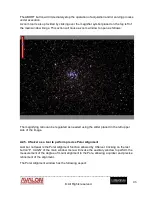
3. Take a single shot, using the SHOT button in the menu bar above the image screen, to
verify if the exposition time and the binning chosen are suitable to a good plate solving.
If very few stars appear increase the exposition. If to many stars are present, decreases
it.
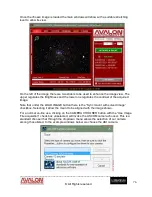
4. Now there are two options: if you want just to verify how far is your target from where
the telescope is pointing (your image), leave the “SOLVE and Center After GOTO”
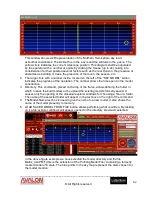
check box unchecked and press the “ACQUIRE & SOLVE” button. The X-Solve will take
an image and will start performing the calculation. After a number of seconds
(depending on several factors) the solution will appear under the form of telescope
coordinates in the SOLVED RA and DEC below the “ACQUIRE & SOLVE” button. The
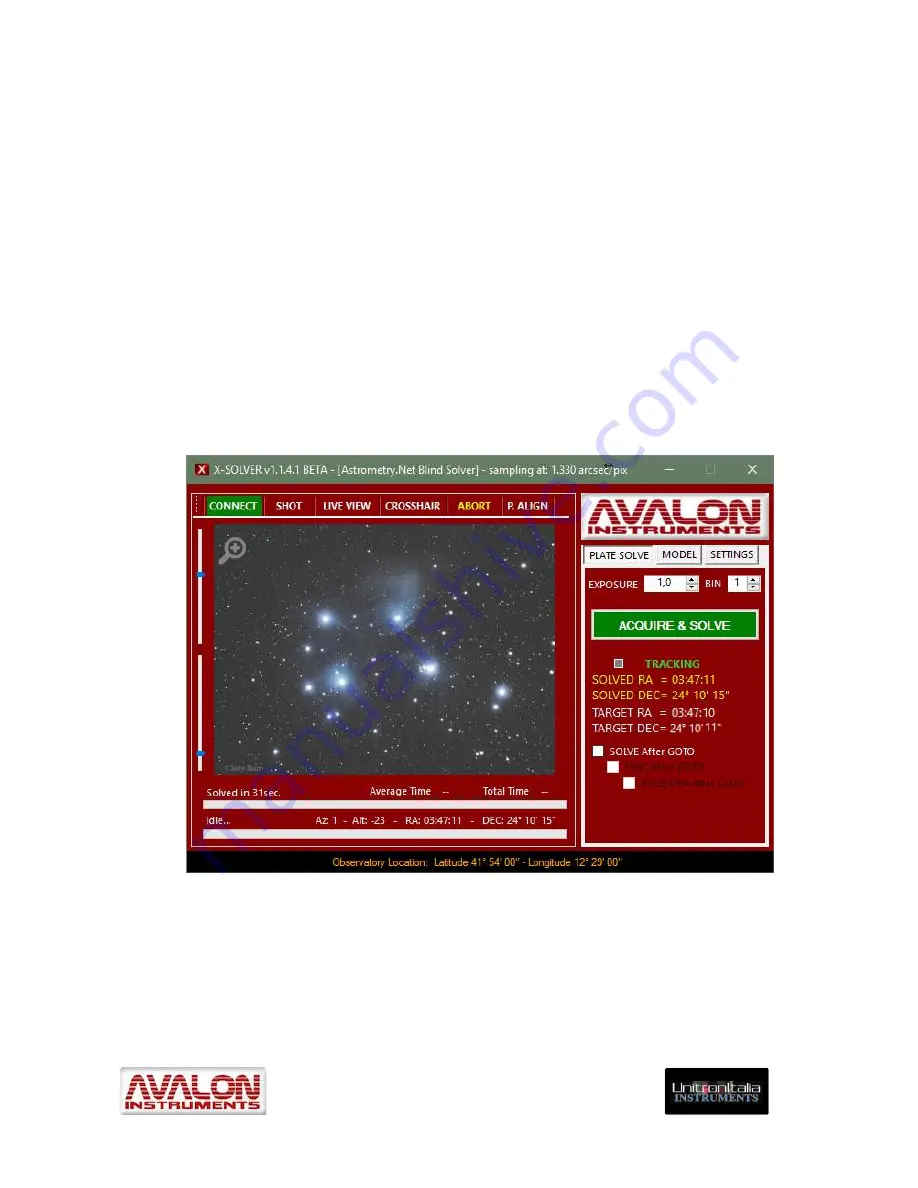
X-Solver windows will look like:
Note the solver time given below the image and the solved RA and Dec that are few
arcsec different from those of the go to target
If you want the telescope automatically sync to the target after the Plate Solve
succeeded, using the above calculated RA and Dec offsets, check the “Sync mount with
solved image” check box before initiate the acquisition and solving process. In this case,
after the solving succeeded, the telescope will be automatically aligned.


