Page
20
of
54
Setting up the Cameras
The ConteraIP
®
Omni LX is user configurable. Prior to installing the camera, thought should be given to
the sensor positions. It is always easier to make adjustments before the camera is installed.
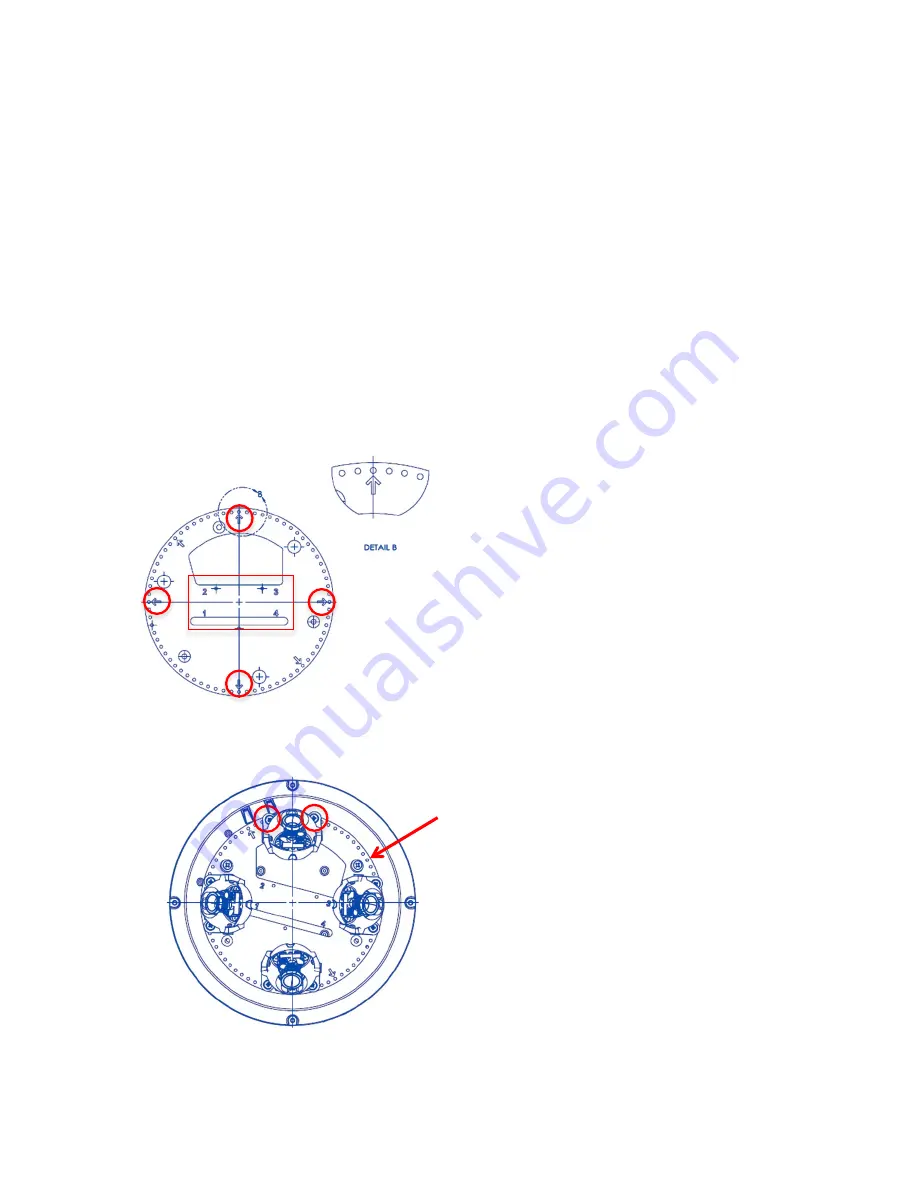
The camera lenses are shipped in a 360º position as shown below (Figure 2). To customize the sensors,
simply remove the two screws for each individual sensor, position anywhere on the magnetic track and
then screw into place. Screw holes around the circumference are spaced in 5 degree increments. The
arrows marked on the track plate are 45 degree reference points (Figure 1).
Sensor numbering is indicated on the track plate; which corresponds to the sensor number via the
camera software (Figure 1). The slots on the track plate provide additional adjustment of the camera after
installation. Simply loosen the three screws to rotate the plate then tighten the three screws after
alignment. This feature is most useful for repositioning the cameras mounted to the center locations after
the camera installation.
Figure 1: Arrows on the track plate indicate 45º increments
Figure 2: 360° configuration (ideal for hallways)
Each hole on
the track
represents a
5
º
increment.


