


88
|
Tutorial 3 — Create an Office Layout Drawing
Create a Round Table and Chairs
In this exercise, you learn to
❒
Create a round table using the All-In-One toolbar and the edit bar.
❒
Set a precise radius using the edit bar.
❒
Use the Absolute Coordinates dial to place items in precise locations.
❒
Rubber-stamp an existing chair and place it in another location.
❒
Create a circular array of four additional chairs that are placed around the
table.
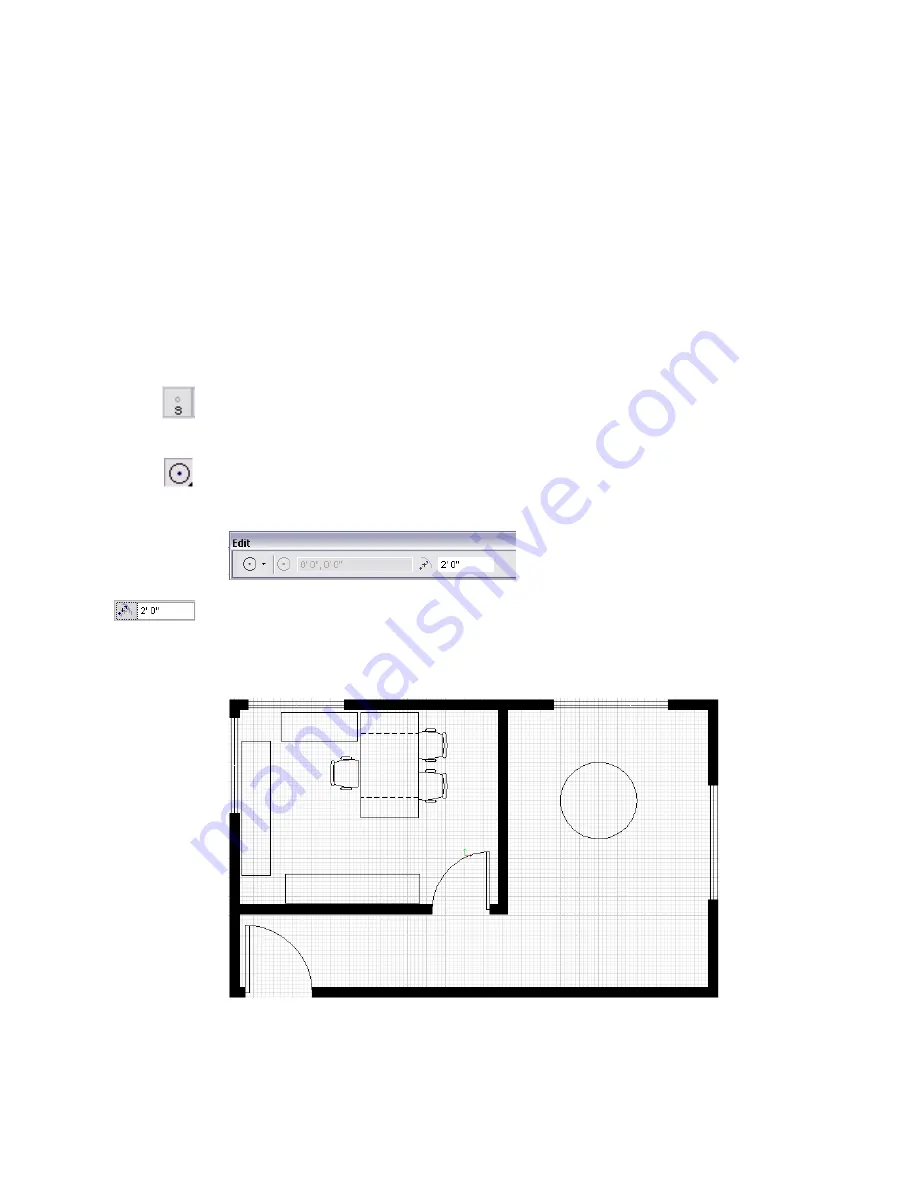
To create a round table and chairs
1
On the Snap toolbar, click Snap to turn on snap settings (you turned them
off earlier, when you placed the doors and windows).
2
On the All-In-One toolbar, click and hold the Circle button.
3
On the toolset, drag the pointer to select Center, Radius Circle.
The edit bar displays tools related to editing a center, radius circle. The
pointer becomes a hollow circle with four points.
4
On the edit bar, set the radius to 2'0
"
.
5
On the right side of the drawing, click when the Absolute Coordinates dial
shows 19'0", 10'0". Then, right-click to end the command.
Your drawing should match the following illustration.
Summary of Contents for 003A1-121111-1001 - AutoSketch v.9.0
Page 1: ...AutoSketch Getting Started 9 June 2004 ...
Page 6: ...vi ...
Page 12: ...6 ...
Page 22: ...16 ...
Page 76: ...70 ...
Page 98: ...92 ...
Page 116: ...Office created using the Office Layout wizard ...
Page 117: ...Jig created using the Mechanical Part wizard ...
Page 118: ...Test Site created using the Diagram wizard ...
Page 119: ...Tuner Diagram created using the Diagram wizard ...
Page 120: ...Utopia Created using the Building wizard ...
Page 121: ...Birdhouse created using the Workbench wizard ...
Page 122: ......


