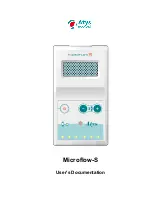
Microflow-S pocket Doppler
User’s Documentation
20 174 C
Page 9/12
7
Operating
7.1 Theory of operation
The 4 MHz and 8 MHz transducers are used to examine the arteries and veins of the upper and lower limbs as
well as to examine the vessels supplying the brain, enabling vascular disease to be evaluated quickly and
easily.
The Doppler principle is used routinely to transcutaneously detect the motion of red blood cells. The probe is
placed against the skin nearest to the target vessel.
One crystal emits 4 or 8 MHz frequency. When sound waves strike the moving blood cells, parts of them are
reflected towards the transducer. The reflected signal has a different frequency than the emitted signal. This
frequency difference is known as the Doppler shift. It is proportional to the blood velocity.
The equipment amplifies the frequency change and channels it to the speaker.
It also calculates the frequency shift and displays it on 6 LEDs, 3 red l LEDs for the flow and 3 blue LEDs for
the backflow.
7.2 Device description
1: Power on/off button. Auto power off after 5mn
without signal
2: Volume down button
3: Volume up button
4: Yellow LED.
- Lights continuously when the battery is
operational
- Flashes if the battery is low.
5: Three red LEDs indicate flow towards the
transducer and three blue LEDs flow away from
it.
The number of lightning LEDs is related to the
flow intensity.
Since the device is bi-directional, the red and blue
LEDs might light simultaneously. This would
indicate that an artery and a vein have been
located at the same time.
The seven LEDs light up during 1 second when the
device is switched on.
The probe is used with a gel for ultrasound.
7.3 CLEANING
Casing cleaning:
The panels of the device can be cleaned with a soft cloth dampened with alcohol.
Always turn off the system before cleaning the machine. Otherwise, electric chock may result.
Do not place fluid on or near the system.
Make sure that the cloth is damp but not saturated, as you should avoid introducing fluids into
areas of electrical components
Probe cleaning:
The probes must be cleaned after each use with a usual mild disinfectant solution.
As the probe comes in contact only with intact skin, the risk of infection is low; so the probe and the probe
casing need only to be cleaned and low-level disinfected between patients.
Never place the probe over open wounds or allow it to encounter body fluid.
Be very careful for the cleaning of the probe.
It must be handled carefully.
Never bend or pull the cable.
Use only hospital approved cleaning agents (for example 70-90% isopropyl alcohol) to clean the
probe and probe casing after each use and wipe dry immediately.
1
2
4
5
3


