


- 50 -
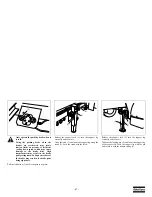
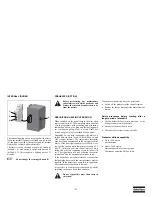
Coupling the compressor
Now connect the compressor's connections to the
vehicle. Follow the correct sequence when making
the connections.
1. First connect the power supply and the
compressor 's ABS plug to your vehicle. Secure
these by fitting the locking bracket.
2. Clean the sealing surfaces and sealing rings of the
coupling's compressed air heads using a clean
cloth. Clean these both on the truck and
compressor.
3. Connect the compressed air line for the control
(yellow).
4. Connect the compressed air line for the feed line
(red).
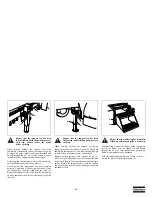
Check whether the connections between the
compressor and truck are all properly connected and
closed. Remove the wheel chocks from underneath
the tyres.
Put these in their designated brackets.
Release the spindle parking brake.
Check the following before each trip:
•
Security of the wheel chocks
•
Plug and socket connections for electrics and
compressed air.
•
Functioning of light system.
•
Functioning of brake system.
•
Has the compressor been coupled properly?
•
Have the support legs been raised.
•
Is the release valve of the service brake (Button
(1) pressed) closed?
•
Is the parking brake released (Button (2) pressed)?
•
Is the ladder folded in properly?
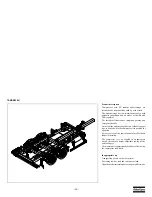
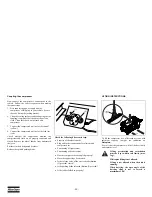
LIFTING INSTRUCTIONS
To lift the compressor, use a lift truck or crane with
sufficient capacity (weight: see indication on
Dataplate
).
See to it that the compressor will be lifted vertically
and remains level.
(1)
P
WABCO
P
(2)
Lifting acceleration and retardation
must be kept within safe limits (max.
2xg).
Helicopter lifting is not allowed.
Lifting is not allowed when the unit is
running.
When hoisting, the apex angle of the
hoisting sling is not to exceed a
maximum of 60°.
Summary of Contents for XRVS 1350
Page 2: ......
Page 24: ... 24 FLOW DIAGRAM EXHAUST AFTERTREATMENT HPFP DOC EAM DPF ...
Page 30: ... 30 SH4 COMPRESSOR CIRCUIT 9822 0963 68 ...
Page 135: ......
Page 136: ......


