background image

Release the filler cap slowly to let pressure
escape.

Never overfill the fuel tank.

Make sure the filler cap is screwed on when the
machine is used.

Avoid spilling fuel on the machine, wipe off any
spilled fuel.

Check regularly for fuel leaks. Never use the
machine if it is leaking fuel.

Never use the machine in the proximity of material
that can generate sparks. Remove all hot or
spark-generating devices before starting the
machine.

Never smoke when filling the fuel tank or when
working with the machine or servicing it.

Only store fuel in a container that is specially
constructed and approved for the purpose.

Consumed fuel and oil containers must be taken
care of and returned to the retailer.

Never use your fingers to check for fluid leaks.

WARNING Unexpected movements

The machine is exposed to heavy strains during
operation. If the machine breaks or gets stuck, there
may be sudden and unexpected movement that can
cause injuries.

Always inspect the machine prior to use. Never
use the machine if you suspect that it is damaged.

Make sure that the handle is clean and free of
grease and oil.

Keep your feet away from the machine.

Never sit on the machine.

Never strike or abuse the machine.

Pay attention and look at what you are doing.

WARNING Dust and fume hazard

Dusts and/or fumes generated or dispersed when
using the machine may cause serious and permanent
respiratory disease, illness, or other bodily injury (for
example, silicosis or other irreversible lung disease
that can be fatal, cancer, birth defects, and/or skin
inflammation).

Some dusts and fumes created by compaction work
contain substances known to the State of California
and other authorities to cause respiratory disease,
cancer, birth defects, or other reproductive harm.
Some examples of such substances are:

Crystalline silica, cement, and other masonry
products.

Arsenic and chromium from chemically-treated
rubber.

Lead from lead-based paints.

Dust and fumes in the air can be invisible to the
naked eye, so do not rely on eye sight to determine
if there is dust or fumes are the air.

To reduce the risk of exposure to dust and fumes,
do all of the following:

Perform site-specific risk assessment. The risk
assessment must include dust and fumes created
by the use of the machine and the potential for
disturbing existing dust.

Use proper engineering controls to minimize the
amount of dust and fumes in the air and to
minimize build-up on equipment, surfaces,
clothing, and body parts. Examples of controls
include: exhaust ventilation and dust collection
systems, water sprays, and wet drilling. Control
dusts and fumes at the source where possible.
Make sure that controls are properly installed,
maintained and correctly used.

Wear, maintain and correctly use respiratory
protection as instructed by your employer and as
required by occupational health and safety
regulations. The respiratory protection must be
effective for the type of substance at issue (and if
applicable, approved by relevant governmental
authority).

Work in a well ventilated area.

If the machine has an exhaust, direct the exhaust
so as to reduce disturbance of dust in a dust filled
environment.

Operate and maintain the machine as
recommended in the operating and safety
instructions

Wear washable or disposable protective clothes
at the worksite, and shower and change into clean
clothes before leaving the worksite to reduce
exposure of dust and fumes to yourself, other
persons, cars, homes, and other areas.

7

© 2051 Construction Tools EOOD | No. 9800 1224 01b | 2051-05-18
Original instructions

Safety and operating instructions

BG 240 H4

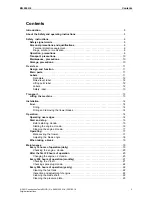
Summary of Contents for BG 240 H4

Page 1: ...Safety and operating instructions Trowel 2051 Construction Tools EOOD No 9800 1224 01b 2051 05 18 Original instructions BG 240 H4...

Page 2: ......

Page 3: ...trowel blades 14 Operation 14 Operating near edges 14 Start and stop 15 Before starting Honda 15 Starting the engine Honda 16 Stopping the engine Honda 17 Operating 17 Manoeuvring the trowel 17 Adjust...

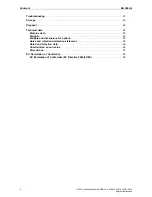
Page 4: ...options 25 Noise and vibration declaration statement 25 Noise and vibration data 26 Uncertainties sound value 26 Dimensions 27 EC Declaration of Conformity 28 EC Declaration of Conformity EC Directive...

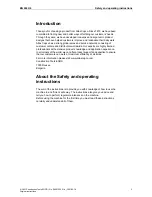
Page 5: ...l corners of the world we can offer product support and expertise to ensure that our customers can work at maximum efficiency at all times For more information please visit www atlascopco com Construc...

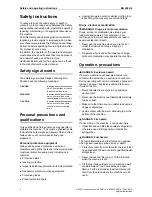
Page 6: ...gloves Proper protective boots Appropriate work overall or similar clothing not loose fitting that covers your arms and legs Drugs alcohol or medication WARNING Drugs alcohol or medication Drugs alcoh...

Page 7: ...disease cancer birth defects or other reproductive harm Some examples of such substances are Crystalline silica cement and other masonry products Arsenic and chromium from chemically treated rubber L...

Page 8: ...st fumes can cause serious injury illness or death Never inhale exhaust fumes Ensure good ventilation extraction of air by fan if necessary WARNING Projectiles Failure of the work piece of accessories...

Page 9: ...d conditions wear warm clothing and keep hands warm and dry See the Noise and vibration declaration statement for the machine including the declared vibration values This information can be found at t...

Page 10: ...s take the cap off the spark plug WARNING Machine modification Any machine modification may result in bodily injuries to yourself or others Never modify the machine Modified machines are not covered b...

Page 11: ...he correct accessories see the spare parts list Main parts A B D E F G H I J A C H G A Throttle control B Blade adjustments quick pitch C Blade adjustments twist pitch D Locking lever E Support Liftin...

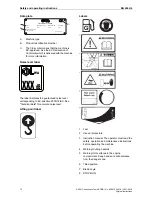
Page 12: ...l indicates the guaranteed noise level corresponding to EC directive 2000 14 EC See Technical data for accurate noise level Lifting point label Labels 1 Fuel 2 Use ear protectors 3 Instruction manual...

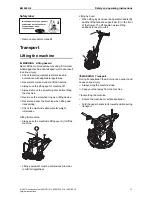
Page 13: ...ng and transporting Check the machine s data plate for weight information Lifting the machine Always use the machine s lifting eye A to lift the machine A Lifting equipment must be dimensioned in orde...

Page 14: ...g or removing the trowel blades the following instructions must be observed To prevent an accidental start Turn the switch to position OFF and let the engine cool down Lubricate the blade shafts with...

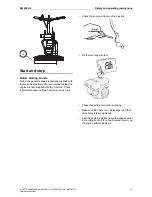
Page 15: ...he engine oil level on the dipstick Fill the fuel tank with fuel Check that all the controls are working Make sure that there is no oil leakage and that all bolted joints are tightened After the engin...

Page 16: ...ts 6 Move the choke valve F gradually to the fully open position 7 Allow the engine to idle a few minutes Hold the operating handle with both hands in a firm position Increase the engine speed with th...

Page 17: ...oating disc in relation to the blade cross to avoid any eccentricity during rotation NOTICE Observe the concrete surface for loosened stones during operation A stone can make marks on the surface If t...

Page 18: ...nt to move the trowel backward This movement can also be achieved by pulling the handle backward Adjusting the blade angle The BG240QP is equipped with a quick pitch lever for adjusting the blade angl...

Page 19: ...e nearest authorised workshop NOTICE Never aim a water jet directly at the fuel filler cap This is particularly important when using a high pressure cleaner The trowel can be leaned forwards and posit...

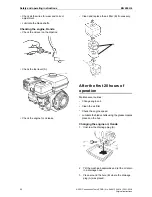
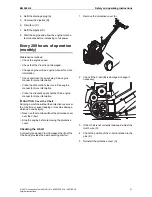
Page 20: ...ation Maintenance routines Change engine oil Clean the air filter Check the engine speed Lubricate the blade shafts using the grease nipples placed on the hub Changing the engine oil Honda 1 Unscrew t...

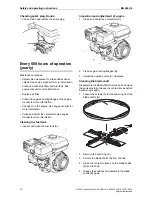
Page 21: ...n CAUTION Cover the V belt Running a machine without the protective cover over the V belt may cause trapping or machine damage which can cause injury Never run the machine without the protective cover...

Page 22: ...the fuel tank Inspect and clean the fuel tank A Inspection and adjustment of engine 1 Clean and adjust the carburettor A 2 Clean engine cooling flanges B 3 Adjust the engine s valve C clearance Cleani...

Page 23: ...oncrete has dried a little Floating disc is used and the concrete is too fresh See engine manual Engine faulty Repair or replace the gearbox Gearbox faulty Replace the broken units One or more blades...

Page 24: ...il and fuel must be dealt with in a way that does not adversely affect the environment Always send used filters drained oil and fuel remnants to environmentally correct disposal 2051 Construction Tool...

Page 25: ...l Regina Grease 2 or equivalent Shell Regina Grease 2 or equivalent Grease shaft for blade adjustments Synthetic Mobil SHC 634 Synthetic Mobil SHC 634 Gearbox oil Weights BG240 58 128 Net weight kg lb...

Page 26: ...hich we have no control This machine may cause hand arm vibration syndrome if its use is not adequately managed An EU guide to managing hand arm vibration can be found at http www humanvibration com h...

Page 27: ...ensions mm in 678 26 7 850 33 5 929 36 6 1449 57 0 799 31 5 610 24 0 631 24 8 27 2051 Construction Tools EOOD No 9800 1224 01b 2051 05 18 Original instructions Safety and operating instructions BG 240...

Page 28: ...sound power level dB A Trowel 97 100 BG 240 Following harmonised standards were applied EN12649 Following other standards were applied 2000 14 EC appendix VIII EN ISO 11201 EN ISO 5349 2 2001 Technica...

Page 29: ......

Page 30: ......

Page 31: ......

Page 32: ...r copying of the contents or any part thereof is prohibited This applies in particular to trademarks model denominations part numbers and drawings www atlascopco com 2051 Construction Tools EOOD No 98...

Reviews: